


- Web templates
- E-commerce Templates
- CMS & Blog Templates
- Facebook Templates
- Website Builders
FAQs
General Tutorials
Featured templates
MonsterONE Subscrioption


This tutorial shows how to add a new category (collection) in Shopify.
Shopify. How to add new category (collection)
In order to add a new category (collection), you should perform the following:
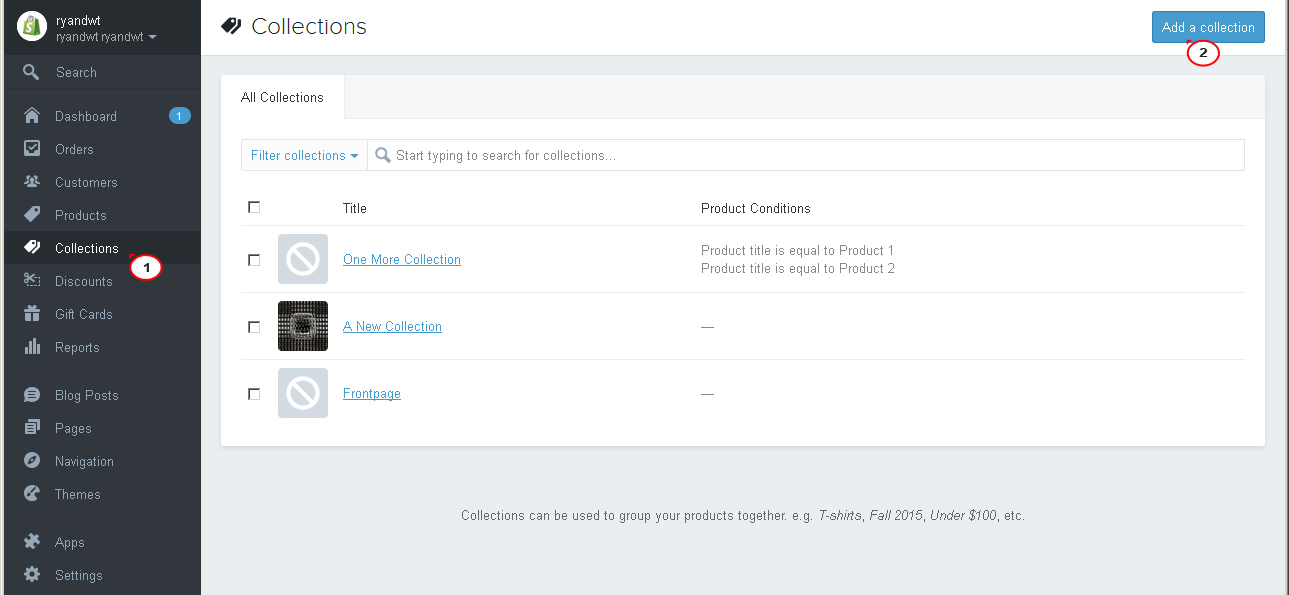
Step 1. Log into your Shopify admin panel.
Step 2. Navigate to Collections – Add a Collection:
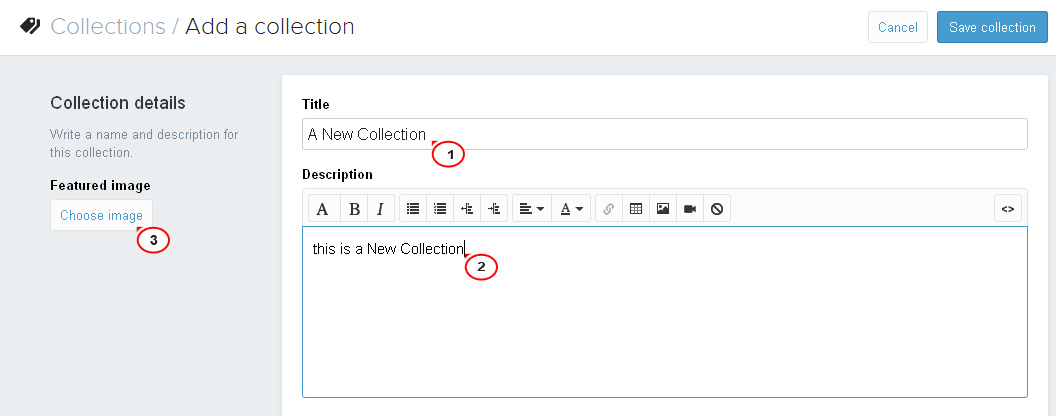
Step 3. Fill in the ‘Collection details’ section:
Specify the Title for your new Collection.
Specify its Description.
To add an image to the collection, please click ‘Choose Image’ under the Featured Image field on the left and select the image from your PC:
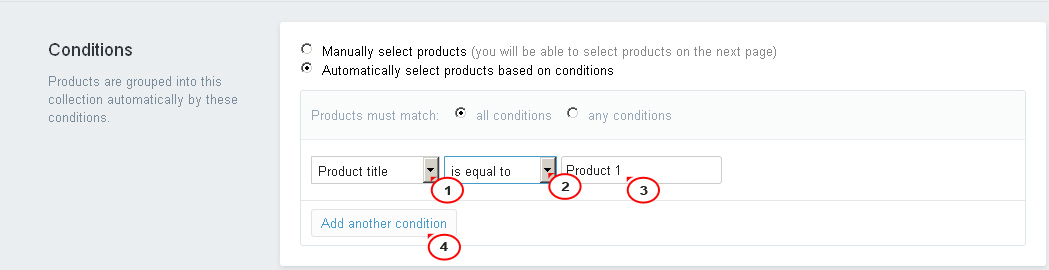
Step 4. Fill in the ‘Conditions’ section for your new collection.
In this section you can choose either to ‘Manually select products (you will be able to select products on the next page)’ or ‘Automatically select products based on conditions’.
To add products manually, follow the steps below:
Click ‘Manually select products’ option.
Proceed to filling the rest of the sections for your new Collection –‘Search Engines’, ‘Visibility’ sections. (refer to steps 5,6 from this tutorial for more details on these sections).
With that done click ‘Save Collection’:
You will see the ‘Products’ section on the left. Unfold the ‘Add Products’ button and select the products you would like to add to your New Collection.
With that done click ‘Save’ button at the bottom right:

To add products automatically, follow the steps below:
Select the ‘Automatically select products based on conditions’ option.
Select the condition from the list such as Product Title, Product Type, Product Vendor, etc. and fill in the next blank field with the corresponding title, type or vendor, etc. for the product you want to add to the new Collection.
If you want to add more than 1 product to the collection, click ‘Add another Condition’ button:
Proceed to filling the rest of the sections for your new Collection -‘Search Engines’, ‘Visibility’ sections. (refer to steps 5,6 from this tutorial for more details on these sections).
With that done click ‘Save Collection’.
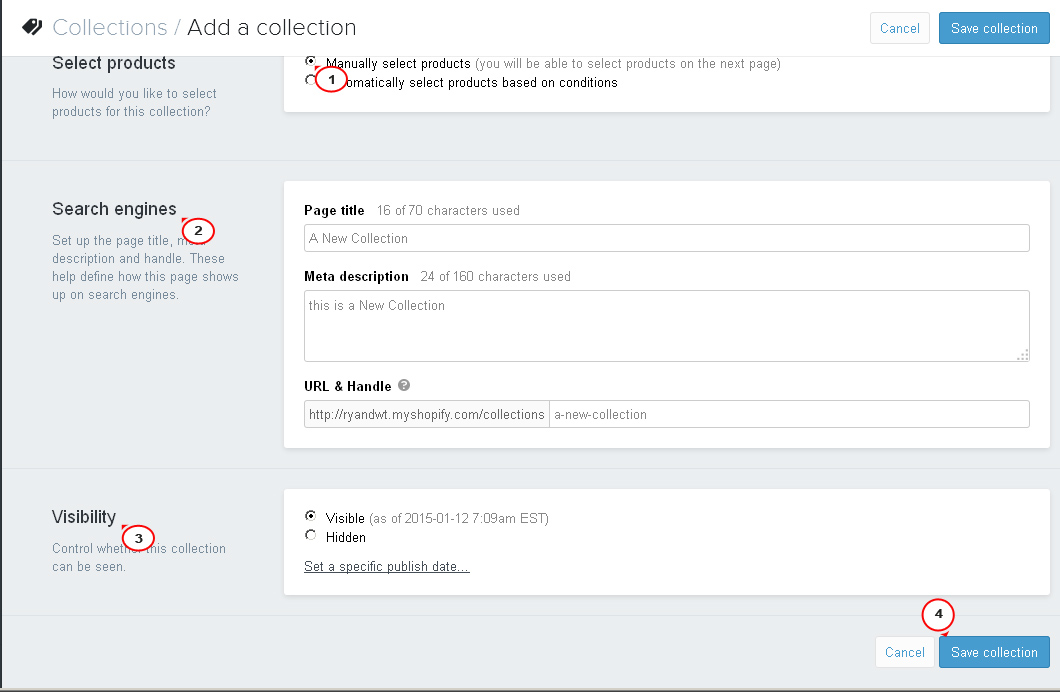
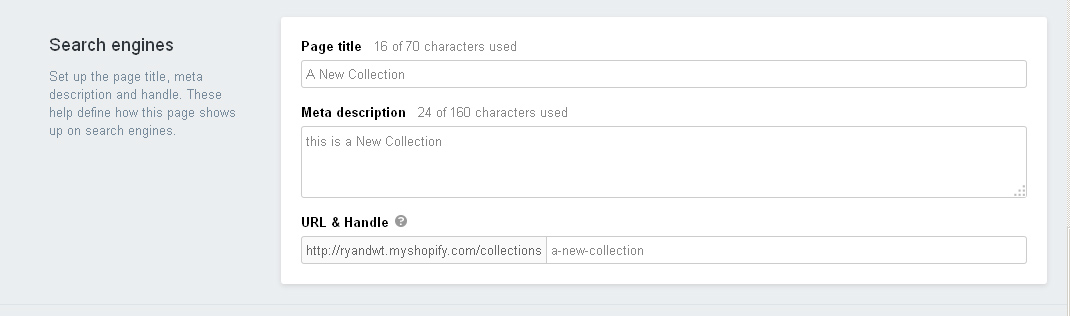
Step 5. Fill in the Search Engines fields for the Collection.
You will see that the Page title, Meta description and URL and Handle boxes already contain some information. It was automatically generated based on the entries you’ve made in the Collection details section earlier. You can change the Page title and Meta description to refine the way the collection is shown in search results.
Note: Make sure not to make any changes to the ‘URL and handle’ field:
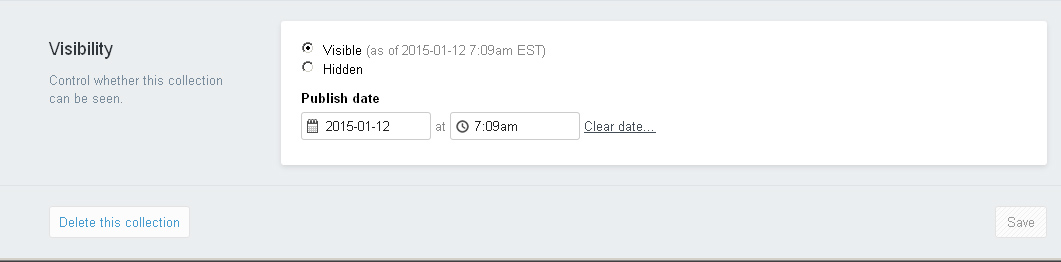
Step 6. Choose options in the ‘Visibility’ section on the page.
You can set the new Collection to ‘Visible’ or ‘Hidden’.
You can also set a specific publish date (known as future publishing) for online collections if you don’t want your collection to appear on your website immediately.
Step 7. Click ‘Save Collection’ button at the bottom right:
Feel free to check the detailed video tutorial below:
Shopify. How to add new category (collection)
As you can see the process of adding a new category (collection) in Shopify is neither too easy nor too difficult. However, it requires some knowledge and more importantly time which you might be short on. To make such things easier for you, TemplateMonster is happy to present the all-in-one solution for those of you who want to own a successful Shopify online store. Meet the Shopify Business Startup Kit!
Starting a Shopify storefront isn’t the same as starting a Shopify storefront with flying colors. The truth is, building a successful dropshipping business from scratch isn’t a piece of cake. There are tons of things that have to be taken into account to make everything work out. Even though nowadays you don’t have to be a professional web developer to build an online store, simply picking a suitable theme still isn’t enough.
Chances are, you will need to spend a significant amount of time on figuring out:All of the mentioned above is just the tip of the iceberg, trust us. Moreover, you probably don’t have that much time on doing all of this by yourself. Right?
So far it seems that a dream to start a dropshipping business is just a dream. Well, it might be so, if there wasn’t Shopify Business Startup Kit. This Shopify store setup service is quite a find for everyone who is into dropshipping.
By paying $359 fee you will get:Start your dropshipping business in an instant by following these steps: Step 1. Choose and buy a Shopify theme that suits you in the best possible way. Step 2. Give us all the needed information about your online store and products you sell. Step 3. Wait for 2 to 3 days and receive a ready-to-use Shopify online shop with the added bonus of 1 month of premium technical support.
We will happily do everything for you, from registering, setting up and customizing a Shopify store in accordance with your needs and expectations to taking care of content-related processes and apps installation. Starting a Shopify business has never been that easy.
