


- Web templates
- E-commerce Templates
- CMS & Blog Templates
- Facebook Templates
- Website Builders
FAQs
General Tutorials
Featured templates
MonsterONE Subscrioption


This tutorial shows how to add one more set (row) of banners in Shopify theme.
Shopify. How to add one more set (row) of banners
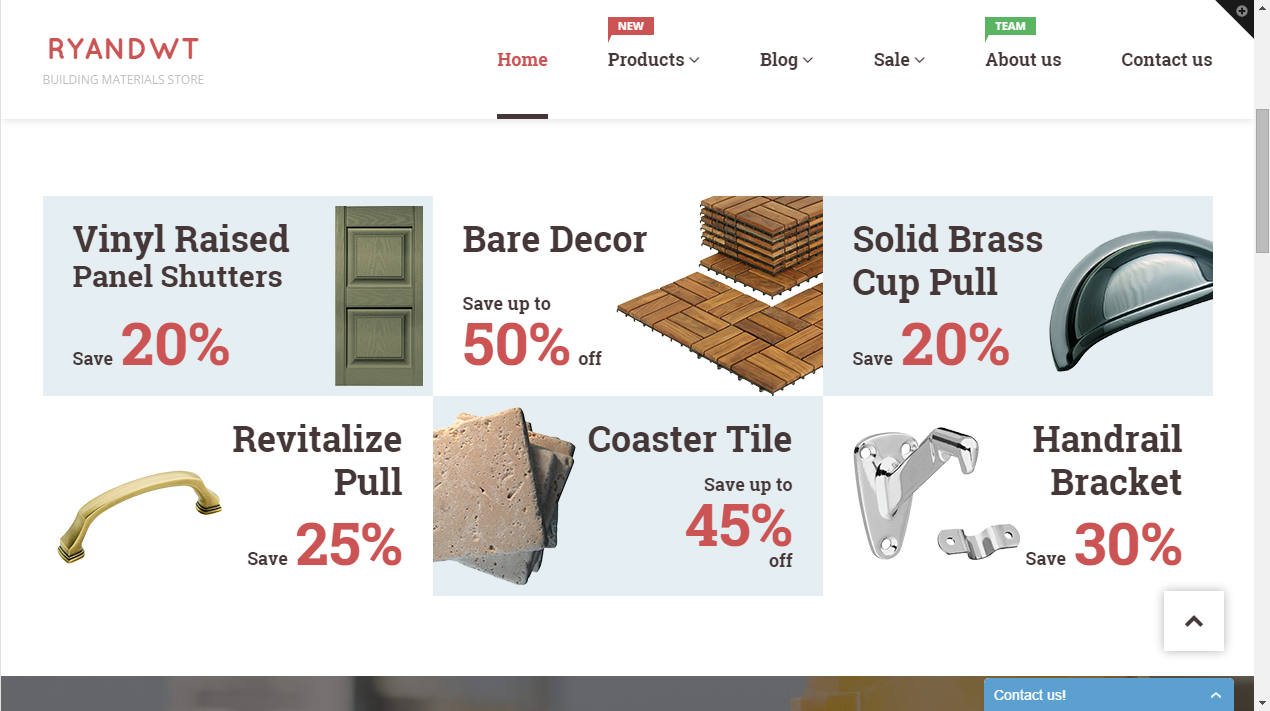
In our case template comes with 6 banners:
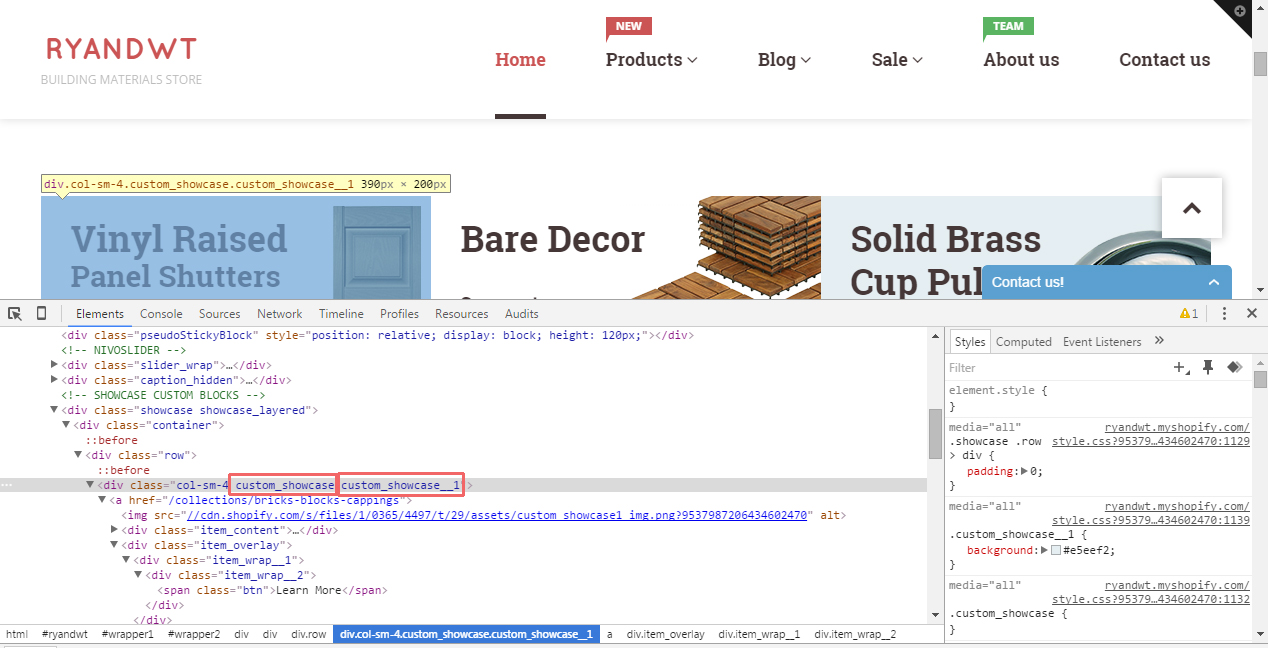
Let’s add 3 more banners (row of banners). Open Chrome developer tool. You may use Firebug in Firefox browser. We can see that classes like custom_showcase and custom_showcase__1 are used. In order to add banners, we should modify template files and styles. We can use such classes in order to locate appropriate part of code in template files:
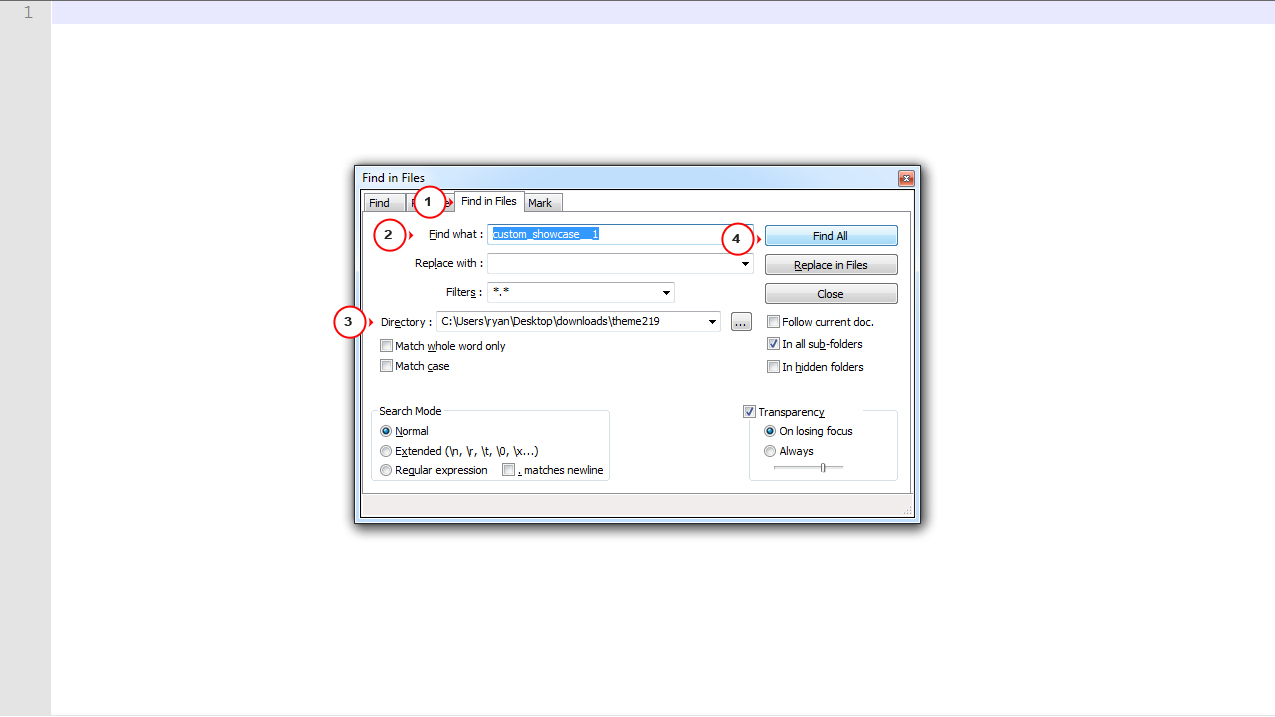
Make sure you have downloaded theme files and unzipped them. Open software like Notepadd++ in order to search code in template files. Open search dialog access Find and replace tab. Specify class name in Find what field. Select the folder where theme files are located, make sure you have the same options and click on Find All:
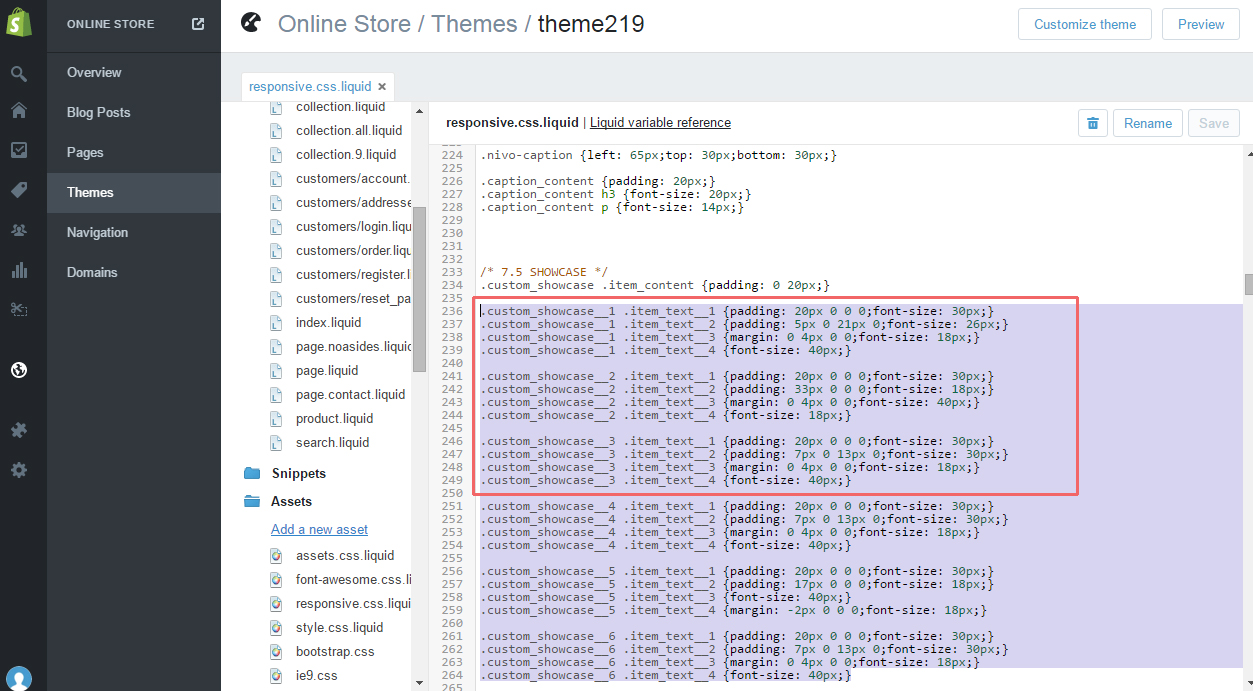
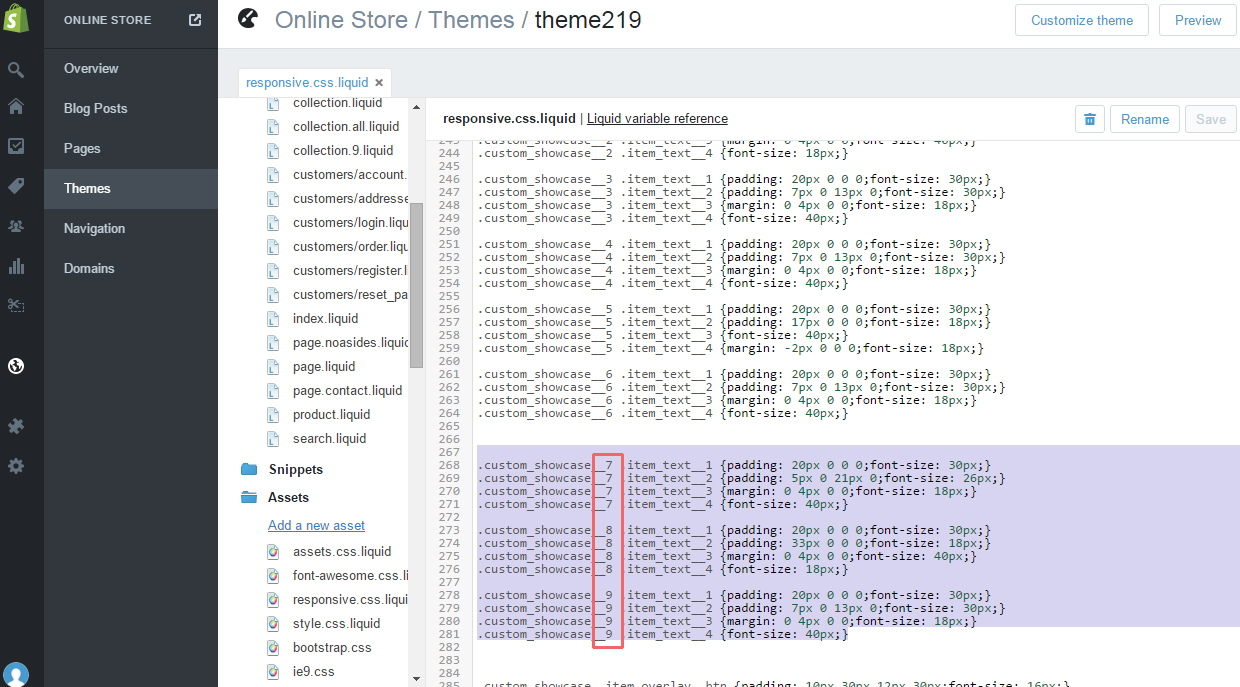
We have located files with styles. We should perform changes in responsive.css.liquid and style.css.liquid files. Open responsive.css.liquid file in Shopify editor. Find the appropriate code. Copy code for the first three banners:
Paste the code below css code of the last banner. Change classes and save changes:
custom_showcase__1 to custom_showcase__7

custom_showcase__2 to custom_showcase__8

custom_showcase__3 to custom_showcase__9
Now we should perform similar changes to style.less.liquid file. Open file in Shopify editor. Find appropriate code and copy code for three banners. Paste the code below styles for the last block. Change classes in the way we have specified previously:

Now we should look for files that define code and settings for banners. In our case the best way is searching using custom_showcase keyword in template files. In our case changes should be performed to the following files: settings_data.json, settings_schema.json, widget-homepage-showcase.liquid. Open settings_data.json in Shopify editor. Search code using custom_showcase keyword. Copy the code for the first three banners:
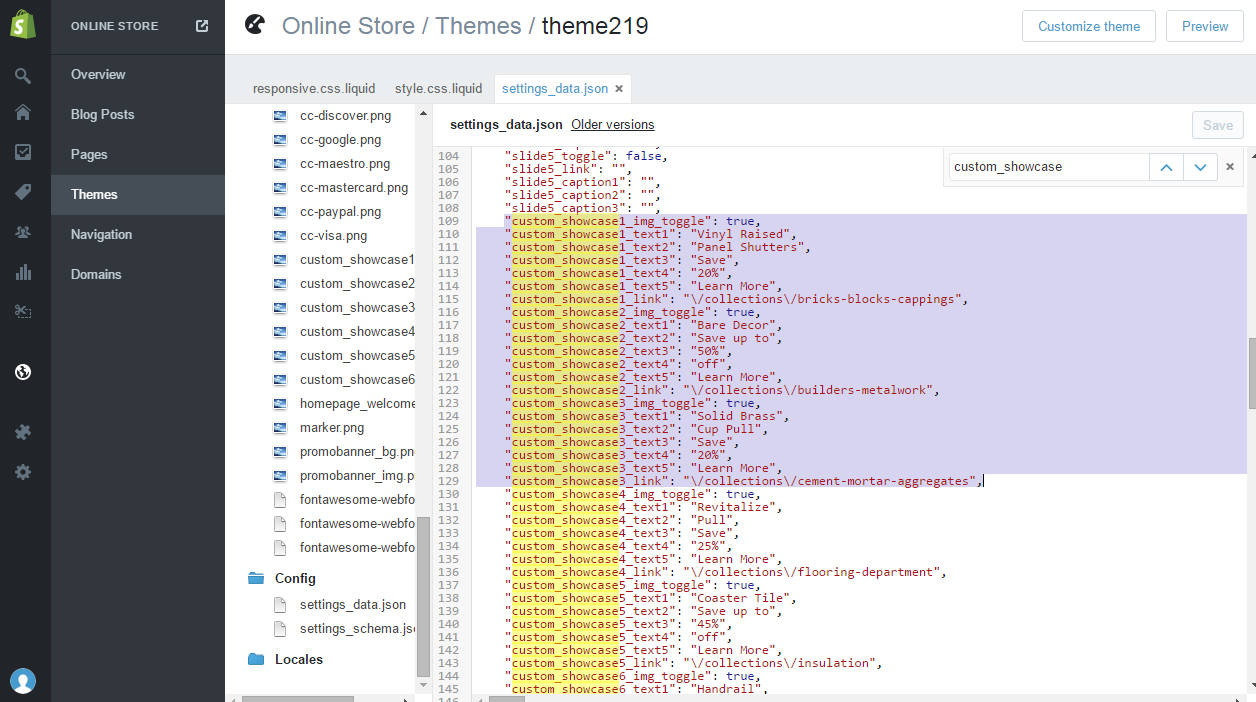
Perform changes to classes and add them below the code for the last banner. Save the changes:

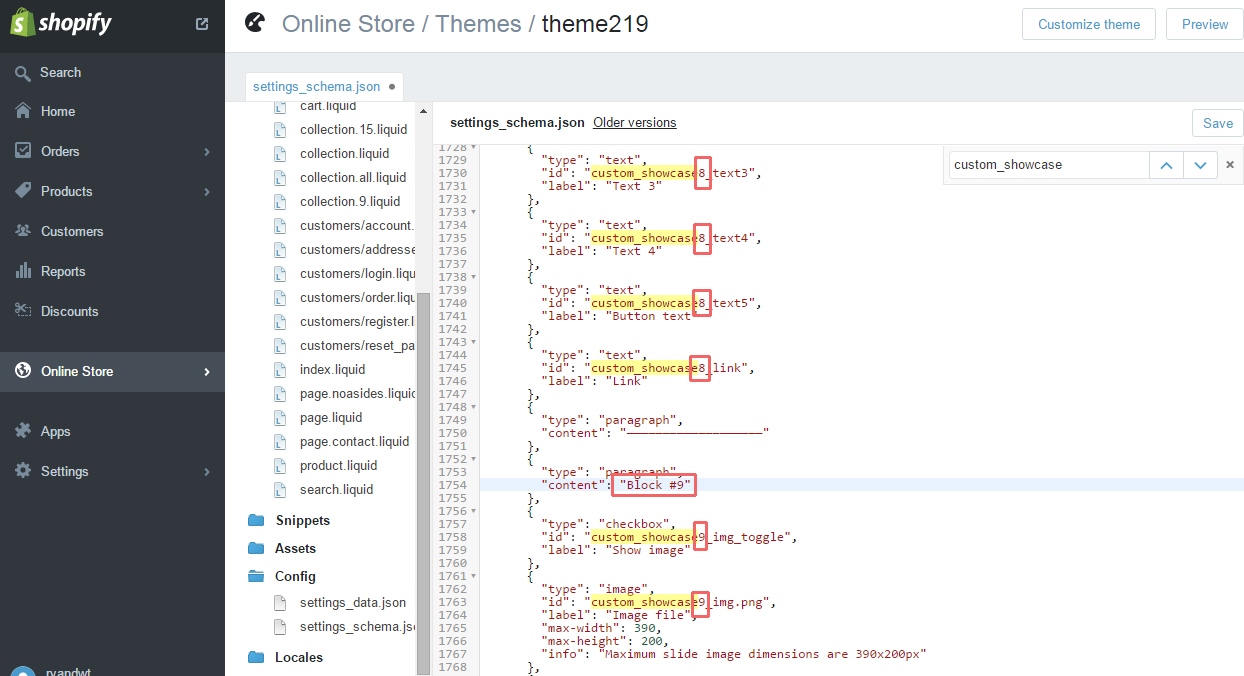
Now we should modify settings_schema.json file. Search the appropriate part of code using custom_showcase keyword. We can see the code for the first block. We should copy the code for three banners and change class names. Paste the updated code below the code for the last banner. Change block number (Block #1 shuold be changed to Block #7 etc.). Please check video version of tutorial for more detailed information:
We should also edit widget-homepage-showcase.liquid file. Open the file in Shopify editor:
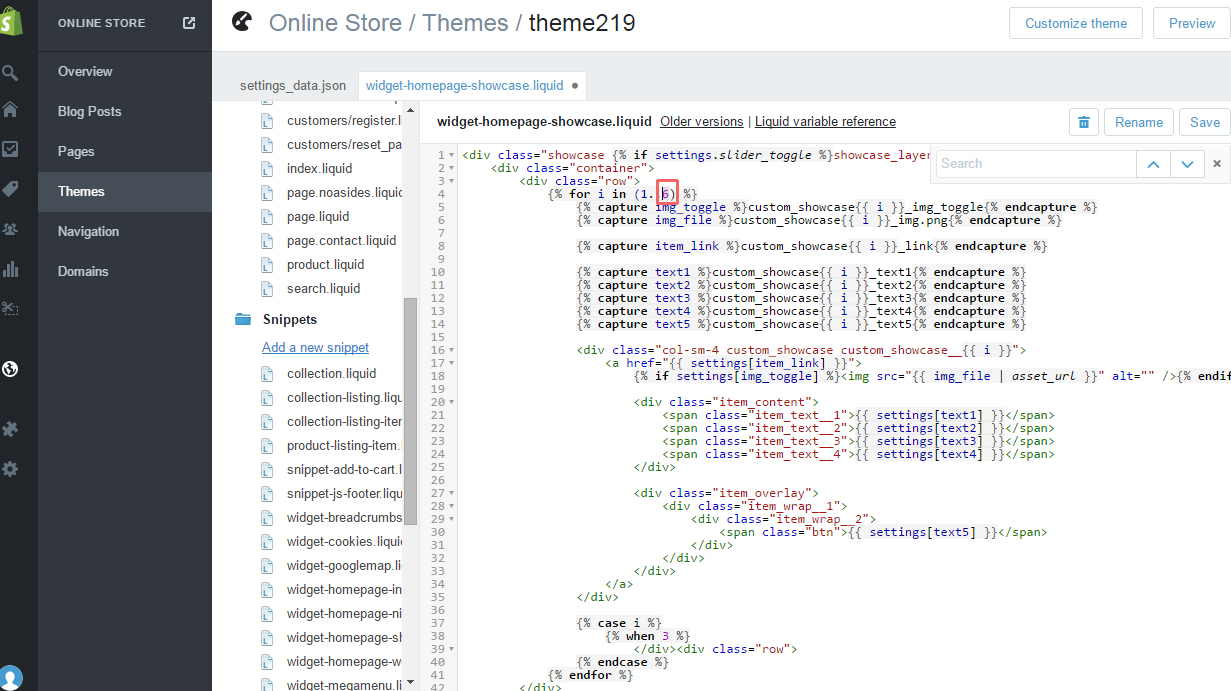
Change number to the number of your banners in cycle. In our case there are 9 banners:

Go to Themes section and click Customize theme. Open Custom blocks. New banners were added. You may need to upload images for new banners:

Refresh the page. We have added a new row of banners:
Feel free to check the detailed video tutorial below:
