


- Web templates
- E-commerce Templates
- CMS & Blog Templates
- Facebook Templates
- Website Builders
FAQs
General Tutorials
Featured templates
MonsterONE Subscrioption


This video tutorial will show how to create custom “password page” for your Shopify store.
Shopify. How to create custom password page
In order to create custom “password page” you should perform the following steps:
There are two ways to customize the design of your password page. You can simply change the message to visitors, or use your knowledge of HTML and CSS to take full control.
In your Shopify admin panel, click Settings, then choose Online Store item:

Scroll down to the Storefront password section. There you have to specify password for your store opening.
In the Message for your visitors section type your message. After inserting introduction text click Save.
For advanced customizations to the password page, you can create a password.liquid template file. Like other .liquid template files, you can freely use HTML, CSS, Liquid, and Javascript to take full design control of the page.
You can create a password.liquid file by following such steps:
In your Shopify admin panel, click Online Store, then click Themes item:
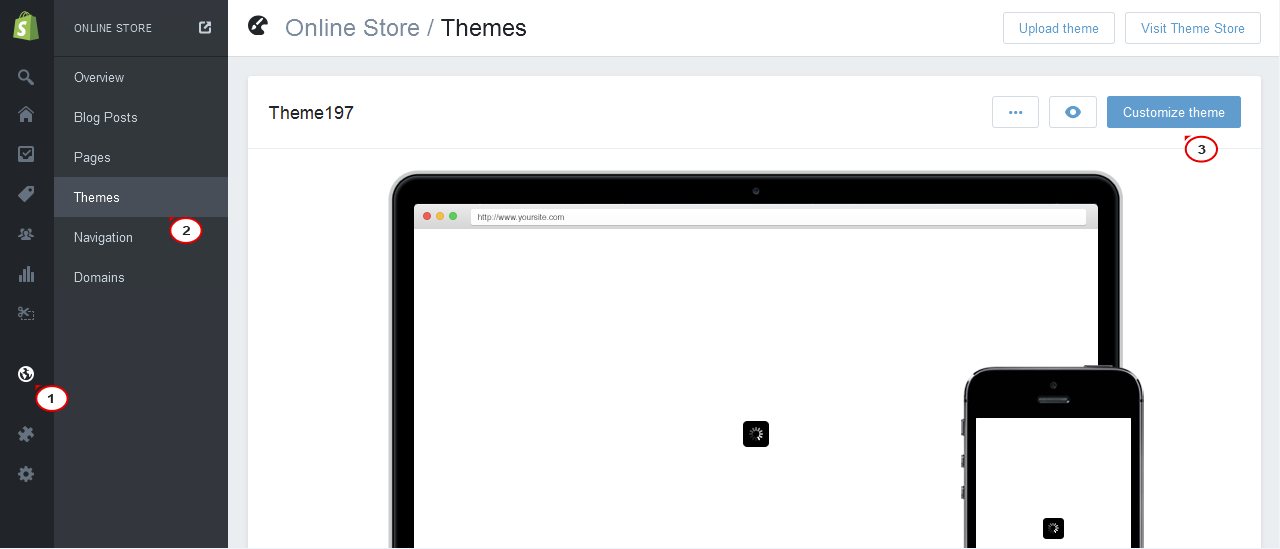
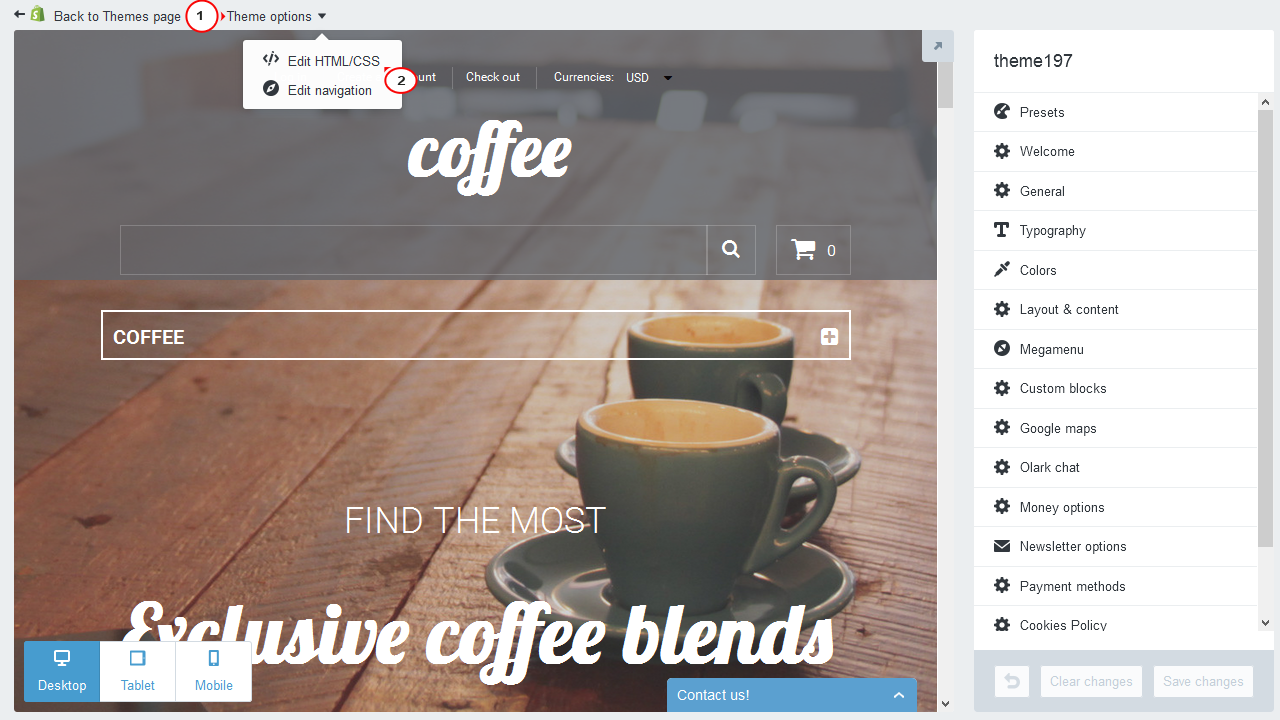
Find the theme you want to edit, click the … button at the top, then click on Edit HTML/CSS:
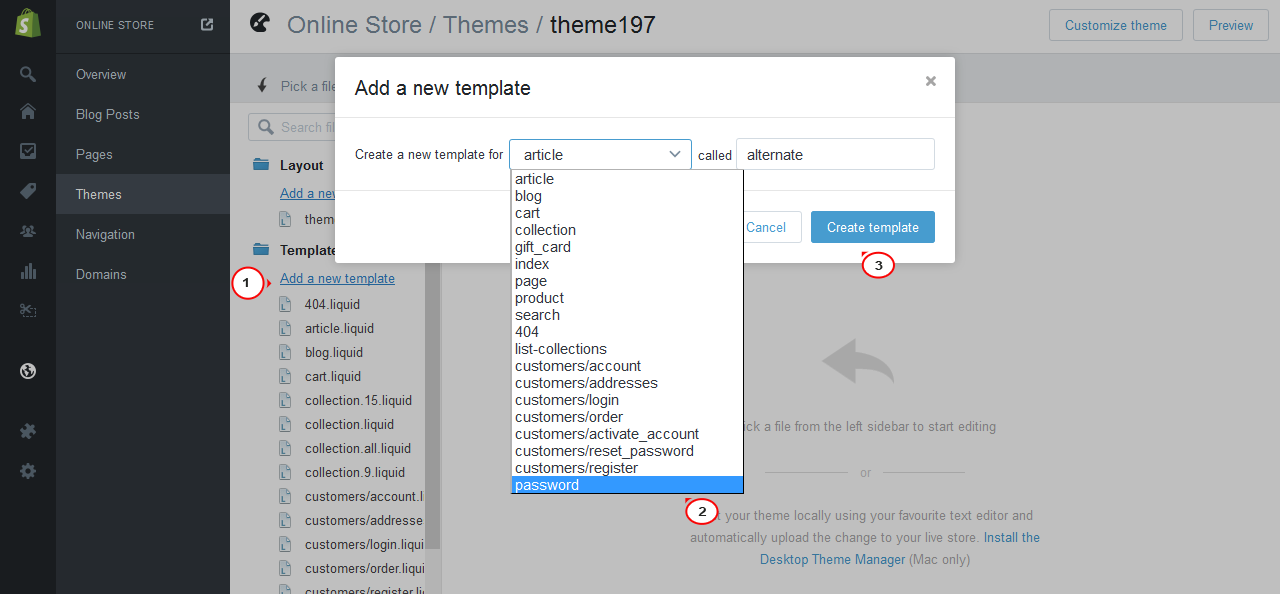
Under the Templates folder, click Add a new template.
Click the drop-down menu beside “Create a new template for” and choose password. After that click Create template:
The password.liquid template will automatically include its own internal style sheet:
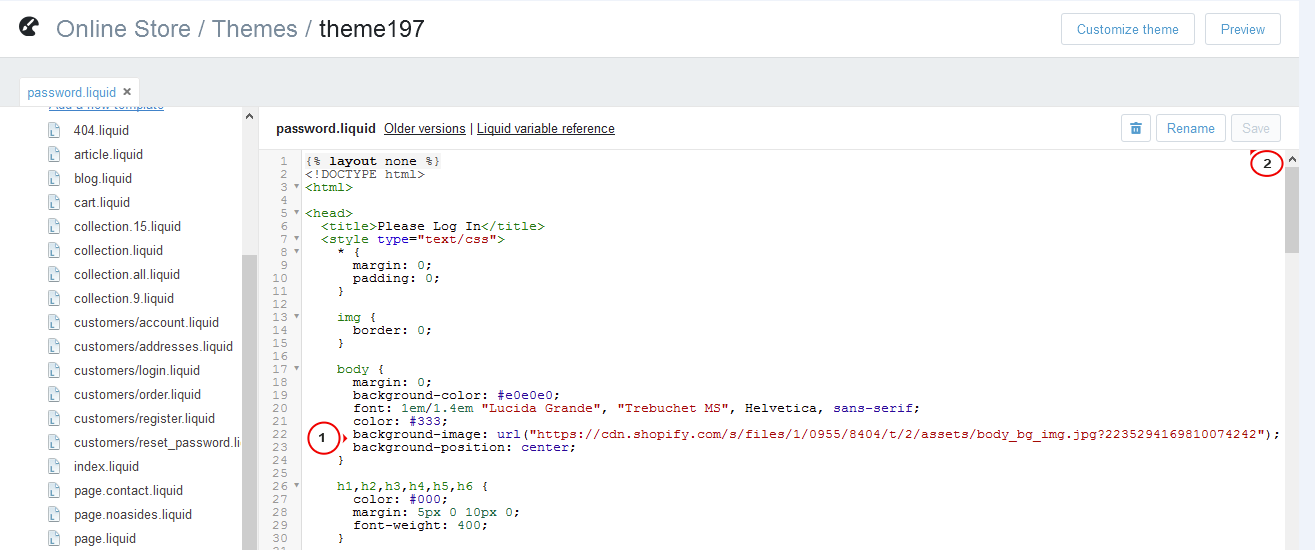
You can edit your password page like any other theme template. In our case we will add background image for password page. We have specified background image to the body of the page by the following CSS code:
   body {
      margin: 0;
      background-color: red;
      font: 1em/1.4em "Lucida Grande", "Trebuchet MS", Helvetica, sans-serif;
      color: #333;
      background-image: url({{ 'body_bg_img.jpg' | asset_url }};
      background-position: center;
    }
Go back to your website and refresh page with text that you have changed. Now we can see that editing was successful.
Feel free to check the detailed video tutorial below:
