


- Web templates
- E-commerce Templates
- CMS & Blog Templates
- Facebook Templates
- Website Builders
FAQs
General Tutorials
Featured templates
MonsterONE Subscrioption


First, if you’re going to use FTP, you need to have an FTP client software installed on your computer. There are lots of solutions for this, but in our opinion, the most versatile and convenient for use is the one named FileZilla. It is available for Windows, Mac OS, Linux and is absolutely free! So, we recommend that you visit the https://filezilla-project.org/ website to download the version that is suitable for your needs, and then install it to the computer as you usually do!

We also suggest that you check The Most Useful FTP Clients Compatible with WordPress article to learn about other FTP clients software, recommended for use.
When the FileZilla is installed, launch it and feel free to start using. In order to do that, you need to enter your FTP connection details to the input fields at the top and press the Quickconnect button.

Here’s where the process usually gets stuck – as you might not know the connection details and have no idea where to get them.
The answer is simple – you need to check the FTP section at your hosting account cPanel, or, if you feel a bit lost here, contact your hosting company for help. They will provide you with all the needed access data – such as hostname, username, password, and FTP port.
Next, when you have the details and press the Quickconnect button, the special window at the top will show the connection process statuses. If everything goes smoothly, shortly you will see the message like
Status: Retrieving directory listing…
Status: Directory listing of “/” successful
This means you have successfully connected to the root folder of your server.
Now, move your sight a bit lower – the four sections below are the ones you will work with. The entire area is divided to show your local computer folders on the left, and the remote server on the right.

If you are going to upload some theme, open the wp-content/themes folder on the right side, and drag the theme folder from the left window to the one on the right, that’s, actually, all you need to do.
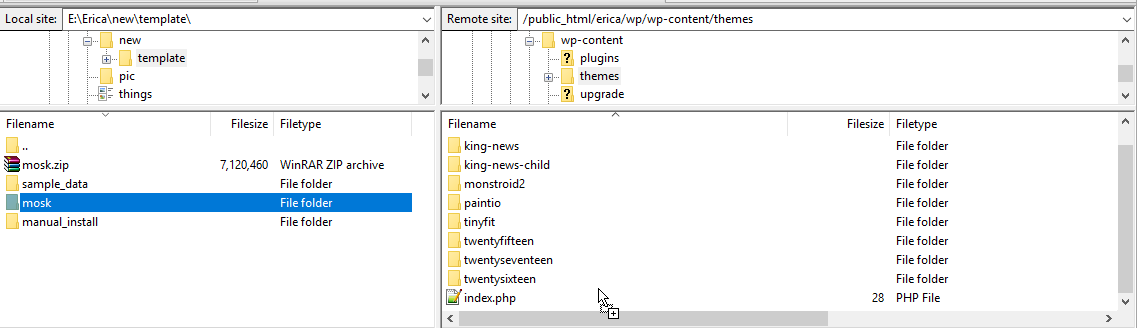
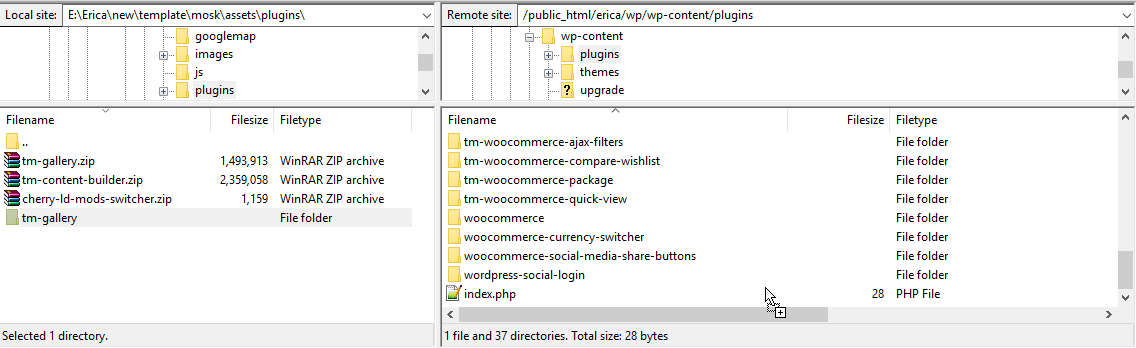
The same is for the plugins upload – in case you want to upload a plugin manually, open the wp-content/plugins directory and drag here the plugin’s folder from the left.
They will appear in your WordPress admin panel right away!
You can also use it vice versa – for example, if you want to backup some files or download them for editing. To do so, drag the required file or folder from the right side (from your server) to the left side of FileZilla (to one of your computer’s folders).
That’s all, now you’re ready to upload the files to WordPress using FTP. Enjoy working on the website and be sure to check our upcoming tutorials!
