- Web templates
- E-commerce Templates
- CMS & Blog Templates
- Facebook Templates
- Website Builders
VirtueMart 2.x. How to change categories images dimensions
October 26, 2013
This tutorial is going to show you how to re-size category images in VirtueMart templates.
VirtueMart 2.x. How to change categories images dimensionsTo follow the steps below you will need to use Firefox and its Firebug plugin.
- On your site, open the page where the category images are displayed (for instance, a sub-category page).

- Click the Firebug icon at the top right of your browser.
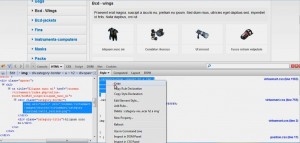
- In the panel that will appear below, will click on “Click an element in the page to inspect”.
- With this tool selected, click on your category image (make sure that the image frame is highlighted)
- In this case, under the Styles you will see the part of your .css file with the width property that you will need to edit. For instance:
- Try adjusting the width in Firebug to get the value you can apply to the actual .css file afterwards. For instance, in our case we have 4 images in a row and since we need 5, the category images should be smaller.
 So we are going to change the with to this
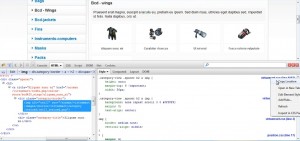
 - When you are satisfied with the result, right click on the .css file name (in our case it’s virtuemart.css) and select Copy Location.
- Then paste the location somewhere to see where your .css file is located on FTP. In our case the location is templates/theme380/css/virtuemart.css
- Connect to your FTP using your File manager or an FTP client (FileZilla).
- Navigate to the location of the .css file and open the file to edit.
- Look for the same you made changes to in Firebug (to see the lines, you can just copy the content of the file to Notepad++, Dreamweaver etc).
- Copy the line from Firebug and replace the corresponding in .css.
 Save the changes.
 - Refresh the sub-category page in your browser. You have done everything correctly, the result should be the same as in Firebug.
- Now, when the category images are re-sized, you may need to re-size their frames to eliminate the space around the images. Using Firebug, select the image frame.
 Under Style you will find the width value responsible for the frame in the same .css file, for instance
 - Change the frame size the same way the category image size was changed and re-fresh the browser window to see the changes.


.category-view .spacer h2 a img {
    height: auto;
    margin-top: 0 !important;
    width: 130px;
}
 .category-view .spacer h2 a img {
    height: auto;
    margin-top: 0 !important;
    width: 56px;
}

.category-view .spacer, .category-view .category {
    margin: 0 0 0 10px;
    padding: 0 !important;
    width: 175px;
}
Feel free to check the detailed video tutorial below:
VirtueMart 2.x. How to change categories images dimensions


