


- Web templates
- E-commerce Templates
- CMS & Blog Templates
- Facebook Templates
- Website Builders
FAQs
General Tutorials
Featured templates
Featured templates
MonsterONE Subscrioption


This tutorial is going to show you how to install Joomla 3.x/VirtueMart 3.x template using fullpackage.zip.
VirtueMart 3.x. How to install VirtueMart/Joomla template using a fullpackage.zip fileThis installation option is used if you don’t have Joomla installed on your server. The fullpackage.zip archive provided in the template package includes Joomla, VirtueMart, template and sample data files, so you don’t need to upload Joomla CMS package separately.

Create a new database for the fresh Joomla installation. You can follow this tutorial to do it properly: How to create a database.
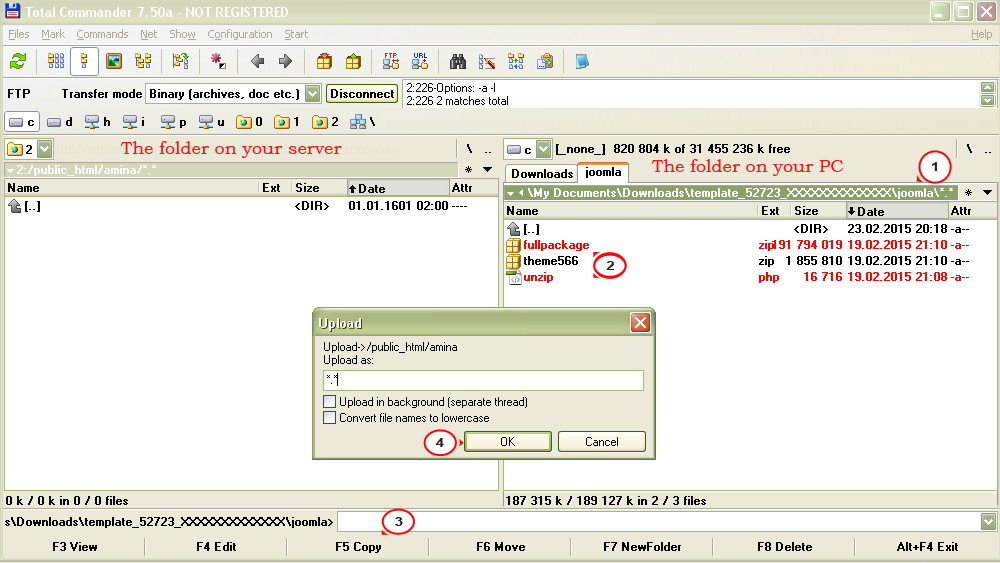
Unzip the downloaded template package on your PC. In the "joomla" folder you will find fullpackage.zip file. You should upload it to the clean root folder on your server and unzip it.
There are 2 ways to do it:
Using a 3rd party FTP manager
Using an FTP-client upload fullpackage.zip and unzip.php (the file used to extract files from .zip archives when uploaded to the hosting server) files to the root folder on your server:
Type the path to ‘unzip.php’ file on your server (http://your_domain_name/unzip.php) in a browser address bar.
You should see the following screen:
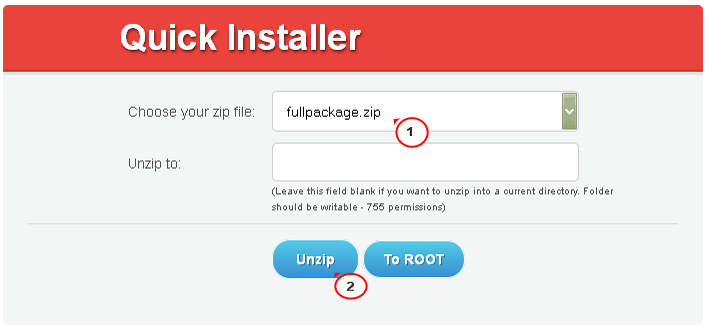
In the ‘"Choose your zip file" box select the uploaded fullpackage.zip file.
In the "Unzip to" field specify the directory where you want to extract the files or leave it empty if you want to extract files to the same directory.
Click the ‘Unzip’ button to proceed.
When all files are extracted, you will see the similar message: Archive “fullpackage.zip” unzipped successfully to the “ROOT” directory.
Please make sure to set the correct permissions for the directory where you are planning to extract the files. Permissions should be CHMOD 755 or 777 depending on your server configuration.
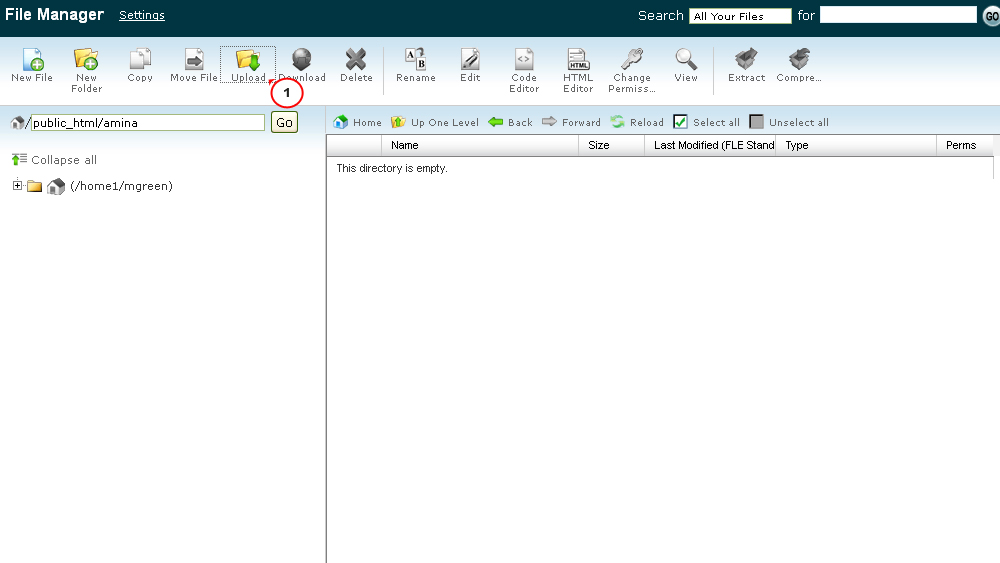
Using File Manager of the Hosting Control Panel
Log in your Hosting Control Panel and open File Manager. In the top menu click Upload button, browse the fullpackage.zip file and click Open:
When the file is uploaded, go back to the File Manager and refresh the page.
Select the uploaded fullpackage.zip file from the list and in the top menu click Extract button and then click Extract File(s):
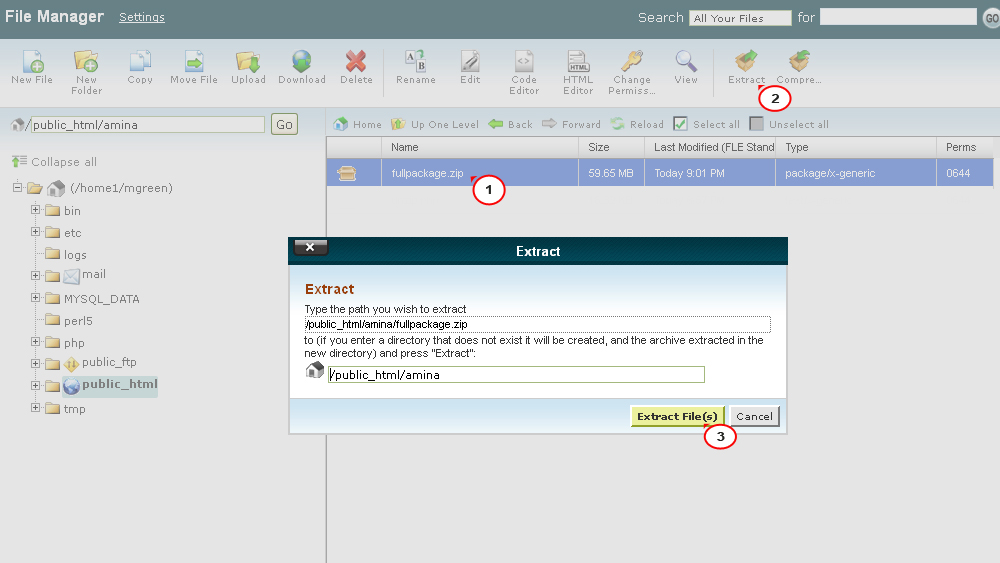
When all files from the fullpackage.zip package are extracted, you can begin the template installation.
Open a browser and type the path to your Joomla directory in the address bar (e.g. http://your_domain_name/joomla, if you extracted fullpackage.zip files to the "joomla" folder on your server). You will be redirected to the initial Joomla CMS installation page. Follow the installation steps:
On the Configuration step, using the "Select Language" box choose Joomla installation language.
NOTE: The "Select Language" box allows you to choose the language of the Joomla installation process only. It won’t affect your website language.
You need to fill in all fields in the "Main Configuration" area. Required fields are marked with the asterisk * symbol.
Fill the "Admin Email", "Admin Username" and "Admin Password" fields in the right column to create a new Joomla website user with administrative rights:
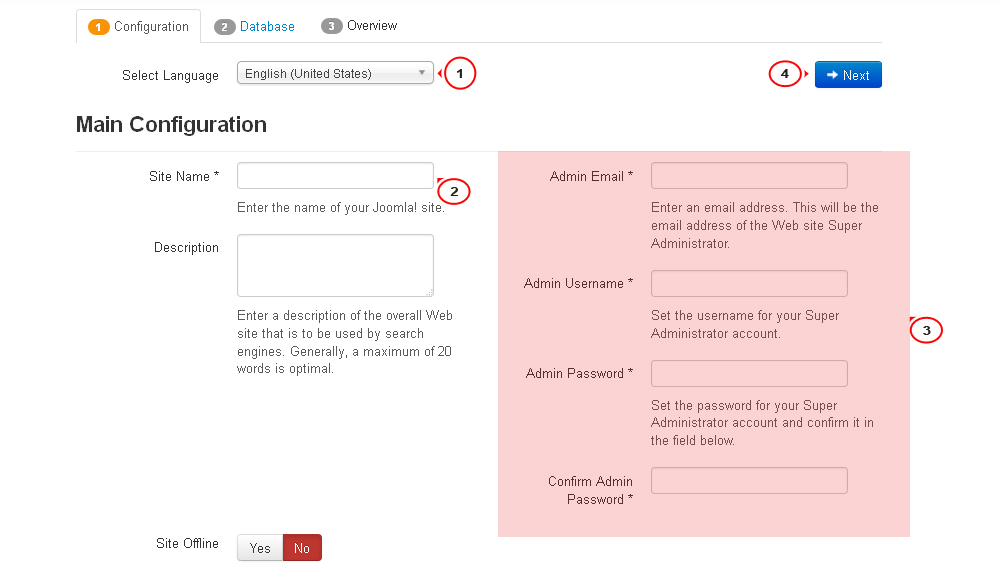
IMPORTANT: "Admin Email", "Admin Username" and "Admin Password" are required to access your Joomla Web site backend. Keep them safe.
When you are done, click the Next button in the top-right corner to proceed.
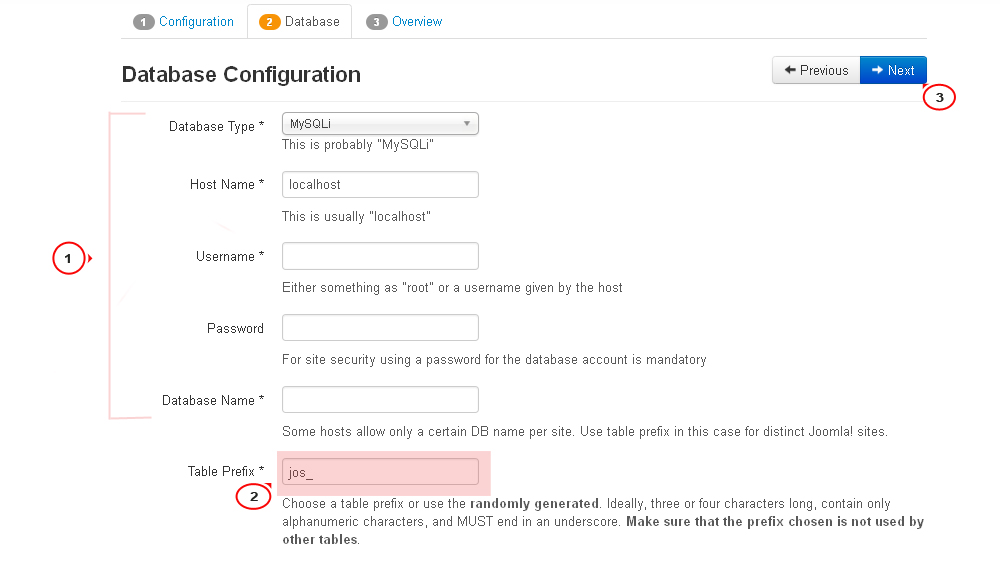
On the Database step you need to input your database details. If you are not sure, please contact your hosting provider to get the correct details.
As you are installing Joomla from scratch, you only need to input "Host Name", "Username", "Database Name" and "Password". You can usually leave other options default. However, there can be some differences depending on your hosting provider.
When you are done, click the Next button in the top-right corner to proceed:
On the Overview step select the Sample data package you want to install or select “None” if you want to set up a pure Joomla website without any content.
NOTE: Sample Data is required if you want to make your Joomla website appear as the template live demo with all the images, sample text and modules configured. To make your site appear as in the live demo page, select the sample data package named “sample_theme###”, where ### is the number of your theme.
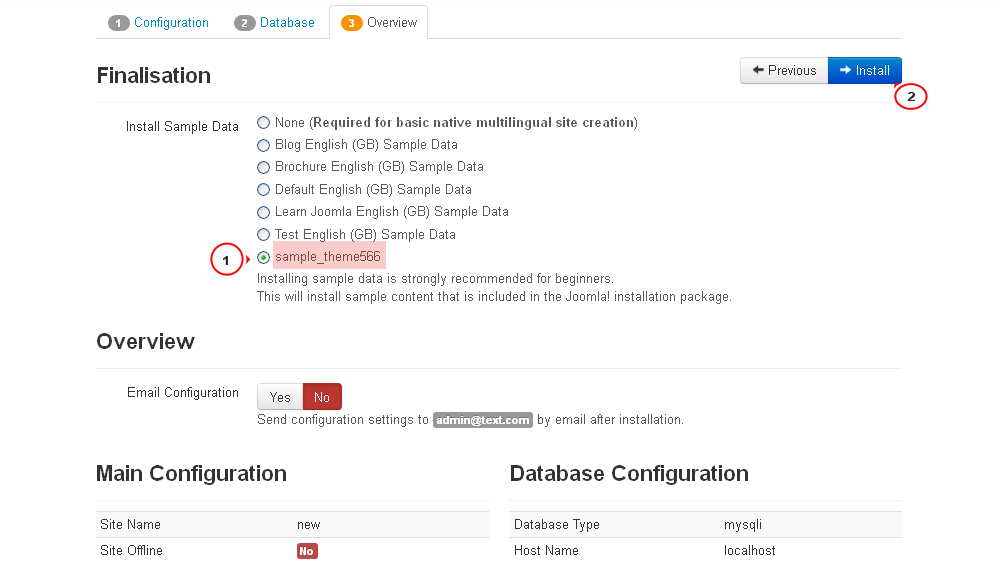
Below you can check if the database configuration and administration panel access details are valid and send them to your email address if necessary.
You can also check your installation settings and see if your hosting server matches the Joomla requirements. If you have any red notification boxes in the “Recommended settings” section, please contact your hosting provider for further assistance.
When you are done, click the Install button in the top-right corner to proceed.
The Installation Complete step. Congratulations! You have successfully installed Joomla CMS.
For security reasons, please delete the installation directory from your Joomla root directory.
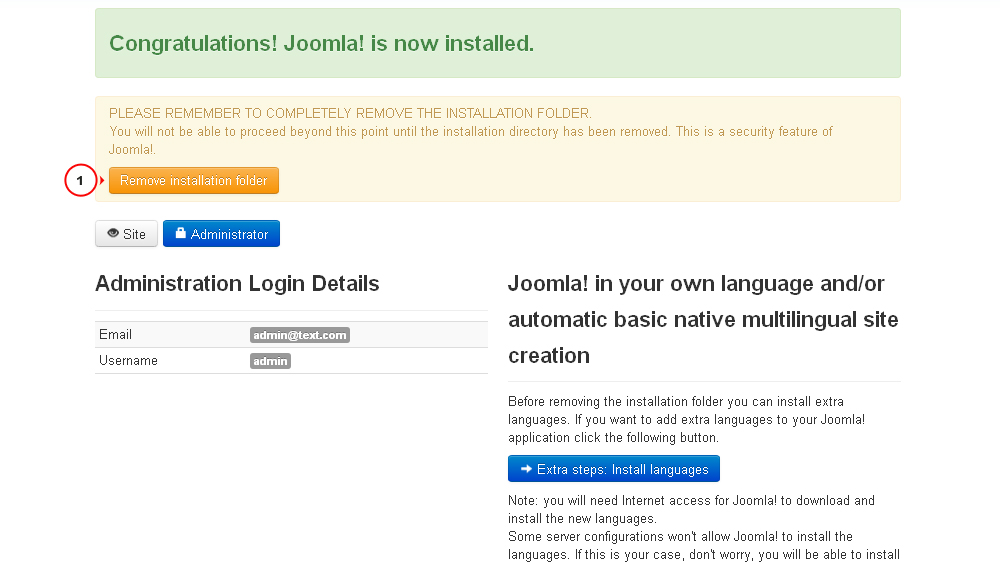
Now you are ready to proceed to configuring your Joomla CMS based website. Click the “Site” button to view your website or the “Administrator” button to view the Joomla backend.
The last but not least important step is to update the database:
Navigate to Components -> VirtueMart -> Configuration -> Configuration, scroll down to the "Advanced Settings" section, mark the "Enable database Update tools" option and click Save & Close button in the top right corner.
Now navigate to Tools -> Tools & Migration menu and click the "Install tables or if necessary update them" button.
Now you can check your site. It should look and work as the template preview demo.
This is the end of the tutorial. Now you know how to install Virtuemart 3.x template using fullpackage.zip.
Feel free to check the detailed video tutorial below:
VirtueMart 3.x. How to install VirtueMart/Joomla template using a fullpackage.zip file.jpg)
