


- Web templates
- E-commerce Templates
- CMS & Blog Templates
- Facebook Templates
- Website Builders
FAQs
General Tutorials
Featured templates
MonsterONE Subscrioption


Hello! This tutorial will guide you on how to create a .CSV file for WooCommerce website. Using this .CSV file you will be able to import products to the store.
Before we proceed, we need to install the software that allows to edit .CSV files.
We recommend that you use OpenOffice Calc program for this.

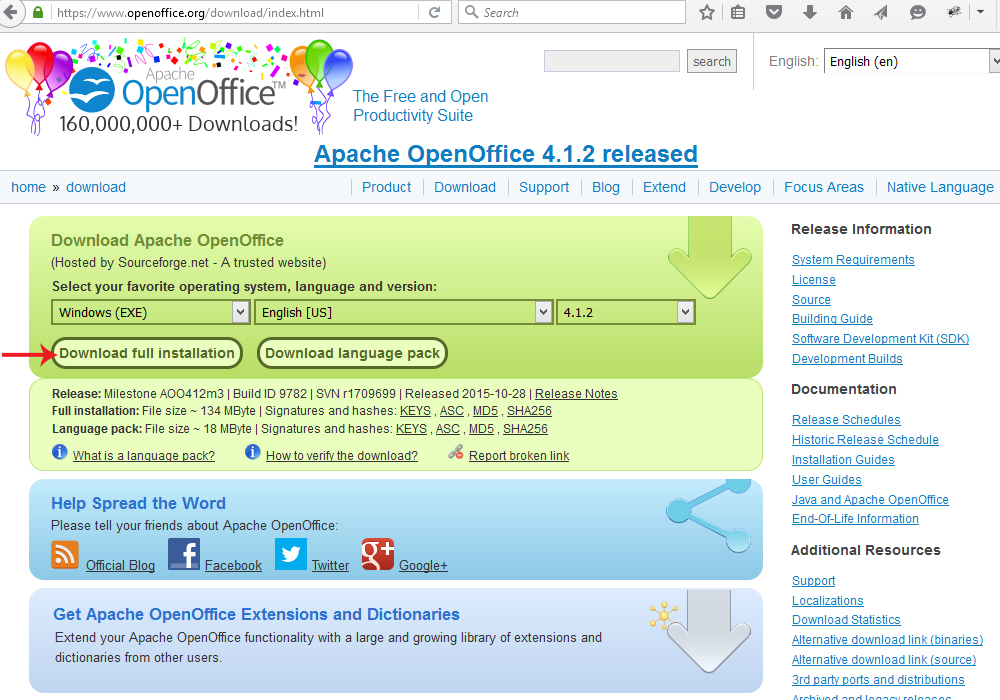
Follow this link to download the OpenOffice program: https://www.openoffice.org/.
Click on I want to download Apache OpenOffice link.
On the next page select your OS and language and press the Download Full installation button.
Then click on Save File button.
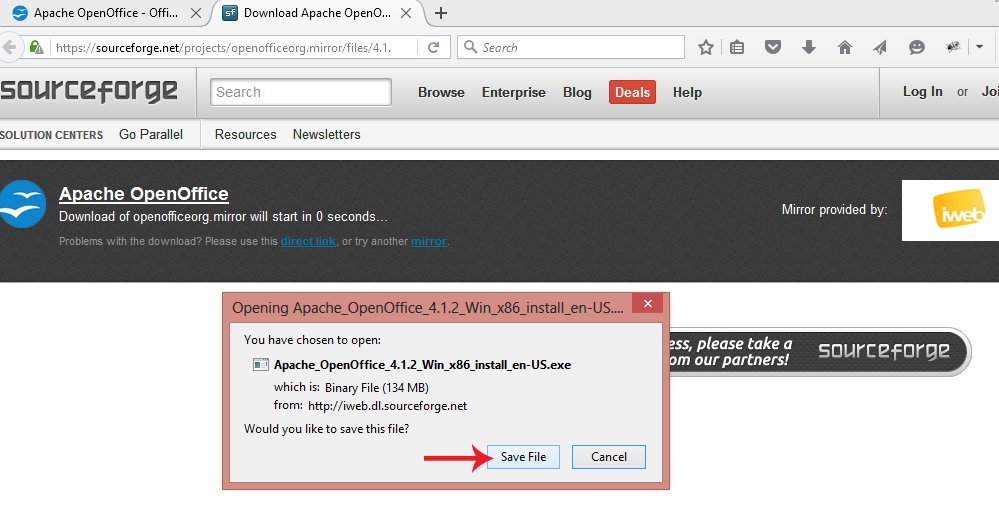
Once it’s done, go to the file download location and proceed with OpenOffice program installation.
Download the sample woocommerce_example_products.csv file using this link.
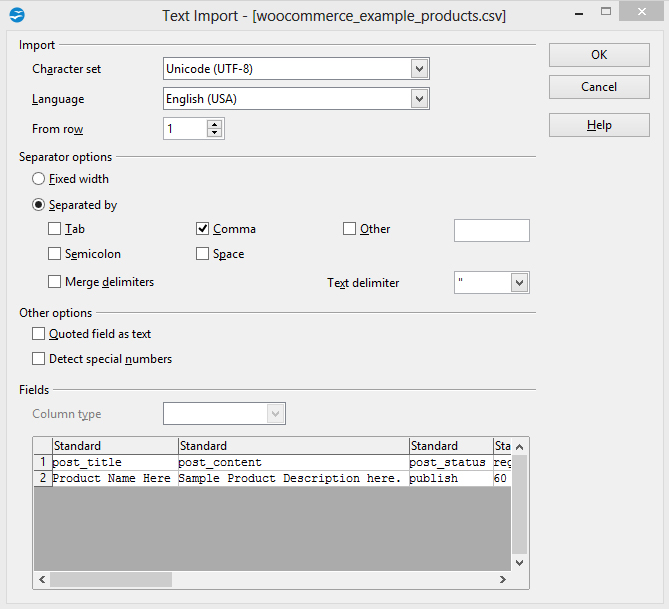
Open woocommerce_example_products.csv file using OpenOffice Calc program.
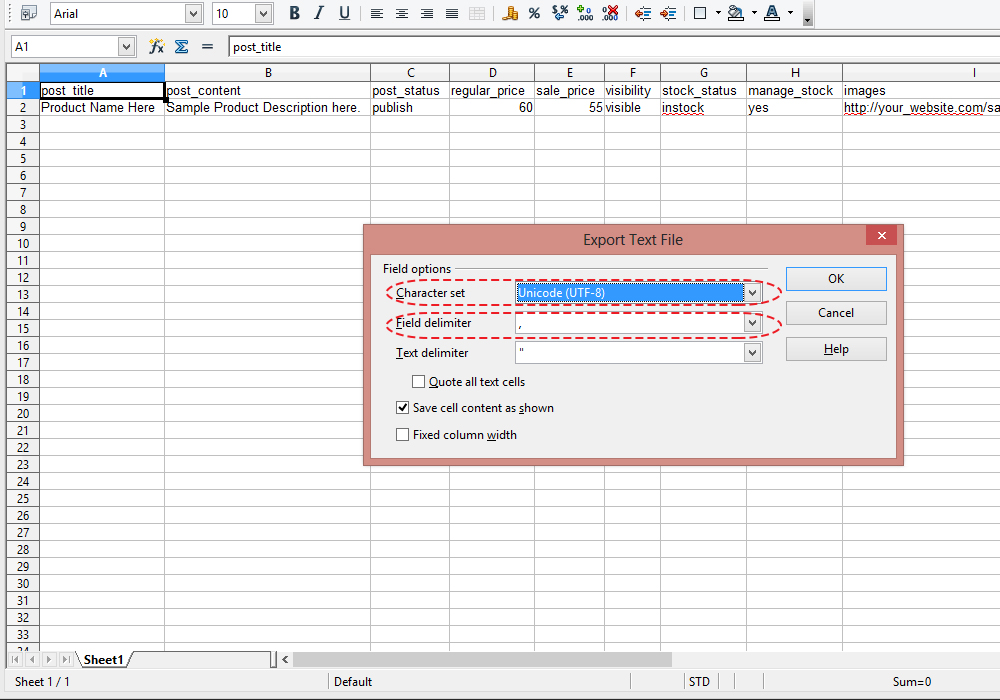
The Character set should be Unicode (UTF-8)
Please, select the comma option.
Click OK button to proceed.
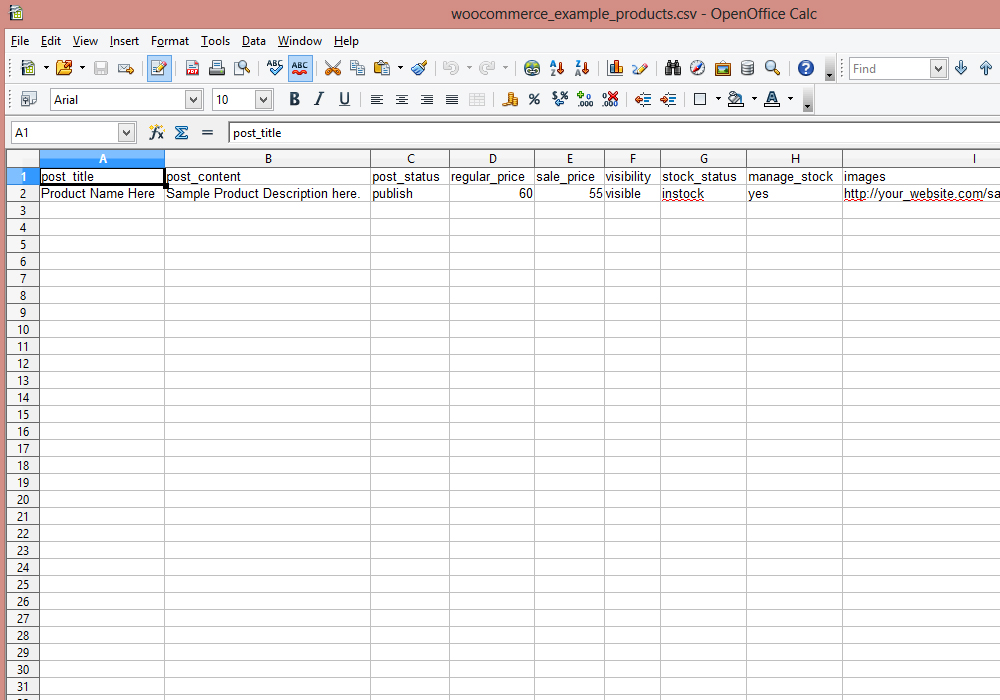
The .CSV file should have the following fields (they are required to import products):
post_title – specify the name of your product;
post_content specify the product description;
post_status – specify whether you wish to enable or disable the product, such as publish;
regular_price – specify the product price. This field should not be empty;
visibility – specify where you want to display your product(s), such as visible;
manage_stock – such as yes or no;
Image – should contain the URL to your image(s). For example: http://domain.com/images/name.jpg
Note:If you do not have Product Images, simply leave “Image” field empty. You can add images via WordPress admin panel later for each product.
tax:product_type – specify the type of your product, such as simple;
tax:product_cat – specify the category name;
tax:product_tag – specify your product brand or manufacturer.
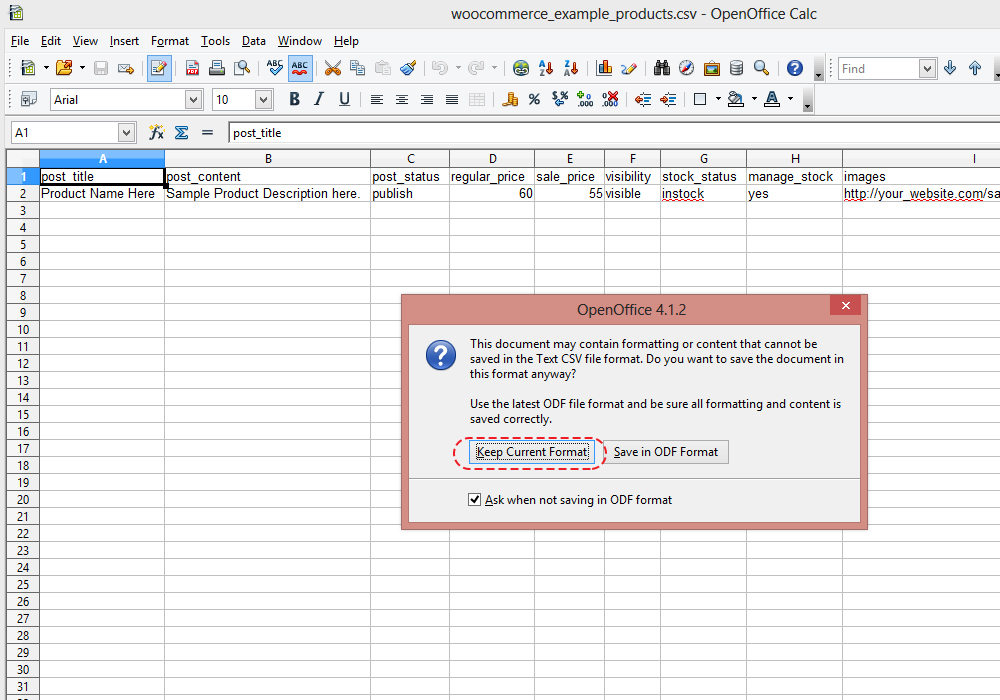
When you are done, go to File -> Save As. Keep the Text CSV (.csv)(*.csv) type. Check the Edit filter settings option.
Then click on the Save button.

Next, click on the Keep Current Format button.
Make sure to select the Caracter set: UTF-8 in the popup window. Select the comma field delimiter and click OK.
This is it. Now we have a correct .CSV file for your WooCommerce website.
Also, don’t forget to view the collection of premium WooCommerce themes to choose the most suitable for your project.
