


- Web templates
- E-commerce Templates
- CMS & Blog Templates
- Facebook Templates
- Website Builders
FAQs
General Tutorials
Featured templates
MonsterONE Subscrioption


Hello! This tutorial is going to show you how to manage My Account drop-down links in Woocommerce templates.
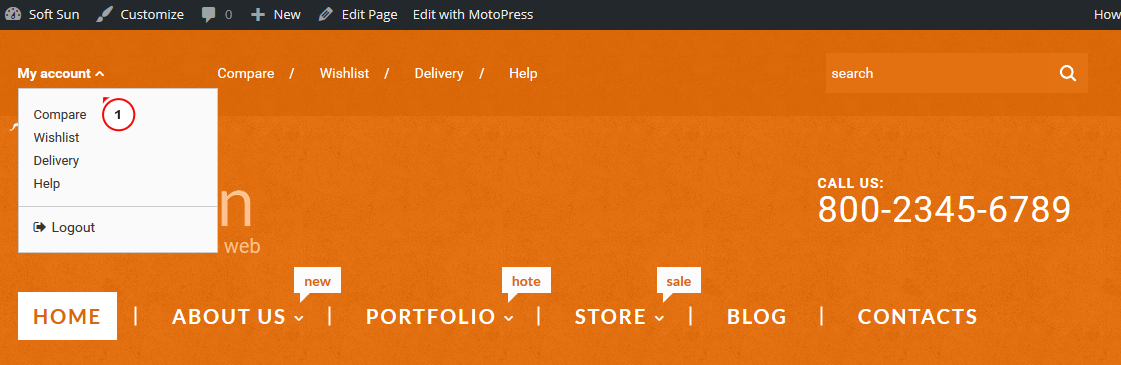
WooCommerce. How to manage My Account drop-down linksUsually My Account menu is located in site header, it is used to let your site visitors manage their account details and log into the site quickly:
First, you need to log into the site admin panel and navigate to Cherry options -> Cherry options -> Shop settings tab.
Next, please specify if you want to Show/Hide account drop-down in header:
If Show is selected, such options are available:
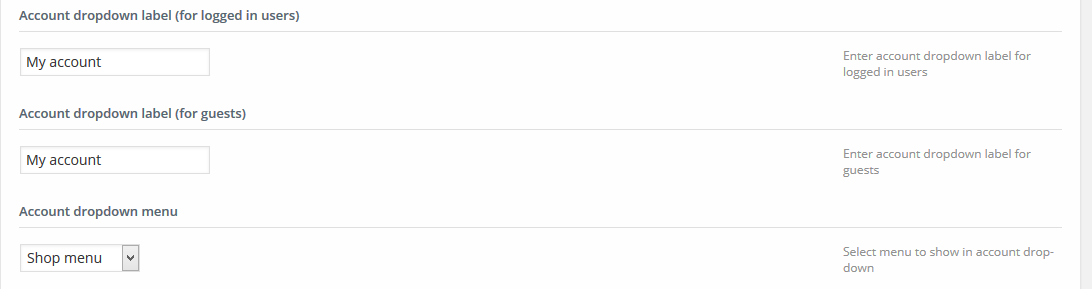
Account dropdown label (for logged in users) – you can specify any title for registered customers accounts;
Account dropdown label (for guests) – you can specify separate title for visitors;
Account dropdown menu – feel free to select menu from list. Keep in mind that menus are available for editing at Appearance -> Menus section:
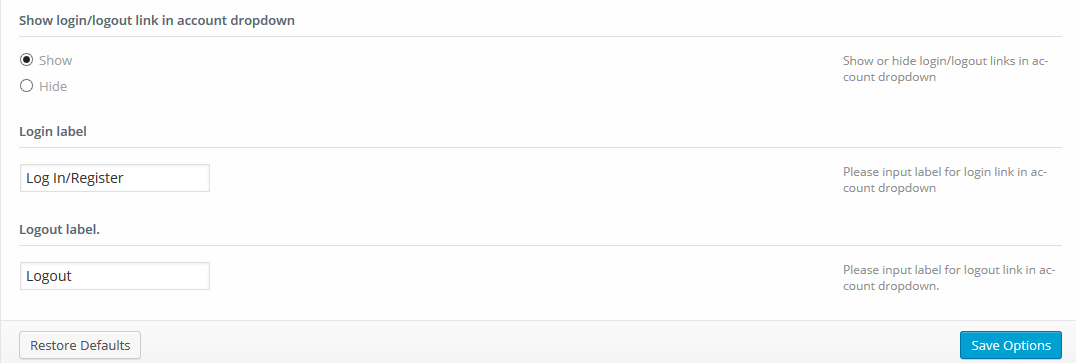
Show login/logout link in account dropdown – select if you’d like to show login links;
Show login/logout link in account dropdown – select if you’d like to show login links;
Login label – specify login label here;
Logout label – specify logout label text:
Feel free to check the detailed video tutorial below:
WooCommerce. How to manage My Account drop-down links