


- Web templates
- E-commerce Templates
- CMS & Blog Templates
- Facebook Templates
- Website Builders
FAQs
General Tutorials
Featured templates
MonsterONE Subscrioption


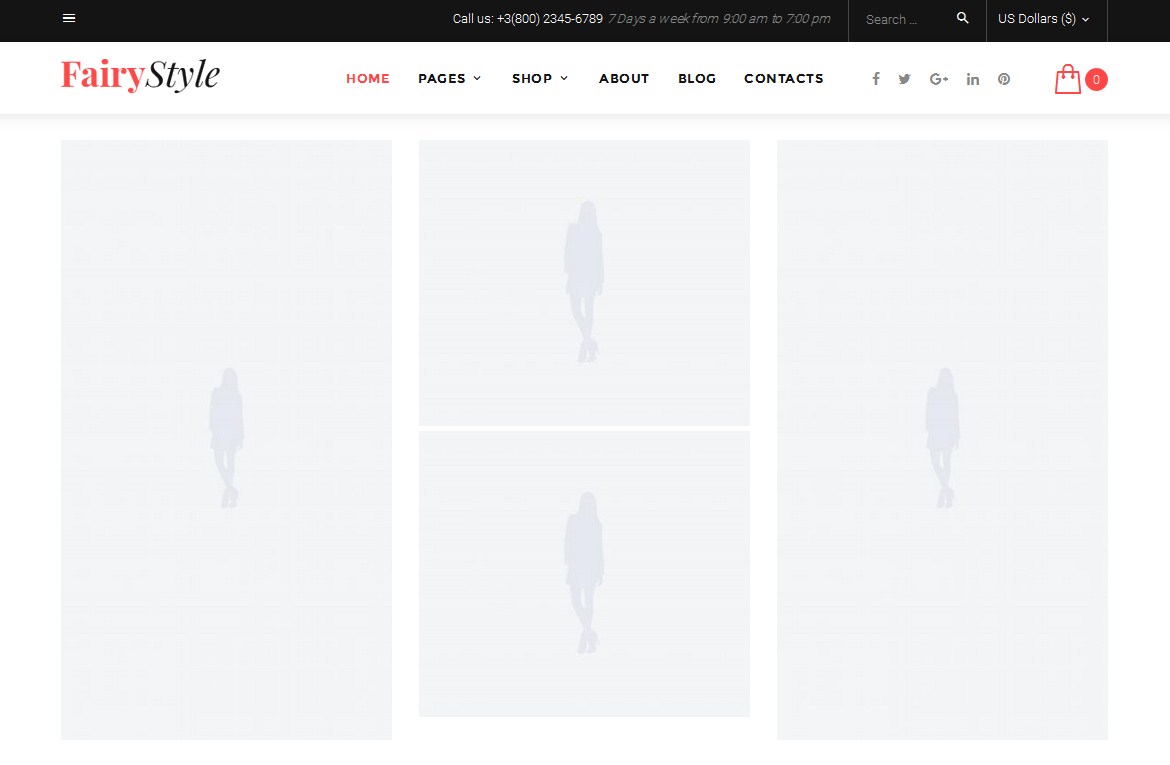
This tutorial is going to show you how to work with “TM Banners Grid” widget.
“TM Banners Grid” widget is used to display a set of images in a certain area:
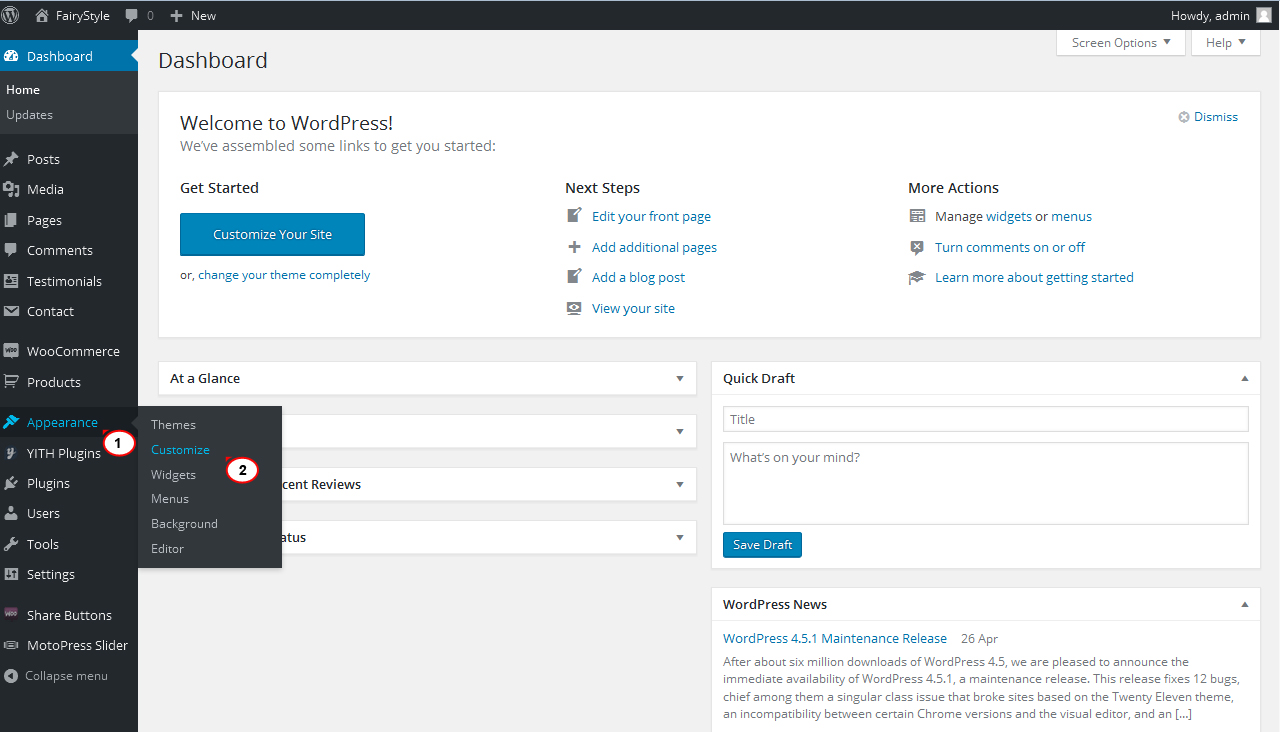
To manage a banner widget, please, login to your WordPress backend:
Navigate to the Appearance > Customize section:
Open the Widget > Before content widget area (or an area where you’d like to display your banner images).
Add or open the TM Banner Grid Widget:
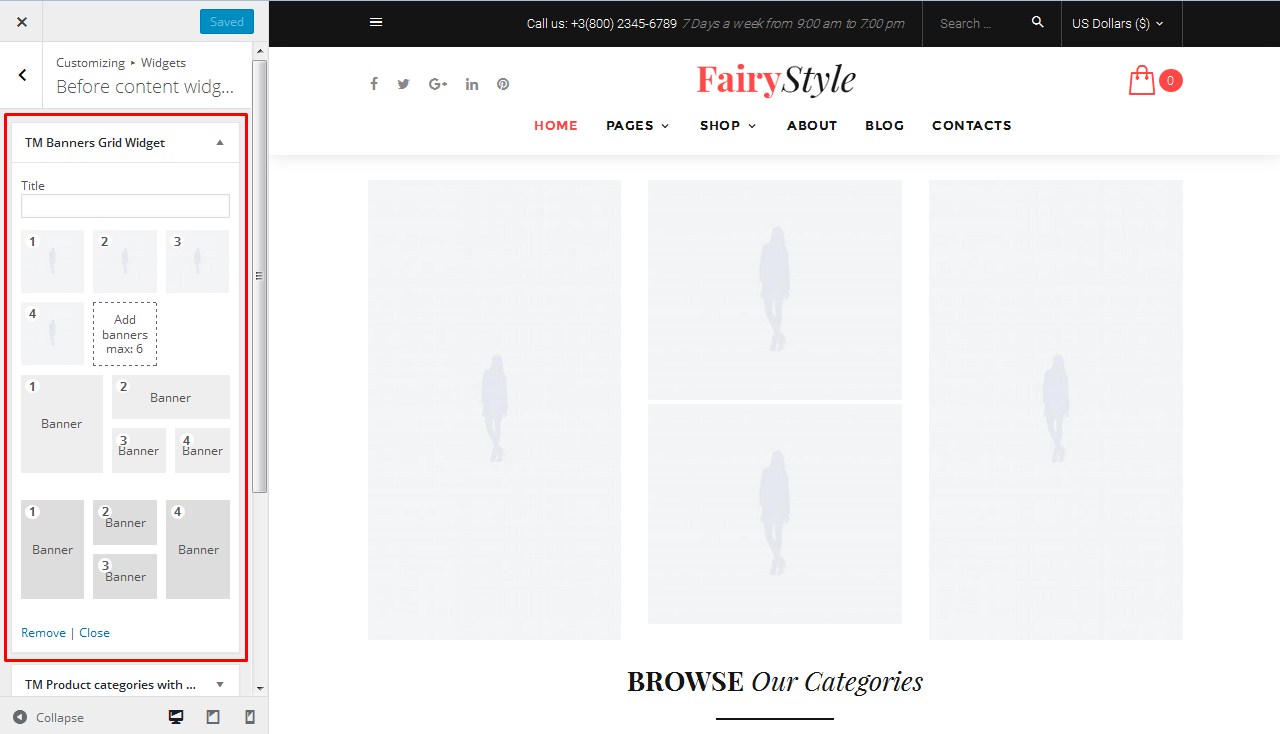
Using the widget settings area you can do the following changes:
Upload or remove banner images. The maximum images number you can upload is 6.
Reorder banner pictures. Using the drag-and-drop option you can change banners order. In the top right corner of each image you can see the banner’s number. Reorder option is necessary for the proper layout settings. You can read about them further.
Set up banner images links. Hover over the image to see the link sign and click on it. Enter your link to the field that appears under the widget images. Click ‘Save’ to save the changes.
Change banner images layout. Widget has two layouts available.
Feel free to check the detailed video tutorial below:
WooCommerce. How to work with “TM Banners Grid” widget