


- Web templates
- E-commerce Templates
- CMS & Blog Templates
- Facebook Templates
- Website Builders
FAQs
General Tutorials
Featured templates
MonsterONE Subscrioption


Our Support team is ready to present you a new tutorial that shows how to install WordPress Blogging theme with sample data manually.
WordPress Blogging theme. How to install a theme manually
Extract template package.
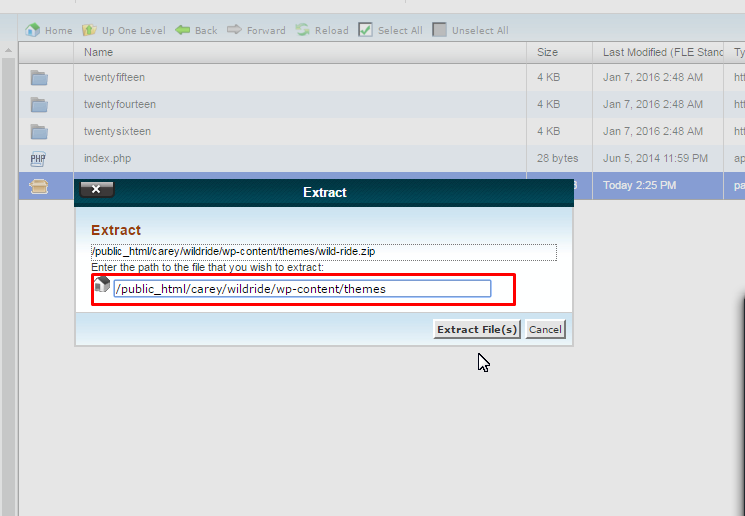
Locate theme/theme_name.zip file in the template package. Upload your theme to wp-content/themes folder on the server and unzip it there:
Navigate to Appearance ->Themes in your WordPress admin panel and activate the installed theme there:

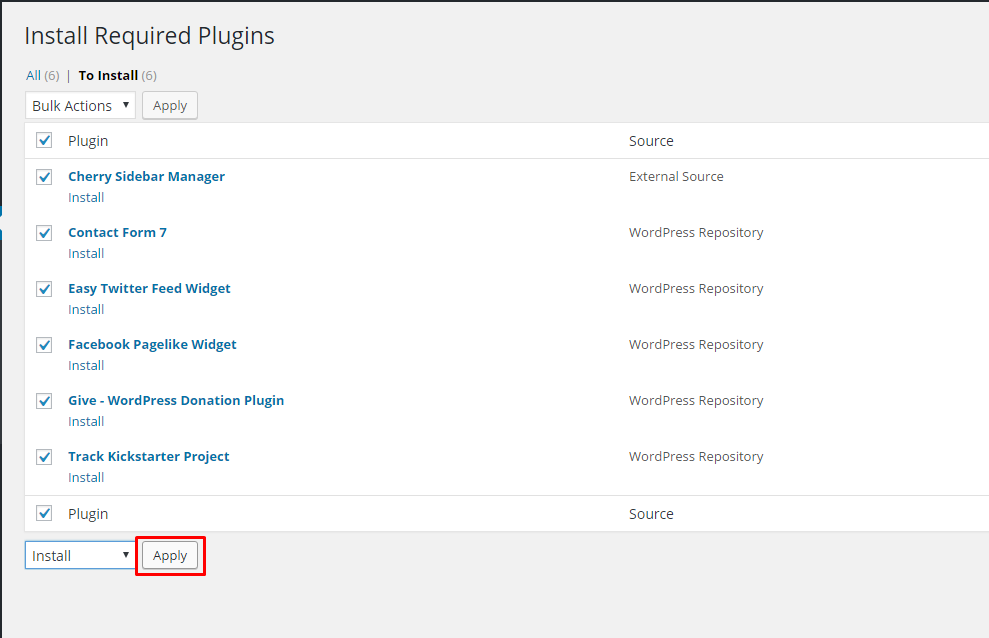
After the theme activation, you should see the list of required plugins. Press on Begin installing plugins to start plugins installation:

Select all plugins, choose install mode and confirm the action by pressing Apply:
In order to import template sample data, first upload theme/manual/install/uploads folder from the template package to wp-content folder on your server. Accept the replacement if folder already exists.
Open theme_name.sql file from ‘theme/manual install’ folder in your text/php editor, such as Notepad++. Replace all instances of “your_website_url_here” with the actual site url:

After editing the file, import it to your site database via PhpMyAdmin tool in your Hosting Control Panel. You can refer to this detailed guide.
ATTENTION: Importing the SQL file to your database will overwrite your existing content and website settings. DO NOT import the SQL file if you want to keep the existing content.
NOTE: ALWAYS back up your database before performing any modifications
1. Open phpMyAdmin tool.
Check your website after importing sample data. It should look like the template Live Demo.
Feel free to check the detailed video tutorial below:
WordPress Blogging theme. How to install a theme manuallyPS. About to start your own blog? Find the perfect Fashion Blog Theme WordPress in our collection of professional templates.
