


- Web templates
- E-commerce Templates
- CMS & Blog Templates
- Facebook Templates
- Website Builders
FAQs
General Tutorials
Featured templates
MonsterONE Subscrioption


This tutorial shows how to edit colors using Power Builder in your WordPress Blogging theme.
Login to WordPress dashboard and open any desired page;
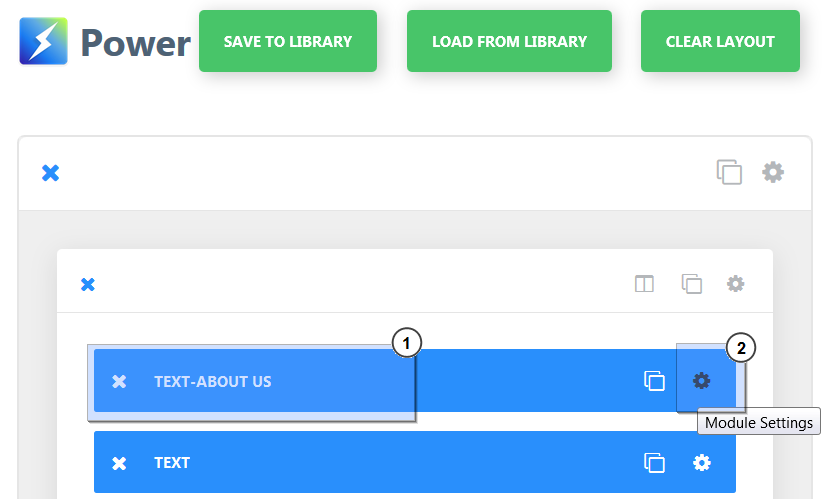
Use ‘Power Builder’ for editing;

Note! Most of the content sections in Blogging themes use their own Custom CSS classes. In case you want to edit colors using Powerbuilder, you need to remove such classes from the module settings. Let’s see how to do it:
.jpg)
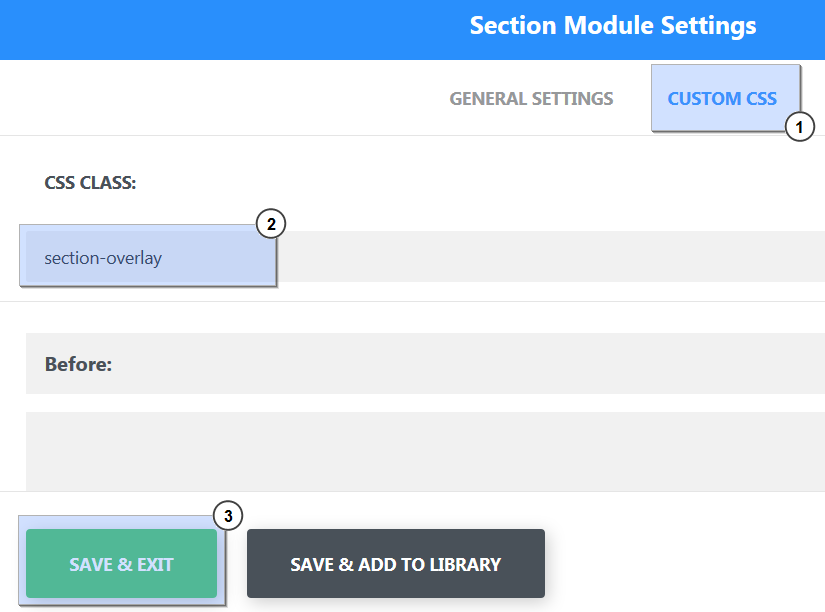
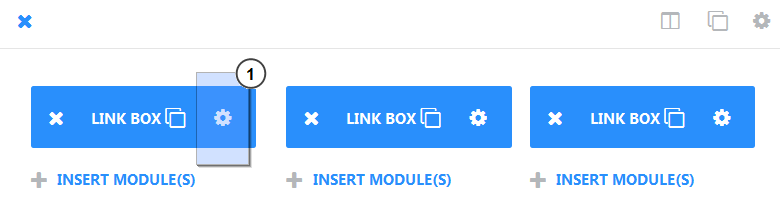
Click the ‘Settings’ button to reach Section Module Settings;

Open ‘Custom CSS’ tab, remove Custom CSS class for this section and save the changes;
We are now ready to edit colors of the body text, content background, titles, icons and so on.
Locate the title text module and open Module Settings window;
Navigate to the ‘Advanced design settings’ tab and change ‘Text Color’ value to any desired color. Save the changes;
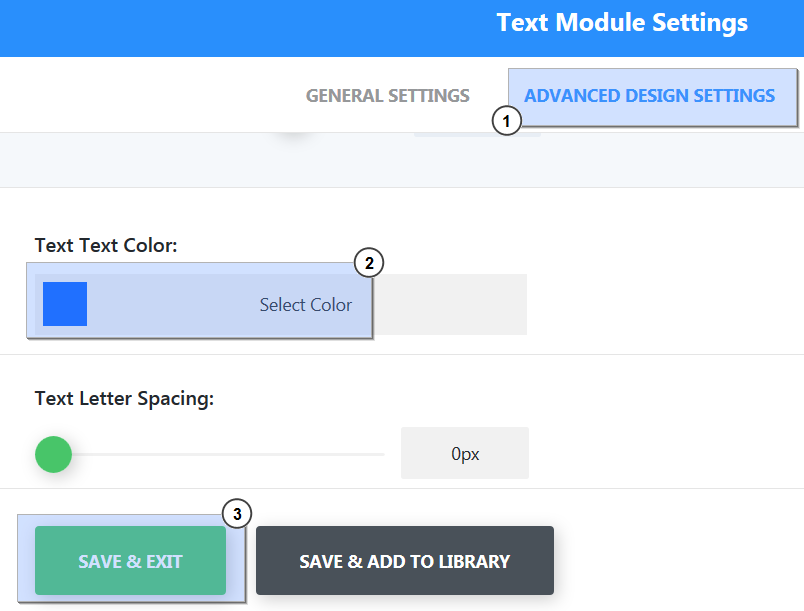
Title color has been successfully changed;

Locate the body text module and open Module Settings window;

Navigate to ‘Advanced design settings’ tab and change ‘Text Color’ value to any desired color. Save the changes;
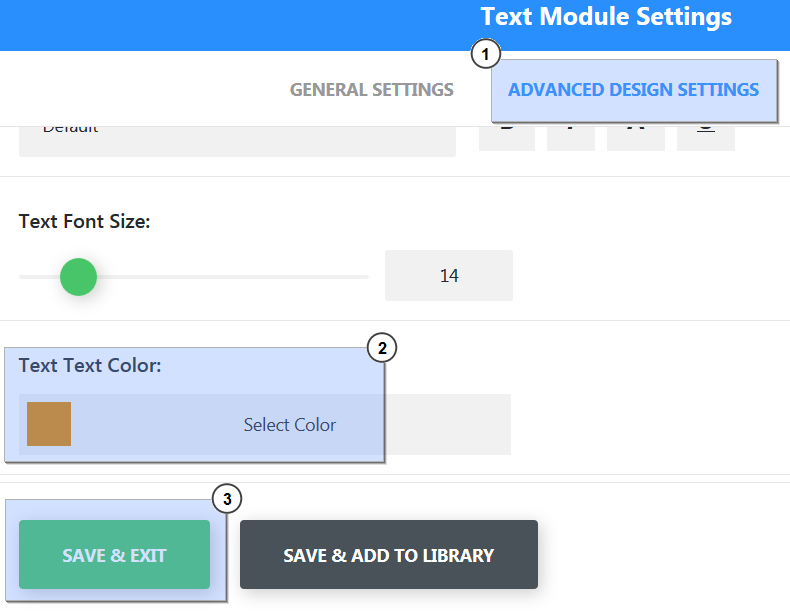
Body text color has been successfully changed;

Locate the needed text module and open Module Settings window;
Navigate to ‘Advanced design settings’ tab and change ‘Background Color’ value to any desired color. Save the changes;
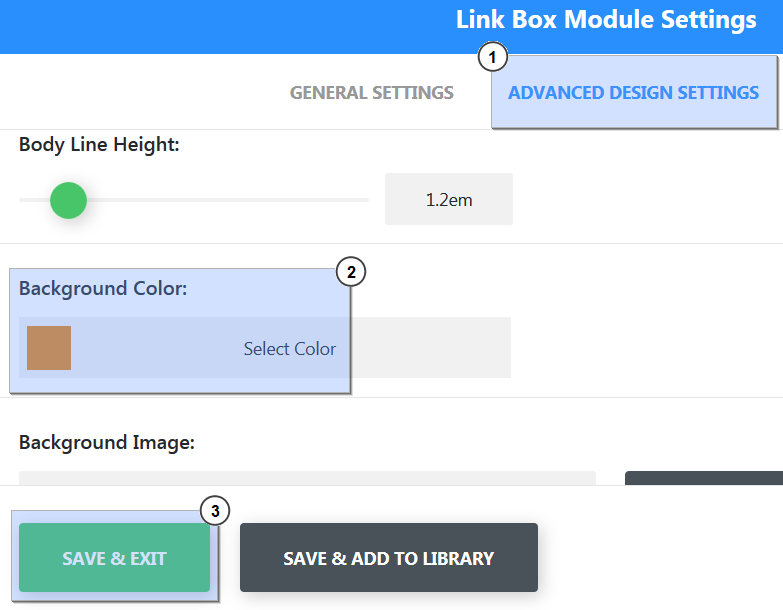
Content Background color has been successfully changed;

Locate the needed module that uses icons and open Module Settings window;

Navigate to ‘Advanced design settings’ tab and change ‘Icon Color’, ‘Icon Hover Color’ values to any desired color. Save the changes;
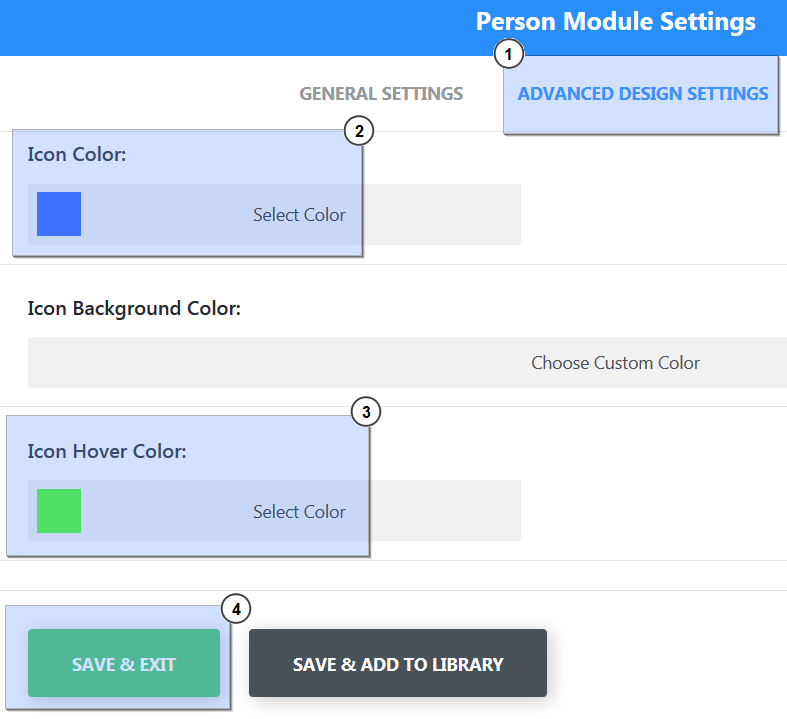
Icon color has been successfully changed;

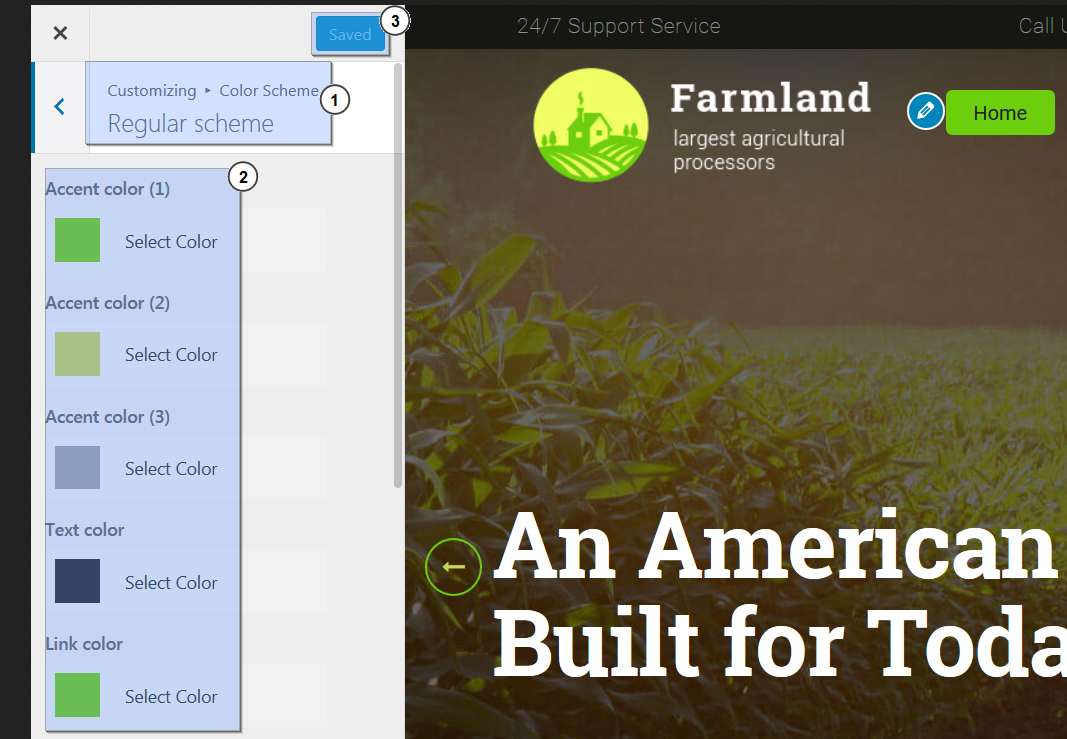
Note! Some website elements such as Menu color, submenu colors, links colors may be changed via Appearance > Customize > Color Scheme menu;
This is the end of the tutorial. Now you know how to edit colors using Power Builder in your Blogging theme.
Feel free to check the detailed video tutorial below:
WordPress Blogging themes. How to edit colors using Power Builder