


- Web templates
- E-commerce Templates
- CMS & Blog Templates
- Facebook Templates
- Website Builders
FAQs
General Tutorials
Featured templates
MonsterONE Subscrioption


Our support team is glad to present you our new guide that will show you how to change a lightbox image in your WordPress template.
WordPress. How to change lightbox image
Log into your WordPress admin panel and navigate to Services –> Services section (in your case posts type may differ). Open any post here:
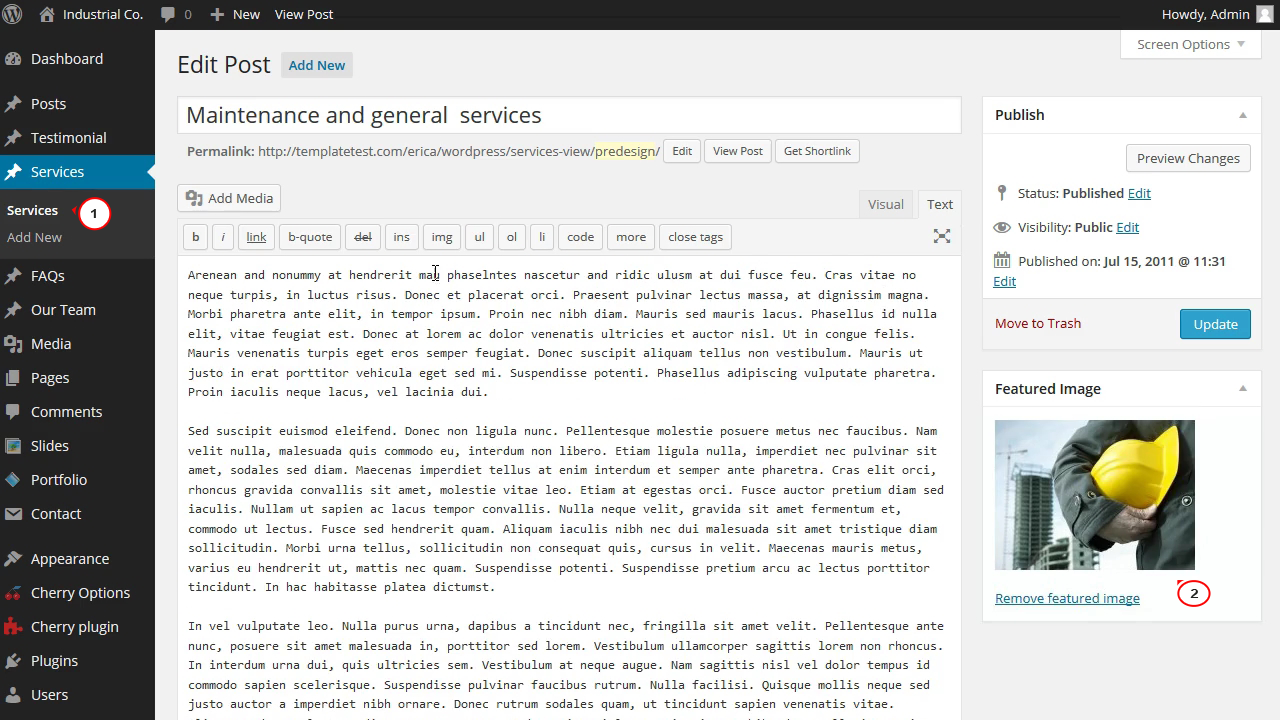
.jpg)
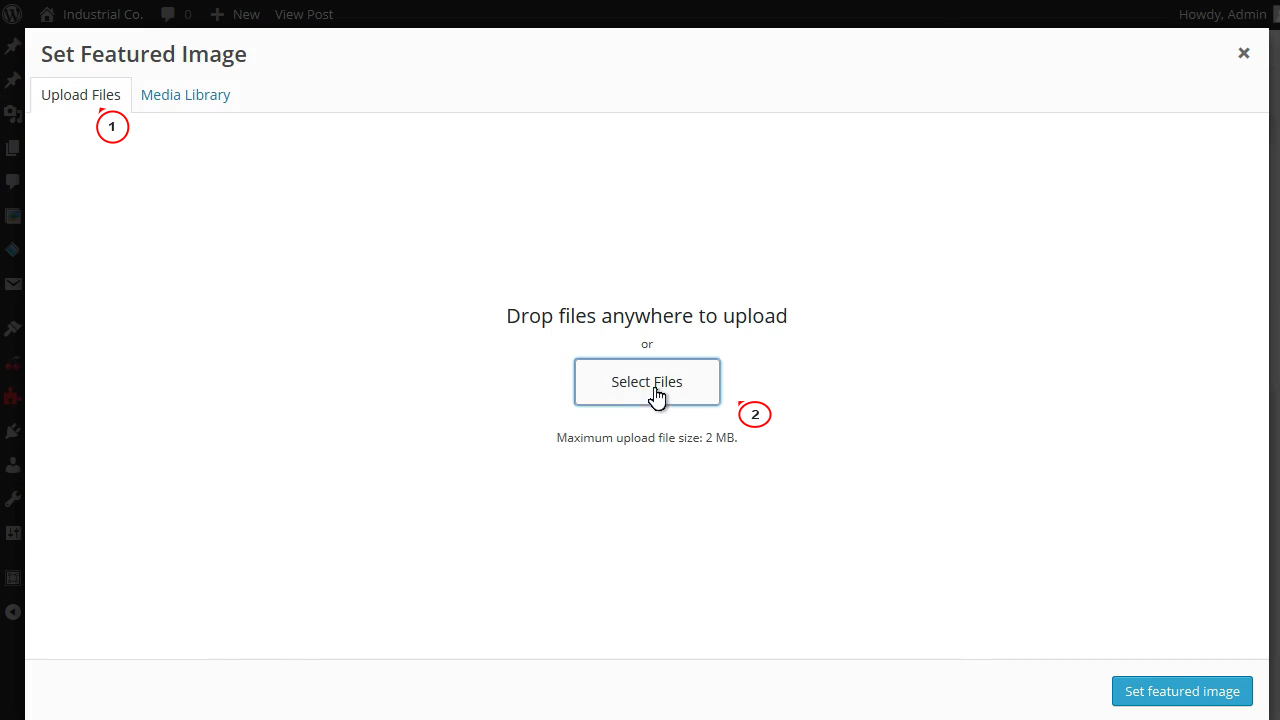
Click on Featured image on the right side and go to Upload images tab. Upload needed images here:
Once images are uploaded, navigate to Media Files tab. Use the dropdown at top left to show Uploaded to this post only:
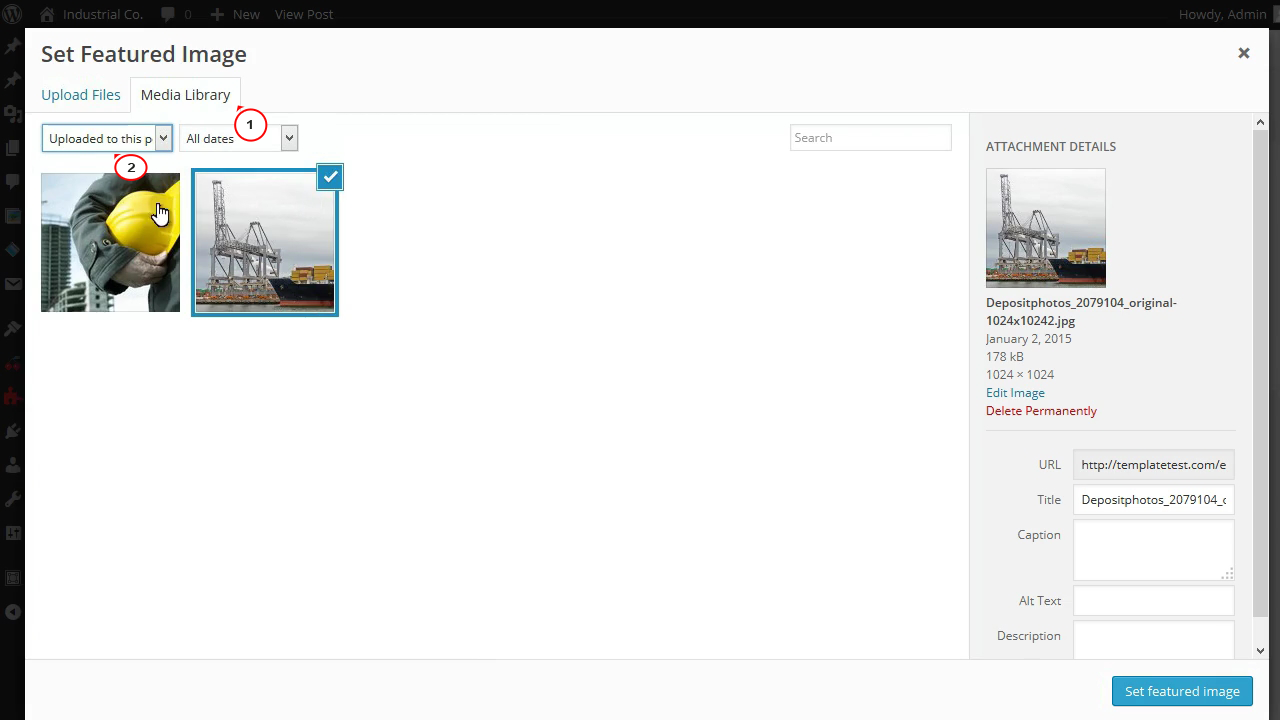
Check the image you’d like to appear as featured one. All the other images that are uploaded to this post will appear in lightbox, so you can upload two images to have a different featured image and a lightbox one; or upload three and more images to have lightbox gallery for this post.
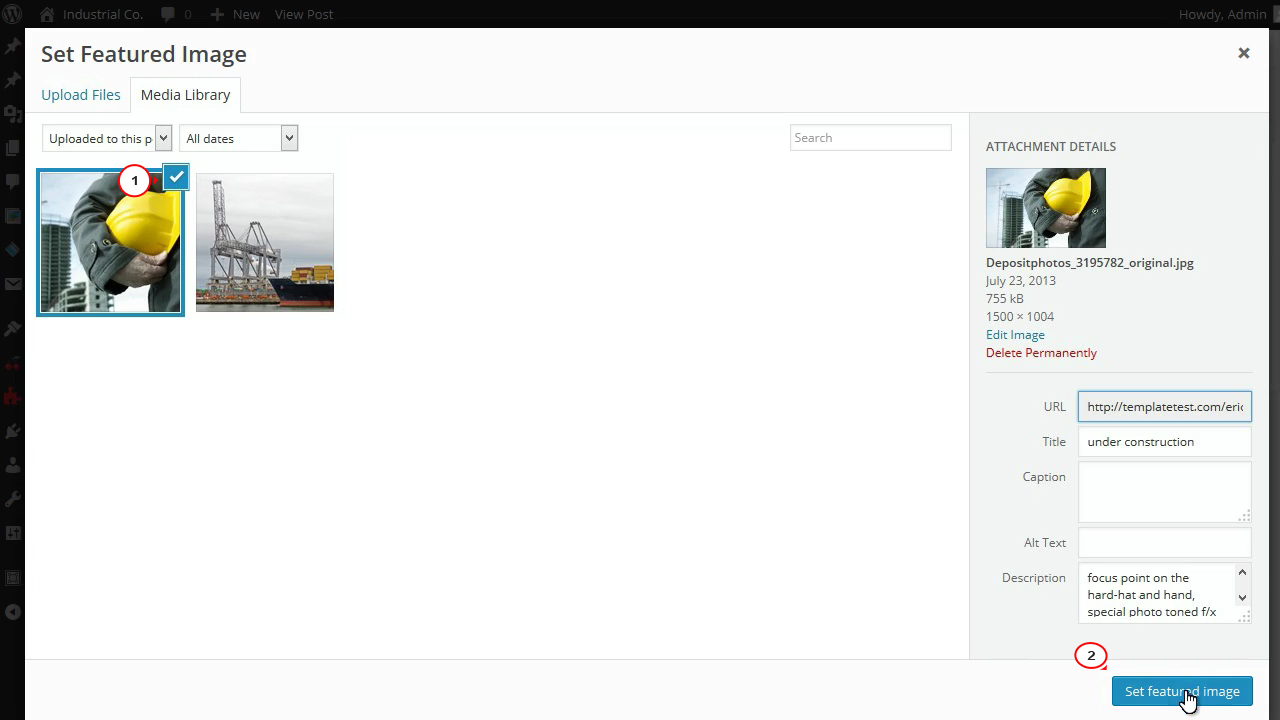
Press on Set featured image button at bottom right and update your post after editing:
Refresh your site now to see the changes applied. You have successfully assigned different images for lightbox and featured image itself.
Feel free to check the detailed video tutorial below:
