


- Web templates
- E-commerce Templates
- CMS & Blog Templates
- Facebook Templates
- Website Builders
FAQs
General Tutorials
Featured templates
MonsterONE Subscrioption


General information
Firstly, you need to download Cherry Framework and the child theme draft to your desktop:
.jpg)
Then, you should install Cherry Framework and the child theme draft, whereupon activate the child theme draft. That is the one we will work with.

You will see the message to install the required plug-ins (Contact Form 7 and Motopress Content Editor) when the child theme activation is completed. You can proceed with installation or hide the message if you do not need them.
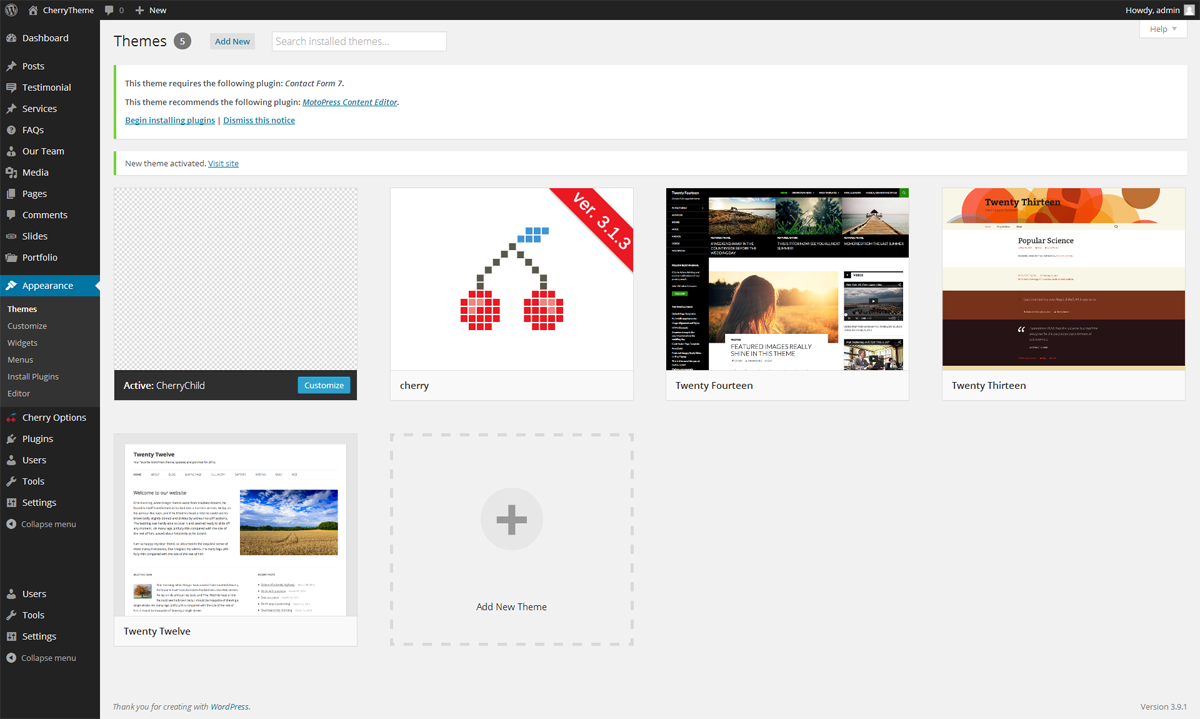
Now you are ready to use and edit the theme.
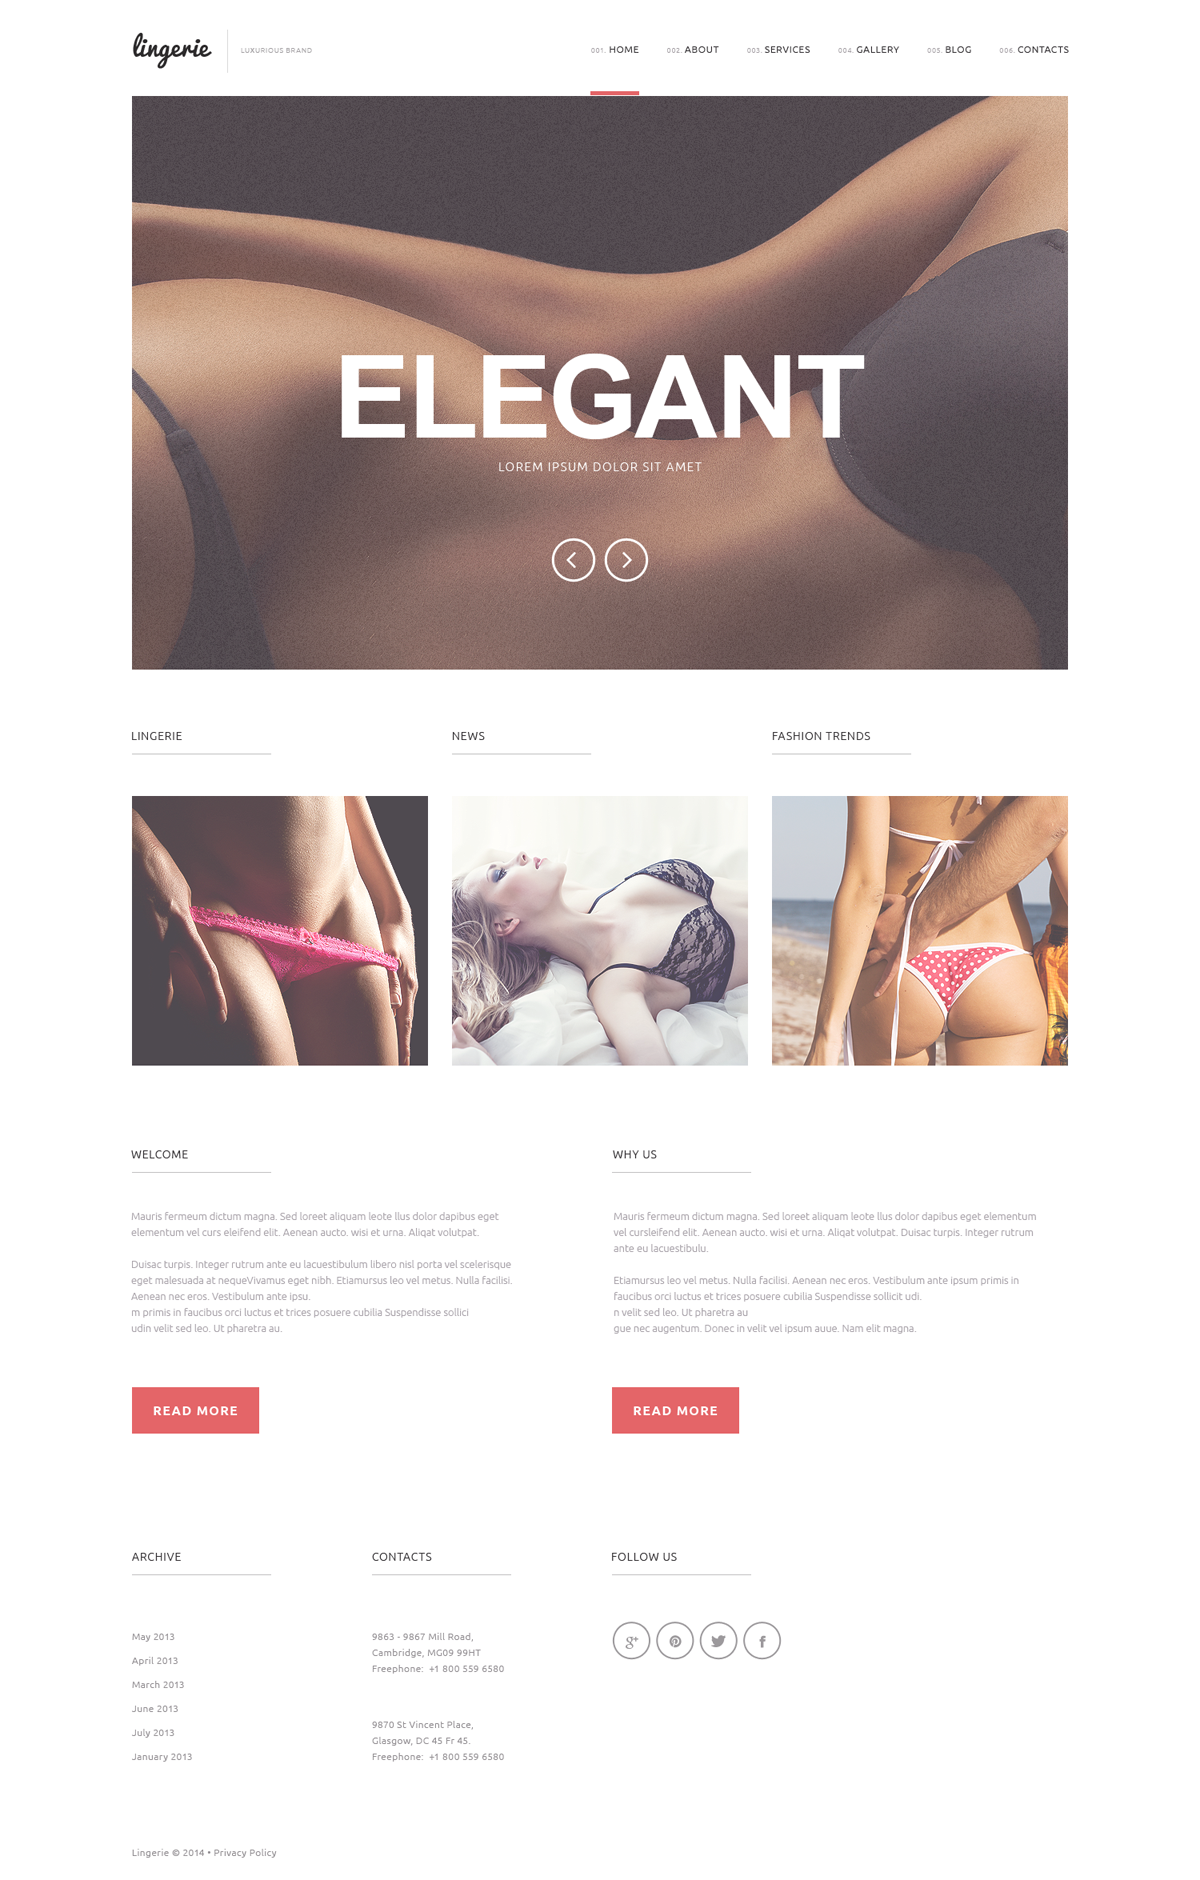
Let’s try to make our draft look like the following:
Before editing let’s find out what our theme consists of. So, our child theme has the following standard structure of files and folders:
Less front-end processor is used for more convenient work with css styles in CherryFramework and child theme. That is why it is required to edit styles namely in .less files, the framework will compile them to CSS. If you do not want to use LESS but edit CSS, then make changes only in style.css file, because other CSS files of the child theme are generated from .less files and are renewed each time while updating the cherry options, that is why your changes will be lost.
Theme construction
Firstly, let’s create the static main page and the blog page – Pages->Add new. Select Home Page for the main page template.
After that go to Settings->Reading and set Front page displays option to Static page and select the newly created pages for Front Page and Posts Page options.
Navigate to Settings->Permalinks menu and define settings for the permanent links. Select, for instance, “Post name” and save changes.
Go to Appearance->Menus and create a new menu. Select “Header Menu” in “Theme locations”, add the required pages and save changes.
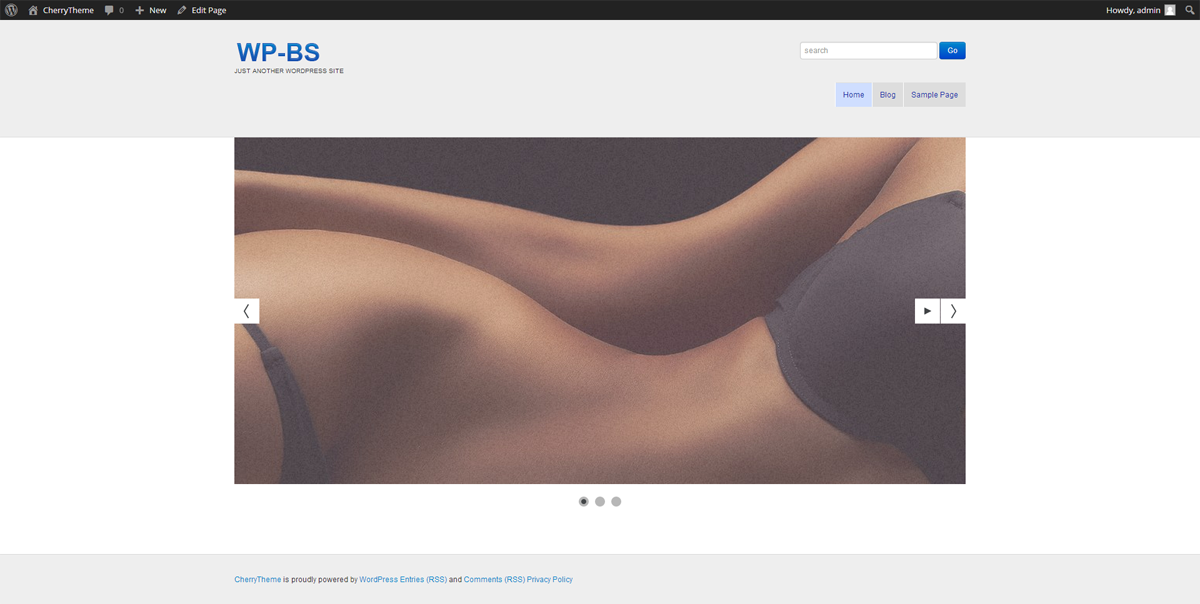
After these steps we should get something like this:

Slider settings
At first you need to define what slider dimensions you want to use and set them in theme-init.php file. For example, we use 1170*720. Open theme-init.php file and find the following line:
add_image_size( 'slider-post-thumbnail', 940, 446, true ); // Slider Thumbnail
edit the corresponding values, i.e. we get in our case:
add_image_size( 'slider-post-thumbnail', 1170, 720, true ); // Slider Thumbnail
Now we need to change some settings of the slider initializing. Open custom-function.php file and add the following code to the end before the closing ?> tag:
							add_filter( 'cherry_slider_params', 'my_rewrite_slider_params' );
							function my_rewrite_slider_params( $params ) {
									$params['height'] = "'61.5%'";
									$params['minHeight'] = "'200px'";
									return $params;
							}
61.5% number is the result of dividing our slides’ height by their width and multiplying by 100%. This option is required for correct slides changing at different screen resolutions. 200px is the minimal height to which you can reduce your slider.
Your slider is ready to work, let’s add slides. You can do that according to the following guide. As a result, you should get something like the following:
If you uploaded slider images before setting dimensions in theme-init.php file, your images won’t have the required size, to rectify that you can use Regenerate Thumbnails plug-in or just re-upload slider images.
General styles
Let’s upload our logo at first. Go to Cherry Options->Logo & Favicon in the admin panel and either upload the logo image or choose “Text Logo” option and define styles due to the corresponding settings.
Open General tab and define background-color for body and header – it is white in our case, you can also set the color of links, styles for theme headings, etc.

Header styles
Define general styles, remove the bottom border, set the required indent, add logo and slogan as the first image shows. As it was mentioned above, it is recommended to add all CSS styles to style.less file, where they will be automatically compiled to the main CSS file (main-style.css). If necessary, you can find the detailed information about managing less here.
Re-write the necessary templates. By default, all template files are located in the framework, but if you need to change the location or order of the elements, modify HTML layout of some page part, you need to edit some template files. To do this, you need to move the necessary file from the framework to the child theme, preserving the folders structure and change it the way you need in the child theme folder (you should not edit files in the framework, because all changes will be lost after the framework update).
Let’s consider an example: imagine that we want to merge menu and logo in one line and locate the search form above them. We need to edit wrapper-header.php template file that is located in “wrapper” folder of the framework. We created the same “wrapper” folder in our child theme and copied wrapper-header.php file there. All files in the child theme possess the higher priority and they will be used for the displaying elements on the page. We need to modify the code the way we need: combine the logo and menu in one line and locate the search above them. As a result, the code in this file will look like the following:
							<?php /* Wrapper Name: Header */ ?>
							<div class="row">
								<div class="span6 hidden-phone pull-right" data-motopress-type="static" data-motopress-static-file="static/static-search.php">
									<?php get_template_part("static/static-search"); ?>
								</div>
							</div>
							<div class="row">
								<div class="span5" data-motopress-type="static" data-motopress-static-file="static/static-logo.php">
									<?php get_template_part("static/static-logo"); ?>
								</div>
								<div class="span7" data-motopress-type="static" data-motopress-static-file="static/static-nav.php">
									<?php get_template_part("static/static-nav"); ?>
								</div>
							</div>
Save changes and check the result. When the previous steps completed, you should get something like the following:

Let’s style the remaining elements – the menu, search form, etc. If you have followed the recommendations and chosen .less file for editing, that would make your work easier and save time in this step, because having changed the variable in one place in .less, we are be able to change styles in all elements where this variable is used. All variables are located in bootstrap/less/variables.less file. After you open this file, you will see that the part of variables is commented out. These variables can be used for defining styles, but their values are set not in variables.less file, but theme options in the admin panel. I.e., if you use @linkColor variable, its value will be taken from the Link Color in theme options, in our case it is #e46568. The same way you can use the following variables:
						@textColor,
						@linkColorHover,
						@bodyBackground,
						@baseFontSize,
						@baseFontFamily,
						@baseLineHeight
Other variables can be changed (defined) directly in variables.less file, for instance, we have flat design and do not want rounded corners, that is why the values of @baseBorderRadius, @borderRadiusLarge, @borderRadiusSmal dimensions we change to 0, etc.
We will add the menu items numeration according to this article principles.
Hide the search form in the options. You can raise a question – why have we added styles to it, if we hide it? Perhaps we will need to add the search form to the header in the future and it would be enough to activate it in the options not wasting time for locating and modifying corresponding css styles.
You can find Use stickUp menu option in theme options (Cherry Options) in Navigation tab – that allows to activate the fixed menu that remains at the top of screen while scrolling, like “sticking up” to it. But it would be better to “stick” to the top of screen not only the menu, but the complete header as well. Let’s edit our theme. Open custom-function.php file and add the following code to the end before closing ?> tag:
You can find Use stickUp menu option in theme options (Cherry Options) in Navigation tab – that allows to activate the fixed menu that remains at the top of screen while scrolling, like “sticking up” to it. But it would be better to “stick” to the top of screen not only the menu, but the complete header as well. Let’s edit our theme. Open custom-function.php file and add the following code to the end before closing ?> tag:
						add_filter( 'cherry_stickmenu_selector', 'my_change_selector' );
						function my_change_selector($selector) {
								$selector = '.header';
								return $selector;
						}
This code changes the element for “stick up” effect at the top of screen. You can configure that for any element replacing .header with the required CSS selector. After that add the the following code to the theme css styles:
						.header.isStuck {
							right: 0;
							left: 0;
							box-shadow: 0 5px 10px rgba(0,0,0,.1);
						}
You finished the header stylization. As a result, you should get the following:

Adding and styling content
Firstly, let’s go back to the slider, add some text banners to it and style the navigation elements.
Proceed with filling the home page with the content and its styles. We will create all the page content in the editor with the help of standard elements and framework shortcodes.
Let’s analyze the headings – they have the specific styles in our first image – the large indents and borders. Here we have the choice – either to set the same styles for all default theme headings or to use Title shortcode, available in CherryFramework.
The first way is not very convenient, because there are a lot of plug-ins and theme elements, located outside the content, that use different headings in their HTML-layout, and that will inherit our newly added styles. In some cases that may lead to unexpected and not pleasant results, so you will need to waste additional time fixing the styles of the required headings. To avoid that, we will use Title shortcode, thus only the headings inside this shortcode will get the required styles. The content structure will be like follows:
							[row]
							[span4]
							[title_box title="Lingerie"]
							<a href="http://yourwebsite.com/wp-content/uploads/2014/06/page-img-1.jpg">
							<img class="alignnone wp-image-31 size-full" src="http://yourwebsite.com/wp-content/uploads/2014/06/page-img-1.jpg" alt="page-img-1" width="370" height="337" /></a>
							[spacer]
							[/span4]
							[span4]
							[title_box title="News"]
							<a href="http://yourwebsite.com/wp-content/uploads/2014/06/page-img-2.jpg">
							<img class="alignnone wp-image-34 size-full" src="http://yourwebsite.com/wp-content/uploads/2014/06/page-img-2.jpg" alt="page-img-2" width="370" height="337" /></a>
							[spacer]
							[/span4]
							[span4]
							[title_box title="Fashion Trends"]
							<a href="http://yourwebsite.com/wp-content/uploads/2014/06/page-img-3.jpg">
							<img class="alignnone wp-image-35 size-full" src="http://yourwebsite.com/wp-content/uploads/2014/06/page-img-3.jpg" alt="page-img-3" width="370" height="337" /></a>
							[spacer]
							[/span4]
							[/row]
							[row]
							[span6]
							[spacer]
							[title_box title="welcome"]
							Mauris fermeum dictum magna. Sed loreet aliquam leote llus dolor dapibus eget elementum vel curs eleifend elit. Aenean aucto. wisi et urna. Aliqat volutpat.
							Duisac turpis. Integer rutrum ante eu lacuestibulum libero nisl porta vel scelerisque eget malesuada at nequeVivamus eget nibh. Etiamursus leo vel metus.
							Nulla facilisi. Aenean nec eros. Vestibulum ante ipsu. m primis in faucibus orci luctus et trices posuere cubilia Suspendisse sollici udin velit sed leo.
							Ut pharetra au.
							[button text="read more" link="#" style="primary" size="normal" target="_self" display="inline" icon="no"]
							[/span6]
							[span6]
							[spacer]
							[title_box title="why us"]
							Mauris fermeum dictum magna. Sed loreet aliquam leote llus dolor dapibus eget elementum vel curs eleifend elit. Aenean aucto. wisi et urna. Aliqat volutpat.
							Duisac turpis. Integer rutrum ante eu lacuestibulum libero nisl porta vel scelerisque eget malesuada at nequeVivamus eget nibh. Etiamursus leo vel metus.
							Nulla facilisi. Aenean nec eros. Vestibulum ante ipsu. m primis in faucibus orci luctus et trices posuere cubilia Suspendisse sollici udin velit sed leo.
							Ut pharetra au.
							[button text="read more" link="#" style="primary" size="normal" target="_self" display="inline" icon="no"]
							[/span6]
							[/row]
You can find the detailed information about Cherry framework shortcodes in the following tutorial: WordPress. How to use shortcodes (Cherry based).
Our theme will look as follows after styling the required elements:

Footer styling
Edit the general footer styles – borders, indents, background, etc.
Add and stylize the widgets. By default, you can use 4 footer widget areas in Cherry framework, which are divided into the equal columns. This structure is acceptable in our case. To change it, we would edit 2 files:
includes/sidebar-init.php file in the child theme. You should register all widget areas for our theme. Here we can add new, remove or modify the existing widget areas with the help of register_sidebar(), unregister_sidebar() functions.
wrapper/wrapper-footer.php file in CherryFramework folder. You need to copy that to “wrapper” folder in the child theme. Footer widget areas are defined in this file, here you can change the existing HTML layout, widget areas location, add your widget area with the help of dynamic_sidebar function.
Define the required copyright text in theme options (Cherry Options) in Footer tab in Footer copyright text option.
The main work is finished. Now you need to look through the website, adjust styles you do not like, but in general the theme is ready to be used.
Additional information. You can find the detailed framework documentation on the official Cherry Framework website.
Below you can see the list of Bootstrap framework .less files, which you may need while managing styles of your theme:
