


- Web templates
- E-commerce Templates
- CMS & Blog Templates
- Facebook Templates
- Website Builders
FAQs
General Tutorials
Featured templates
MonsterONE Subscrioption


This tutorial shows how to install Cherry Framework theme sample data manually using an SQL file.
WordPress. How to install Cherry Framework theme sample data manually

1. Open the theme\manual_install folder of your downloaded template package.
2. Upload the “uploads” folder to the wp-content directory of your WordPress installation, accept folder(s) replacement. Please note that your images may be replaced with sample images.
3. Let’s install the sample data. In the theme/manual_install folder you will find the themeXXXXX.sql file (XXXXX is the template number). Open the file themeXXXXX.sql in any text editor (we recommend using Notepad++ or Dreamweaver) and use the search function (Hot key CTRL + F on Windows or Command + F on a Mac) to find the following content your_website_url_here and replace it with your website address (URL) (for example http://yoursite.com) without a slash at the end. Please make sure to click on Replace All button and save it.

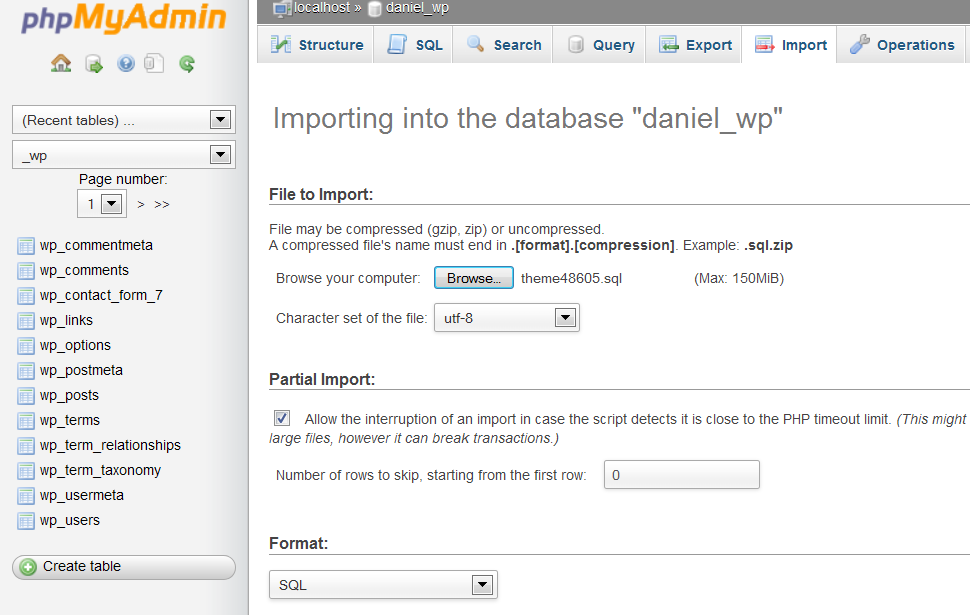
4. Open your WordPress database using a database management tool. Usually the database tool is called PhpMyadmin.
Importing the SQL file to your database will overwrite your existing content and website settings. Do not import the SQL file if you want to keep the existing content.
Note: always back up your database before performing any modifications.
5. Go to the Import tab and import the .sql file.
6. Go to Settings->Permalinks.
7. Click the Save Changes button.
8. Refresh your home page. The template has been installed and looks exactly like the live demo with sample content.
Feel free to check the detailed video tutorial below:
WordPress. How to install Cherry Framework theme sample data manually
