


- Web templates
- E-commerce Templates
- CMS & Blog Templates
- Facebook Templates
- Website Builders
FAQs
General Tutorials
Featured templates
MonsterONE Subscrioption


Our Support team is ready to present you a new tutorial that shows how to insert an image to a post content and link it to any custom URL in WordPress.
WordPress. How to link a post image to a custom URL
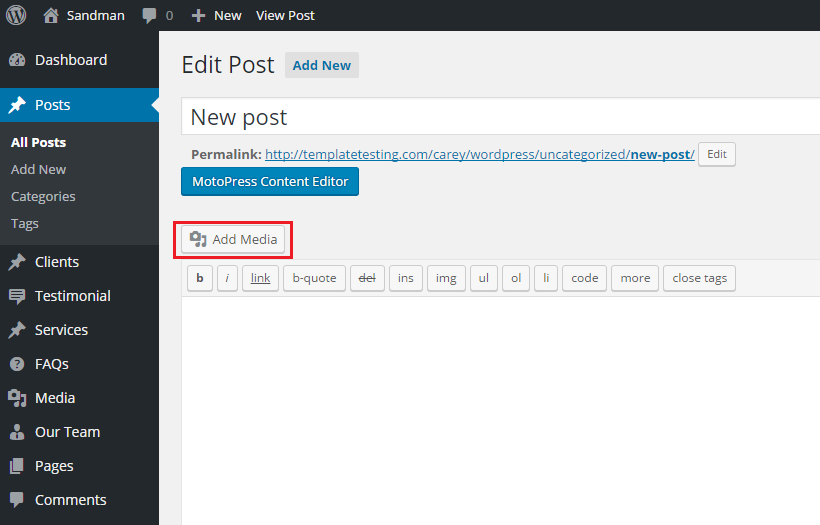
Navigate to Posts > Add new or open any existing post.
Click on Add media button to add your image:
You can select any image from the Media Library or upload a file from your computer.
After selecting the image, see Attachment Display settings. Select Custom url in the Link to drop down and provide your URL in the field below:

Click on Insert into post button when you are done.
If you open the post in Text view, you will see the HTML code for the link and image:

In case the image was inserted without a link, you can add it manually. Open Page/Post content in Text view and add HTML code for link. You will need to add the following code before the image:
<a href="#">
where # is your custom URL, and add the closing tag after the image code:
</a>
Save changes to post when you are done and check the result on your website.
Feel free to check the detailed video tutorial below:
