


- Web templates
- E-commerce Templates
- CMS & Blog Templates
- Facebook Templates
- Website Builders
FAQs
General Tutorials
Featured templates
MonsterONE Subscrioption


Hi there! Today we are going to learn how to create API key and define it within the WPL plugin‘s settings in a WordPress template.
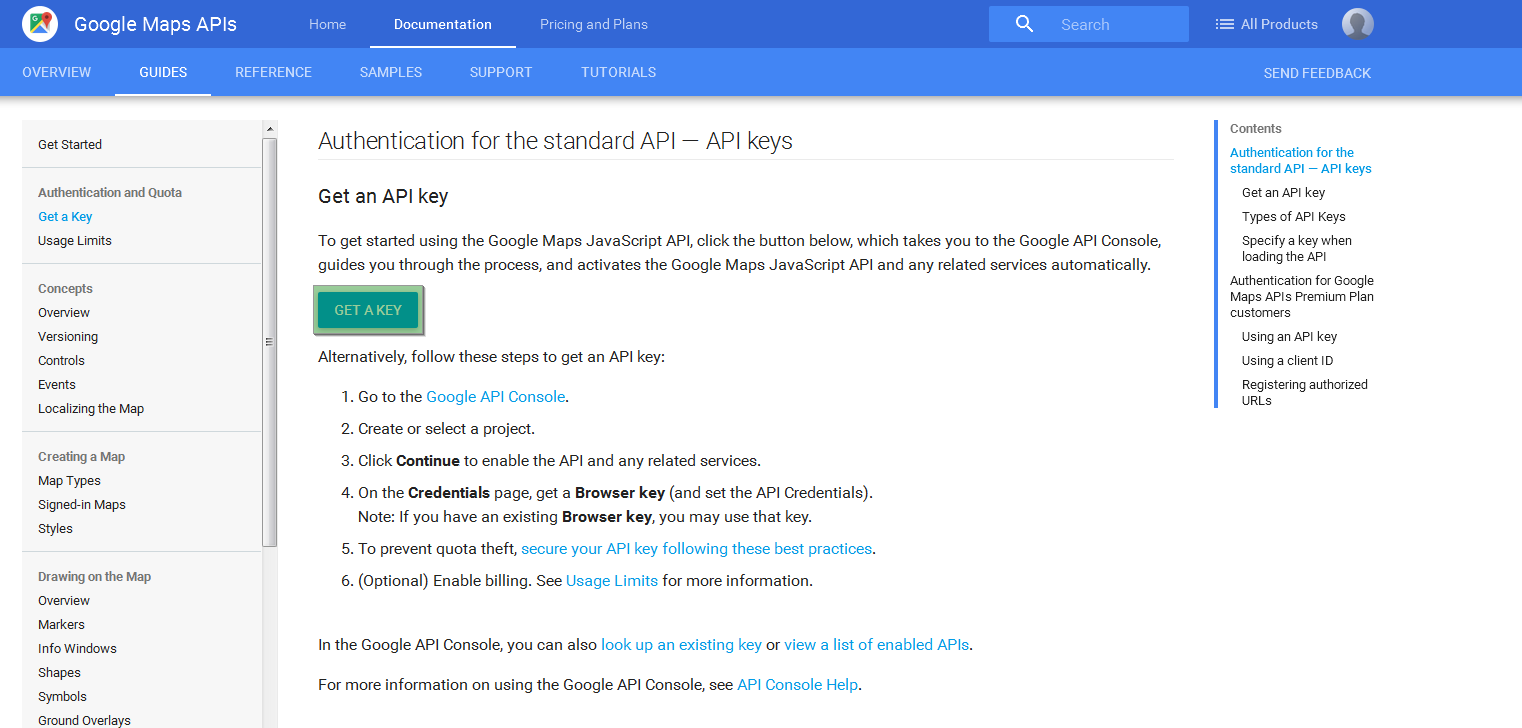
First of all, visit the https://developers.google.com/maps/documentation/javascript/get-api-key#get-an-api-key page. Then click ‘Get a key’ button.
Click Continue to proceed.
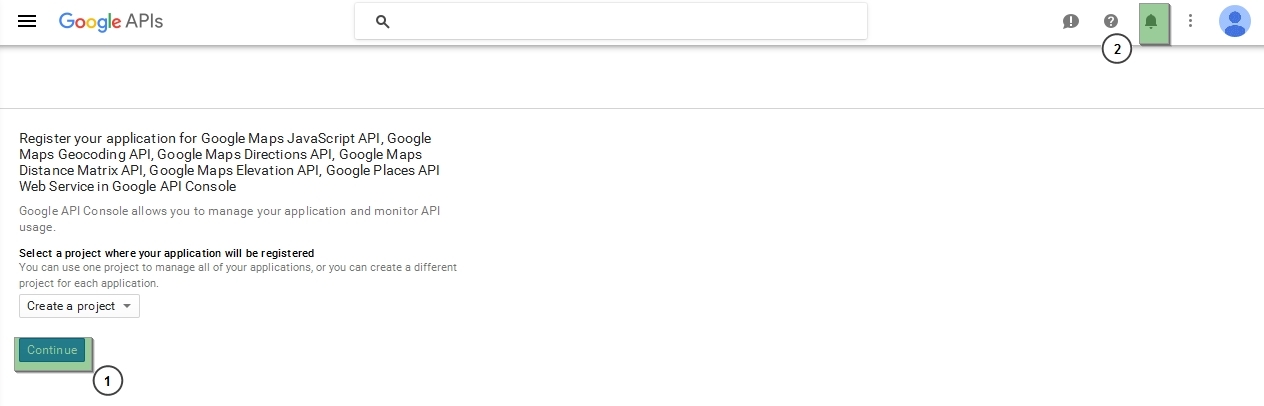
It might take a while, stand by. Click on Notifications button and choose your latest project (or create a new one).
Navigate to Credentials tab on the left. Type in any name or leave the default value. Enter your site url to the second field in such format: mysite.com. Once you have it, click ‘create’.

Your API key is generated, copy it.
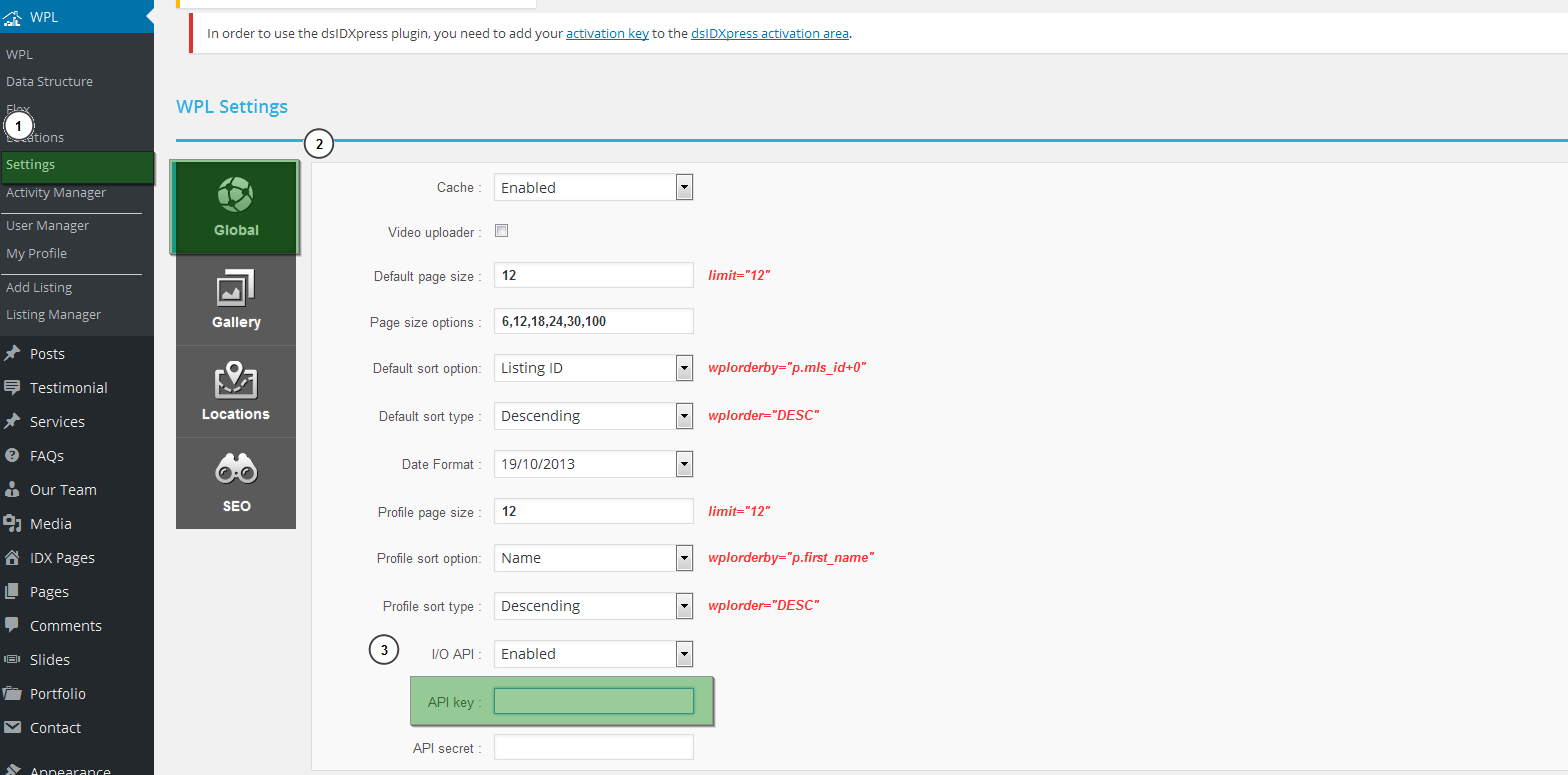
Now navigate to your WordPress admin panel, go to WPL > Settings > Global. Scroll down, you will see the ‘API key’ field, insert your API key there.
Nicely done. Feel free to check the detailed video tutorial below.
WordPress. How to manage Google Maps API key in WPL plugin