


- Web templates
- E-commerce Templates
- CMS & Blog Templates
- Facebook Templates
- Website Builders
FAQs
General Tutorials
Featured templates
MonsterONE Subscrioption


This tutorial shows how to manage Job Listing page in WordPress.
WordPress. How to manage Jobs listing page
In some Jobs WordPress templates, we have the Job Listing section. Let’s find out how to manage this section:
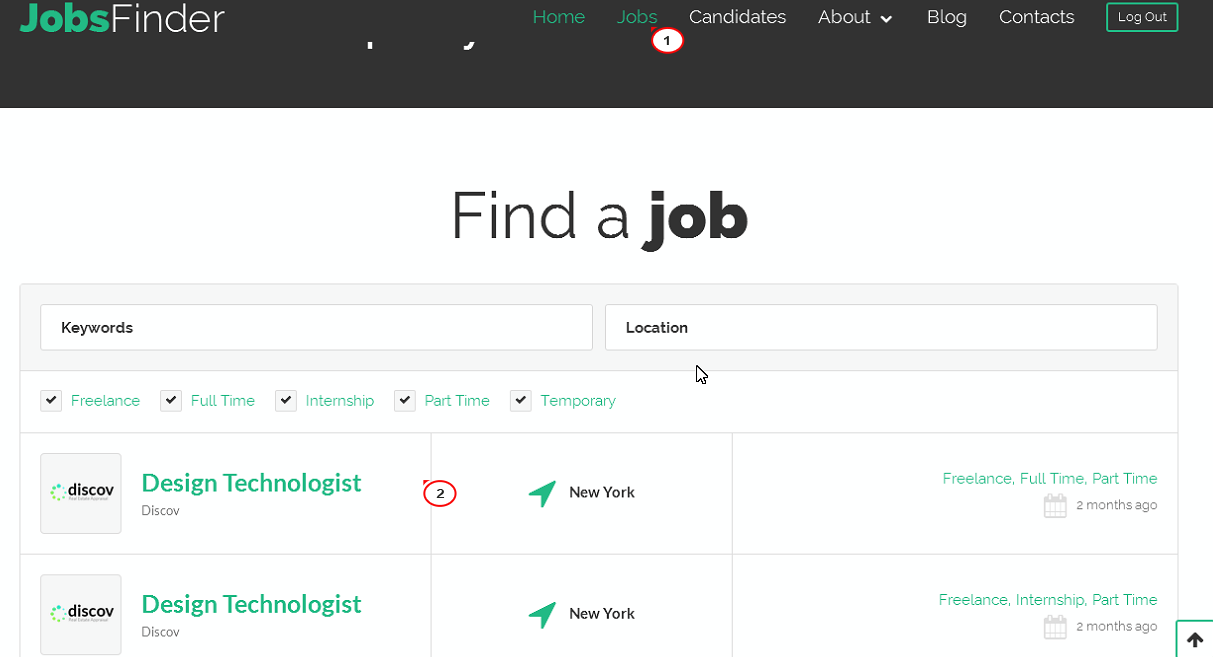
Under the Jobs menu button, you will see the Jobs Listing section. If you’re logged into the wordpress admin panel, from the front end click Edit Page to start editing:
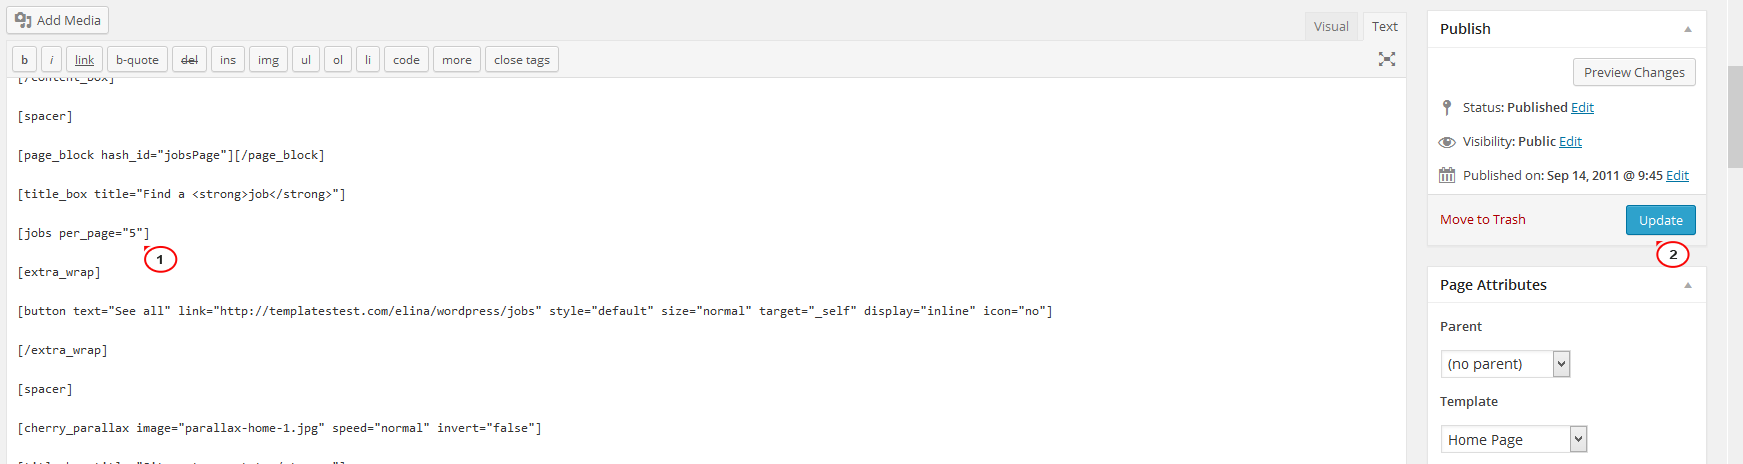
You will see this shortcodes in your page editor:
[jobs per_page="6"]
6 is the number of jobs that is showing in this section on the front-end. You can set the number of jobs listing there. As an example, we choose 5, click Update to save the changes:
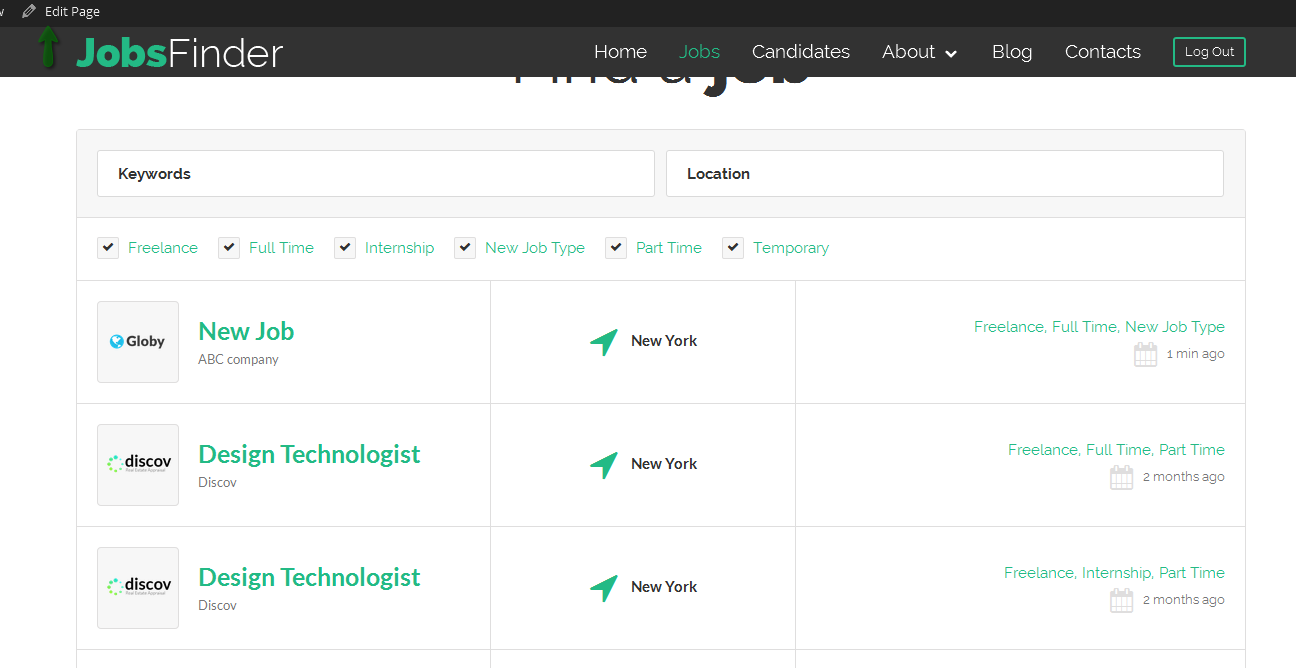
After this refresh the page to see that there are 5 jobs showing up:

Now we will try to edit the jobs.
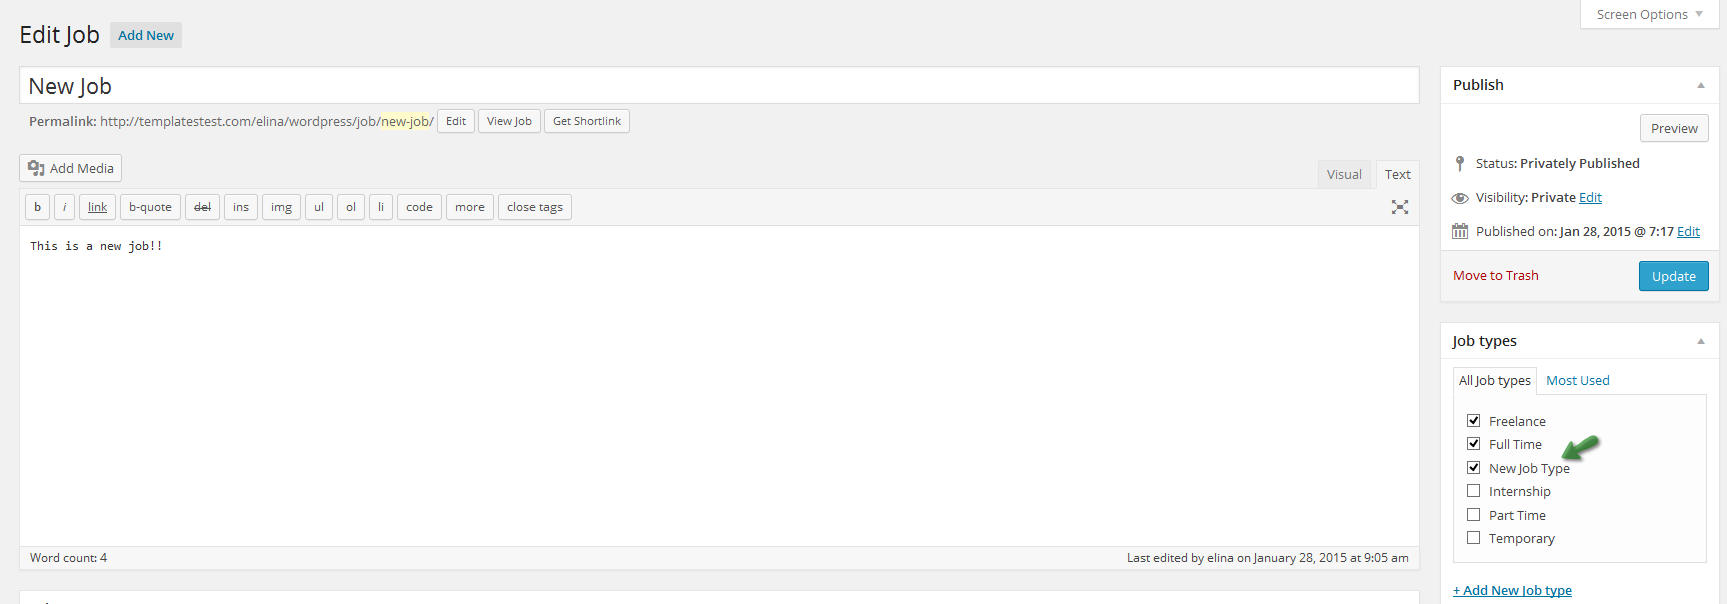
From WordPress Admin Panel, go to Job Listing, select All Jobs, you will see the list of jobs:

Click each of them to make the changes. Or you can also click Add New to create a new one.
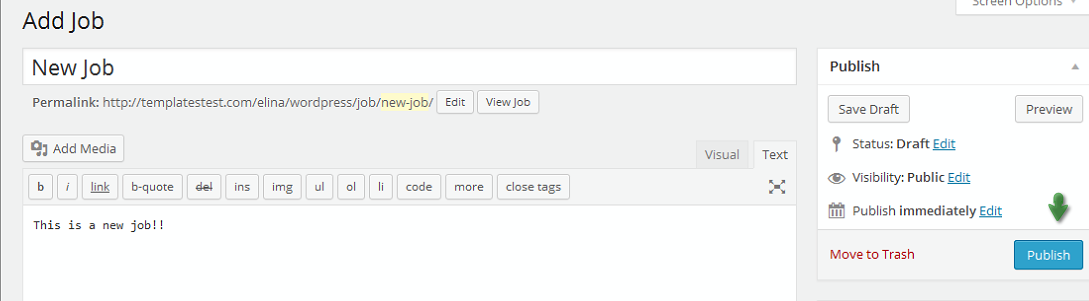
Let’s try to create a new job now:
Click Add New:

Fill in the title of job, the description, location, company name, e-mail, upload the logo of the company, expires date, etc. Also, select the Job Type for the new job:
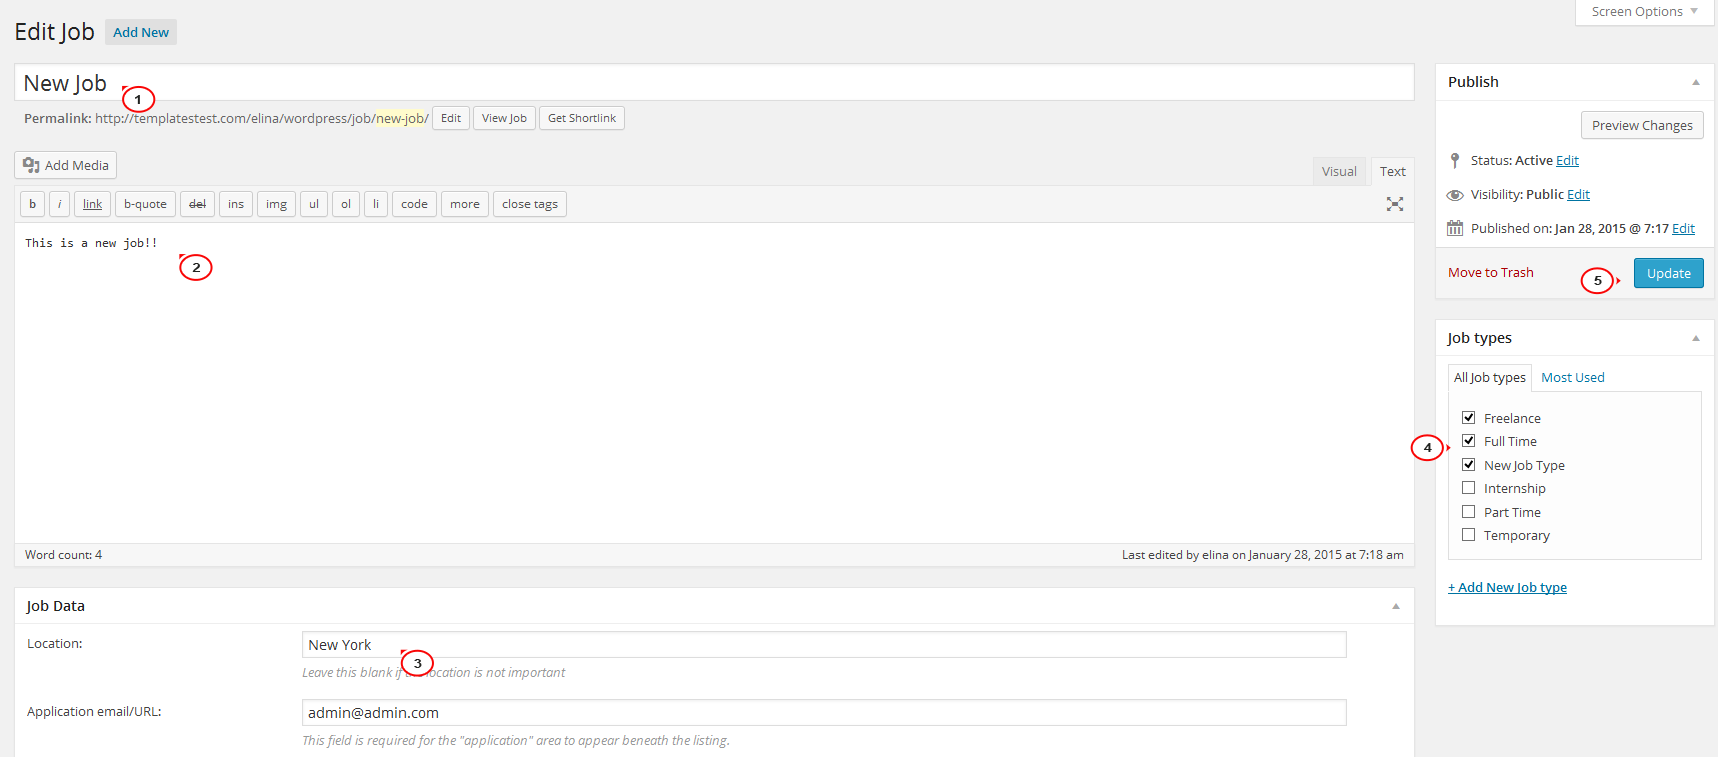
Click Publish to save the new job:
Refresh the page to see the new job has been added:
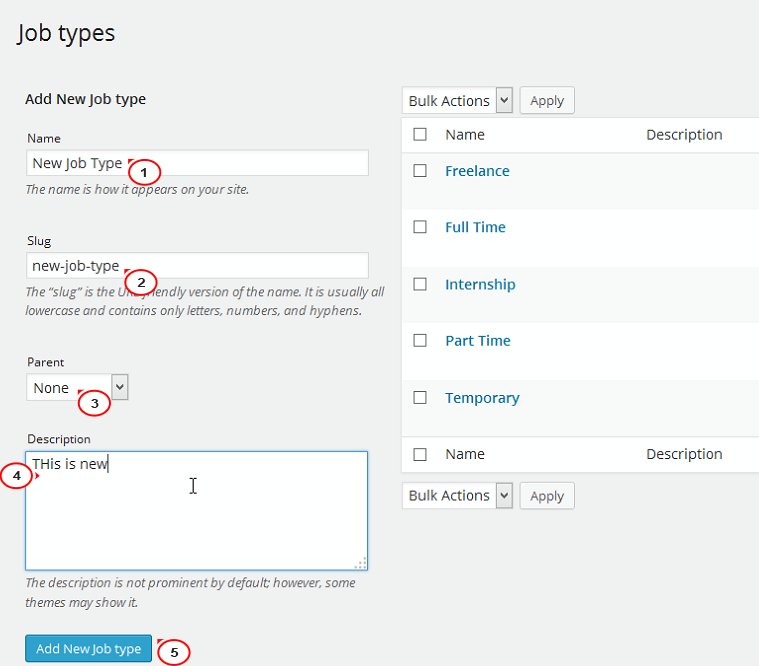
Next, we will edit the Job Types section. Go to Job Listing/Job types:

You can edit the current Job types listed there, or create a new one.
To create the new one, just fill in all the fields from the left hand side, including Name, Slug, Parent, Description, then click Add New Job Type button:
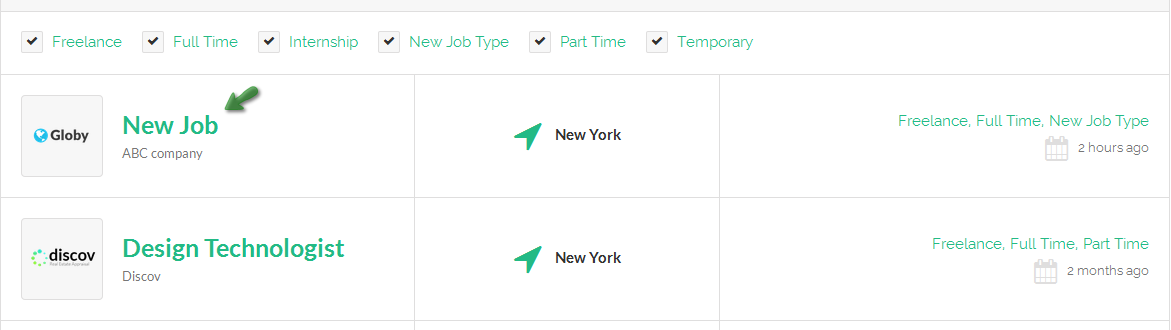
Go back to the Job Listing, you will see the new Job type has been added:
Check the front end, in the filter section the new Job Type has appeared:

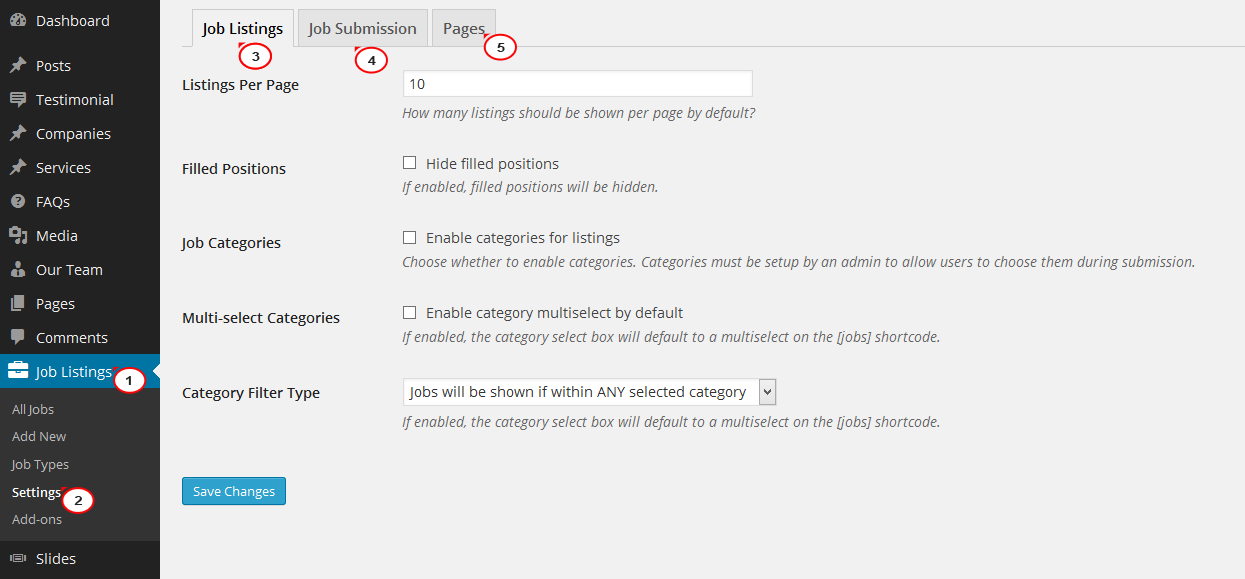
You can also navigate to Job Listing/Settings to set some setting for this section:
Feel free to check the detailed video tutorial below:
WordPress. How to manage Jobs listing page
In case you’re seeking premium themes to put up a professional website, take a look at job themes wordpress selection.
