


- Web templates
- E-commerce Templates
- CMS & Blog Templates
- Facebook Templates
- Website Builders
FAQs
General Tutorials
Featured templates
MonsterONE Subscrioption


This tutorial will show you how to manage menus with WordPress Customize tool.
Now with WordPress 4.3+, you are able to edit, create and manage menus from the customizer section.
Navigate to Appearance->Customize in your admin panel.
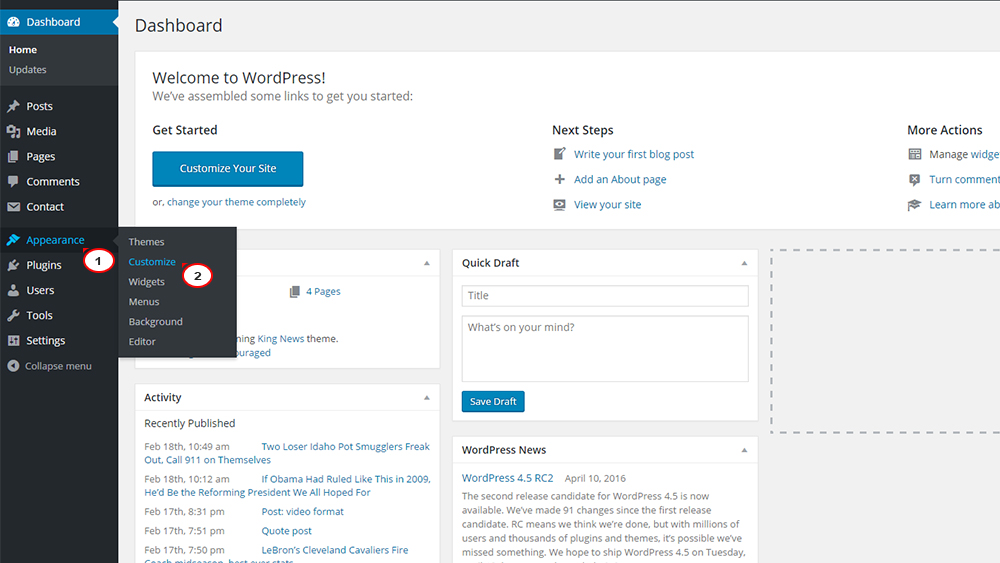
Then choose the Menus tab in Customizer.

There you will be able to manage menu locations, define menu items for existing menus or add a new one.
To add a new menu item, open your menu for editing and press the Add item button.
Choose an item you would like to add from the list and press the Add button.
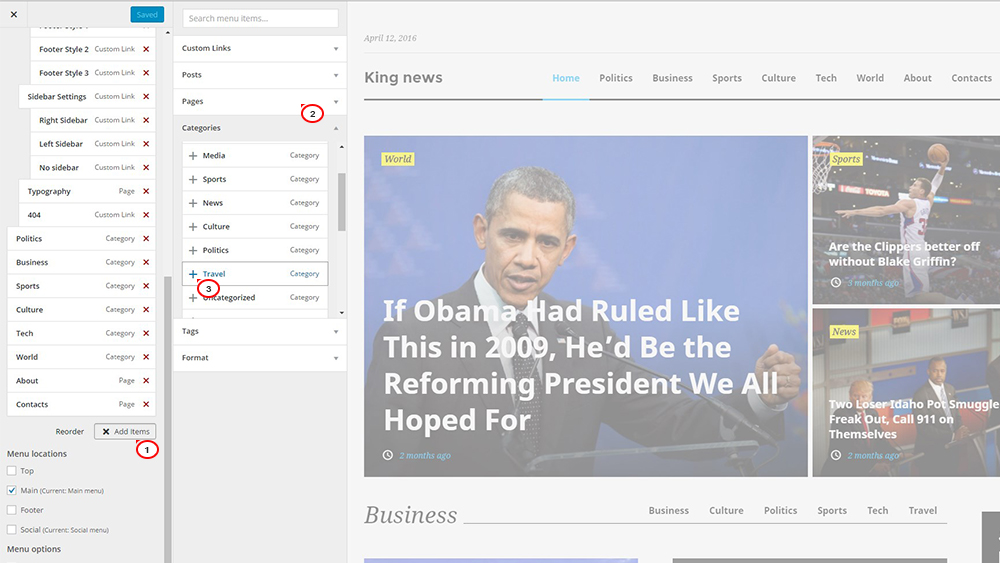
In order to remove an item, select it among the list of items and press the Remove button.

The WordPress Customizer allows you to create multi-level menus using a simple "drag and drop" interface. Drag menu items up or down to change their appearance order in the menu. Drag menu items to the left or right in order to create sub-levels within your menu.
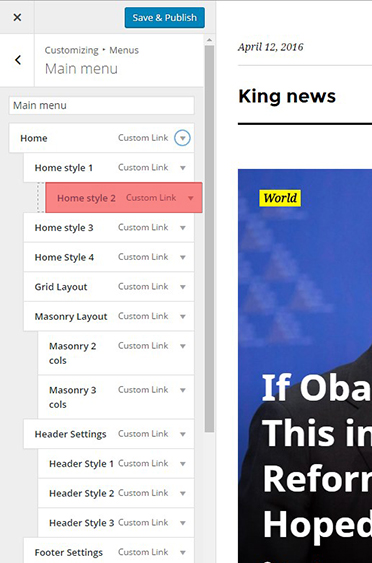
Press Save & Publish button to save changes and refresh your website.
That is the end of the tutorial. Now you know how to manage menus with Customize tool.
Feel free to check the detailed video tutorial below:
WordPress. How to manage menus in Customizer (WordPress 4.3+)