


- Web templates
- E-commerce Templates
- CMS & Blog Templates
- Facebook Templates
- Website Builders
FAQs
General Tutorials
Featured templates
MonsterONE Subscrioption


Hello! Now you will learn how to manage browser titles for your WordPress pages.
WordPress. How to manage pages browser titles
Usually, by default, WordPress provides a decent way of including <title> information for your posts, pages, and various archive views. Using WordPress built-in template tag, “wp_title()”, we can specify several useful parameters, including the following:
sep – a string value indicating the separator displayed before the title;echo – a boolean value determining whether or not the title is displayed;seplocation – specifies the position of sep string, either left or right of the title.Here is the basic format for this tag:
<?php wp_title('sep', 'echo', 'seplocation'); ?>
It is typically combined with the bloginfo('name') tag and used in the header.php file as follows:
<head>
<title><?php wp_title(' | ', 'echo', 'right'); ?><?php bloginfo('name'); ?>
</head>
This would produce the following output for each of the following page types:
The Home page – outputs the name of the site;
Individual pages – page title | name of site;
Single post views – post title | name of site;
Archived post views – outputs the name of the site;
Date-based archives – year and/or month | name of site;
Category archives – category title | name of site;
Author archives – public username | name of site;
404 error pages – outputs the name of the site;
Search results – outputs the name of the site;
Tag archives – tag name | name of site.
For the average blog this works fine. Most pages include the title as well as the blog name, while those without specific page names simply output the name of the site instead. To go above and beyond, however, a little more preparation is needed.
As a test we will try to change a browser title for category archives page from original to a custom one. For applying the changes of that kind, you will need to make the following steps:
Enter cPanel and open your wordpress folder/wp-content/themes/cherryframework folder, there you will find header.php file which needs to be copied and placed into the child theme folder which will be located in wp-content/themes/themeXXXX:

After copying the file, you need to open it and locate the following part of the code – >
<?php if ( is_category() ) {
echo theme_locals("category_for")." ""; single_cat_title(); echo '" | '; bloginfo( 'name' );
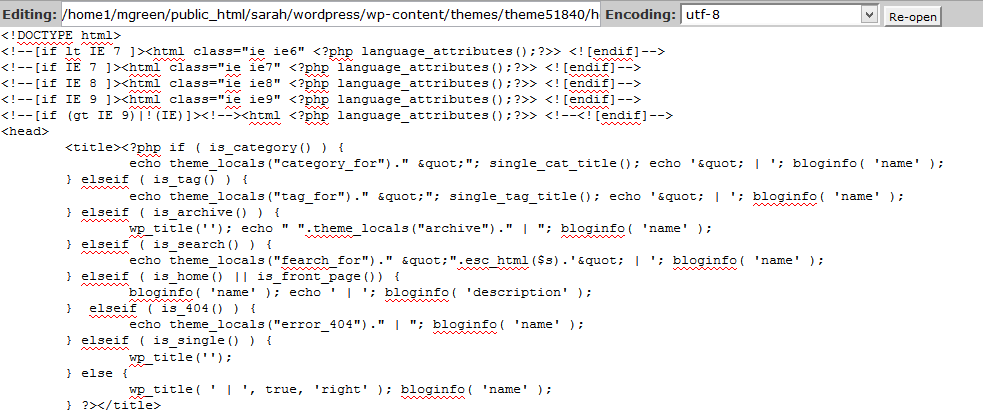
It should be changed to the following -> echo __('Any custom text goes here', CURRENT_THEME); , the title can be changed to the one you like to be displayed in your browser:
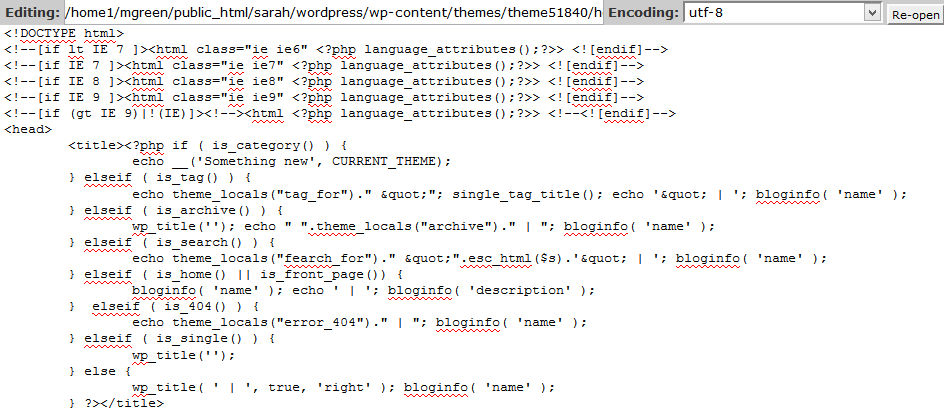
You should save the file. Reload the page which includes category archive to view the changes.
In case you need more information, feel free to check the video version below:
