- Web templates
- E-commerce Templates
- CMS & Blog Templates
- Facebook Templates
- Website Builders
WordPress. How to work with a booking form
April 29, 2013
This tutorial is going to show you how to work on a booking form that comes with some of the WordPress templates.
WordPress. How to work with a booking form
It includes fields for name, email, phone and message, a select list, a count select, two datepickers and a submit button. If your template comes with a booking form and you would like to change some of its options:
- Log into your WordPress admin panel.
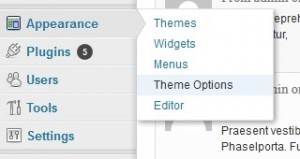
- Go to the left-side menu Appearance -> Theme Options.
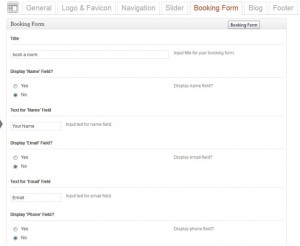
- Click on the Booking Form tab at the top.
- There you will find a list of self-explanatory options:
- Title allows you to put a name of the form e.g. book a room:
- Display ‘Name’ Field? with yes/no selections allows to switch the name field off and on;
- Text for ‘Name’ Field allows you to input text for the field, e.g. Your Name
- Display ‘Email’ Field? allows you to switch the email field on and off;
- Text for ‘Email’ Field allows you to input text for the field, e.g. Email
- Display ‘Phone’ Field? allows you to switch the phone field on and off;
- Text for ‘Phone’ Field allows you to input text for the field, e.g. Phone
- Default Text for Select Element allows you to input text for the for select element, e.g. Select room type
- Display Count Select? allows you to switch the count select on and off;
- Text for Count Select allows you to input text for the count select, e.g. No. of rooms
- Number of Items in Count Select allows to enter a number of items in count select (from 1 to 10), e.g. 5
- Date Format allows to choose date format for datepicker elements, e.g. Default: mm/dd/yy
- Display Datepickers 1? allows to switch Datepickers-1 on and off;
- Include Timepicker to Datepickers 1? allows to switch the timepicker in Datepickers-1 on and off;
- Default Text for Datepicker 1 allows you to input text for datapicker-1, e.g. Check in
- Display Datepickers 2? allows to switch Datepickers-2 on and off;
- Include Timepicker to Datepickers 2? allows to switch the timepicker in Datepickers-2 on and off;
- Default Text for Datepicker 2 allows you to input text for datapicker-2, e.g. Check out
- Display ‘Message’ Field? allows you to switch the message field on and off;
- Default Text for ‘Message’ Field allows you to input text for the message field, e.g. Additional Comments
- Text for Submit Button allows you to input text for the submit button, e.g. submit
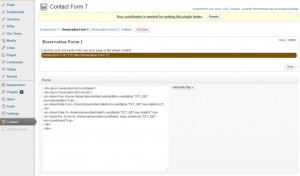
<div class="reservation-form-user">

  <p><label>First Name:</label>[text* your_name]</p>

  <p><label>Last Name:</label>[text* your_surname]</p>

  <p><label>E-mail:</label>[email* your_email]</p>

  <p><label>Phone:</label>[text* your_phone]</p>

  <p><label>Fax:</label>[text your_fax]</p>

  <p class="area"><label>Special Requirements:</label>[textarea your_requirements]</p>

  <p class="submit">[submit "Send"]</p>

  </div>
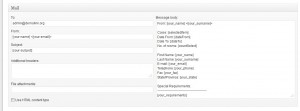
From: [your_name]

Coise: [selectedItem]
Date From: [dateFrom]
Date To: [dateTo]
No. of rooms: [countSelect]

First Name: [your_name]
Last Name: [your_surname]
E-mail: [your_email]
Telephone: [your_phone]
Fax: [your_fax]
State/Province: [your_state]

Special Requirements:
----------------------------------------------
[your_requirements]
Feel free to check the detailed video tutorial below:


.jpg)
