


- Web templates
- E-commerce Templates
- CMS & Blog Templates
- Facebook Templates
- Website Builders
FAQs
General Tutorials
Featured templates
MonsterONE Subscrioption


WordPress. WPL plugin settings overview
Our Support team is ready to present a new tutorial that provides an overview of WPL plugin settings.
Log into your WordPress Dashboard, navigate to WPL -> Settings.
By using this menu you can manage all the WPL global settings in one place. Based on the Add-ons you installed on your website or any customizations you might have, there can be more or less options available:
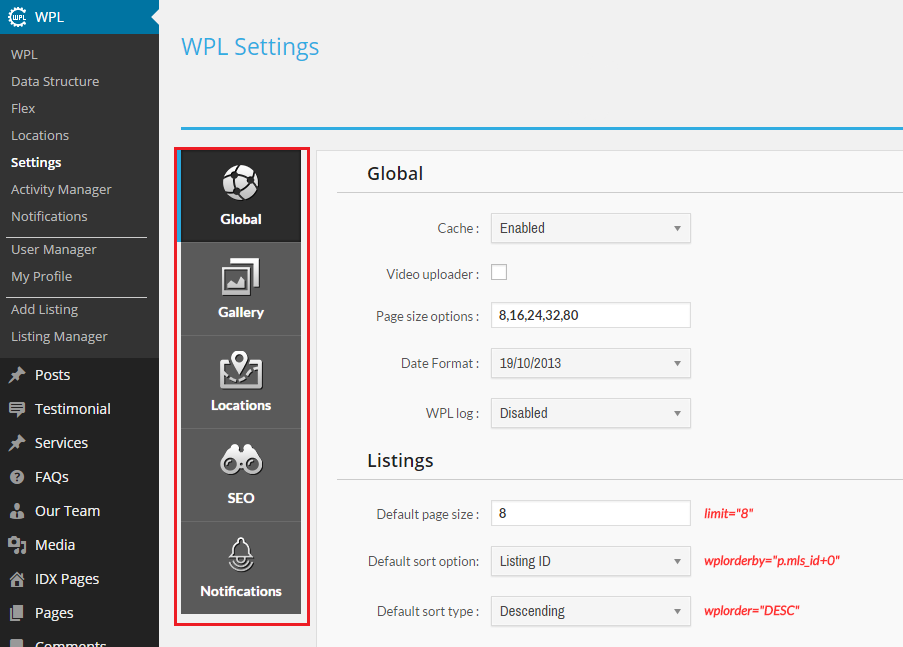
We will describe the most commonly used settings.
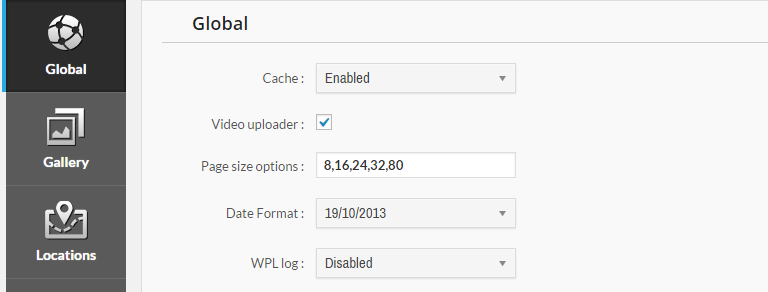
Global section has a few subsections. In the first, global area, you can change the date format, enable or disable cache and WPL log. If you would like to enable the Video uploader, you can also do it from there:
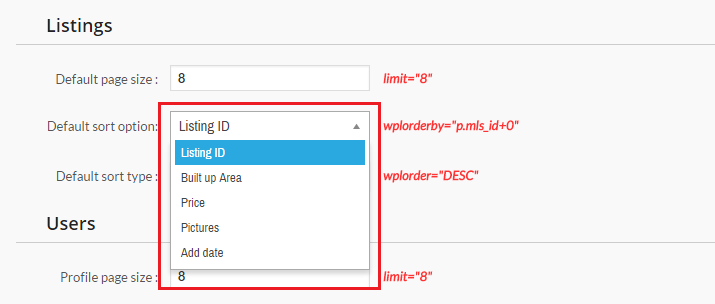
Global -> Listings area allows you to select the Default sort option and Sort type. You can sort your properties by Price, Area, Pictures, Add date or Listing ID:
In Users section you can change the Profile sort option and Profile sort option type. You can sort users by Name or Country.
In Gallery section, you can select the Image resize method and enable or disable the Watermark for your images:

There are 3 ways to resize images: Resize, Crop resize, Crop resize (Center). If you choose the first option (resize), your image will be resized according to the desired width and height without losing any part of the picture. If you choose the second option (crop resize), the dimension scale is different. It doesn’t change the shape of image, but it crops a section of the image out from the right. If you select the third option (crop resize (center)), it is similar to the second option, except the center of image will be cropped instead of the top left. Please see the following article for more details.
In Watermark section, you can enable or disable the watermarks, select the position, opacity and upload your watermark logo.
You can insert your desired location names and select proper configurations based on your country location system:
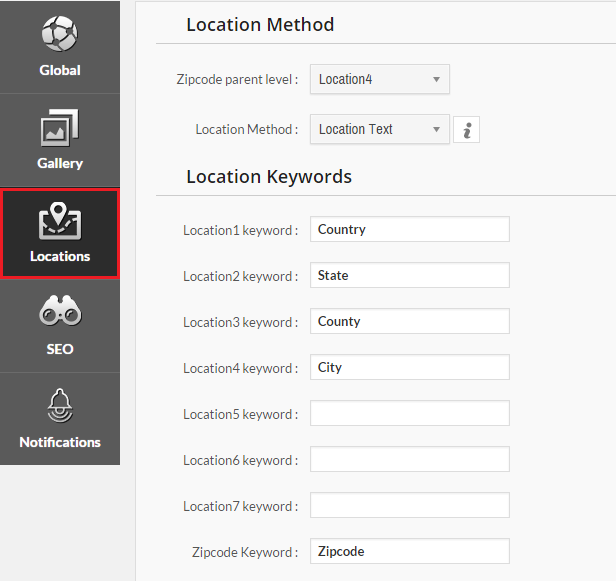
By filling in location keywords, you can easily change the label of the locations in the WPL. For example, you can change the label of the secondary location level from “State” to “Territory” if needed.
In case you have additional questions, please refer to the plugin documentation.
Feel free to check the detailed video tutorial below:
WordPress. WPL plugin settings overview
In case you’re seeking premium themes to put up a professional website, take a look at premium real estate wordpress themes.
