


- Web templates
- E-commerce Templates
- CMS & Blog Templates
- Facebook Templates
- Website Builders
FAQs
General Tutorials
Featured templates
MonsterONE Subscrioption


This step-by-step tutorial will show you how to add multiple product images in ZenCart store:
In your ZenCart admin panel navigate to Catalog –> Categories/Products and open the product you want to modify:


On the product editing page scroll down and find the image file name:
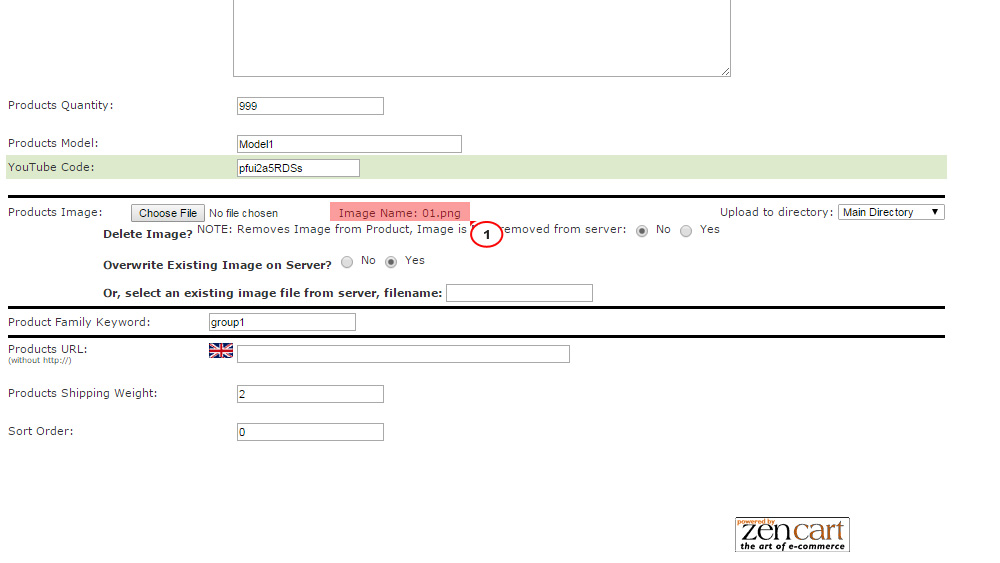
Now we need to create new product images with the names, that contain the default product image file name, e.g. the file name is 01.png, the additional image file name must be 01_1.png, 01-2.png, etc.
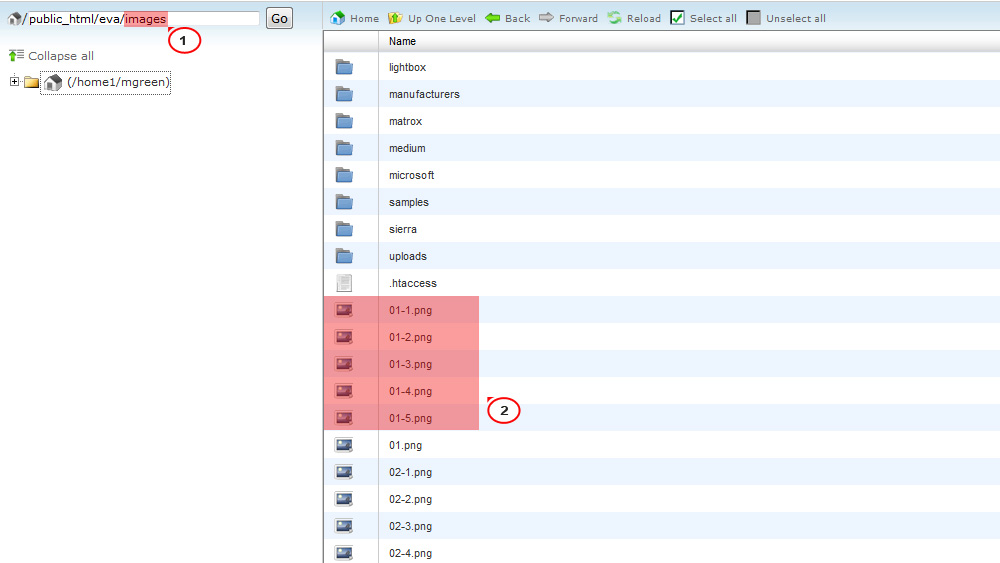
Upload the additional images to the directory where the default image is located. Usually the product images are stored in the images directory of your ZenCart installation:
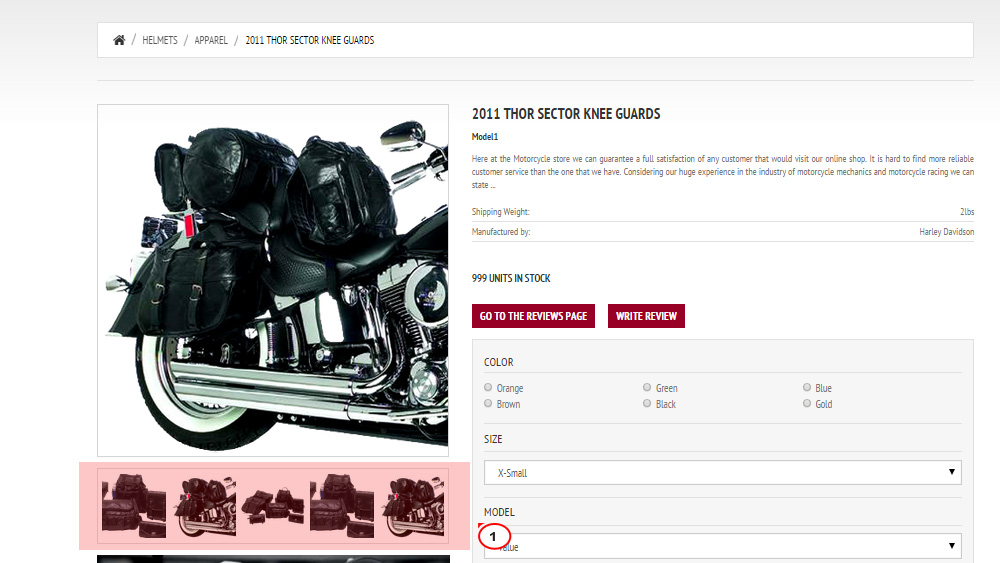
When the upload is complete, open the product page in your browser and refresh it to see the additional images you have added.
Feel free to check the detailed video tutorial below:
ZenCart. How to add multiple product images