- Web templates
- E-commerce Templates
- CMS & Blog Templates
- Facebook Templates
- Website Builders
Changing image colors in Adobe Photoshop
November 15, 2010
During the customization of your web design template maybe you’ll need to change colors of some image elements to fit your corporate colors. This section provides you with instructions of how to do that.
If you want to change color do the separate image you should locate layer containing it. The easiest way to do that – is to control click it, just click on this image holding “Ctrl” button. But if some transparent layers exist over this image layer you’ll have some troubles with it. Top layer will be selected instead of your image layer.
To check content of current selected layer do the following. Go to layers panel, choose Window/Layers if you cant see it for any reasons. Find out highlighted layer in layer list – this is the current selected layer. At the left of the layer name you can see “eye” icon. Click it some times to “hide/unhide” layer and see which image element disappears in whole picture. If this is image which colors you want to change – you are one the right way. If selection is wrong use alternative way to select layer with appropriate image.
Right click with mouse on image. List of layers containing images under cursor will appear. Try to choose different layers from that list. Use procedure described above to make sure that you have selected right layer.
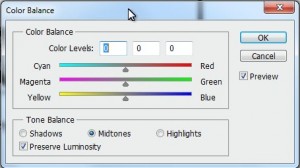
When layer containing needed image is selected do the following. Choose “Image/Adjustment/Color Balance…” from the top menu or just click “Ctrl + B” hotkey. Color balance window will appear. You’ll see three color sliders there. Move them until you’ll be satisfied with image color. Now confirm color change by clicking Ok button or reject these changes by selecting “Cancel” button.
Color Balance Window
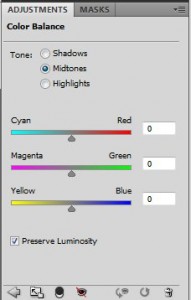
If you want to change color scheme of whole web design template do the following. Select top layer from the layers list panel. Choose “Layer/New Adjustment Layer/Color Balance…” from the top menu. Confirm creation of new color adjustment layer by pressing “Ok” button in popup window. In color balance window you’ll see three color sliders there. Move them until you’ll be satisfied with image color. Now confirm color change by clicking “Ok” button or reject these changes by selecting “Cancel” button.
New Adjustment Layer
After you have done all image colors modifications you should update those changes to your web design template.
Feel free to check the detailed video tutorial below:
Changing image colors in Adobe Photoshop


