


- Web templates
- E-commerce Templates
- CMS & Blog Templates
- Facebook Templates
- Website Builders
FAQs
General Tutorials
Featured templates
MonsterONE Subscrioption


Hello! This video tutorial shows how to manage Navigation settings in WordPress Cherry Framework 4 templates.
Cherry Framework 4. Navigation settings overview
There is a great Cherry Options dashboard in Cherry Framework 4 that allows to manage multiple sections of your site easily to make it look beautiful.
The “Navigation” appears to be one of these options. Let’s learn how to manage it.
The tutorial assumes you are already logged into your WordPress dashboard.
Navigate to Cherry ->Options tab:

Then click the “Navigation” tab to open the Navigation settings interface:

Two main sections appear in front of you: “Header Menu Typography” and “Footer Menu Typography” – each one has a block of options available for editing.
You can edit the Font Family, Font Size, Font Style, etc. both for Header Menu and Footer Menu by altering respective options.
Good news are that you can see how performed changes affect your site right away in the example field below each section:
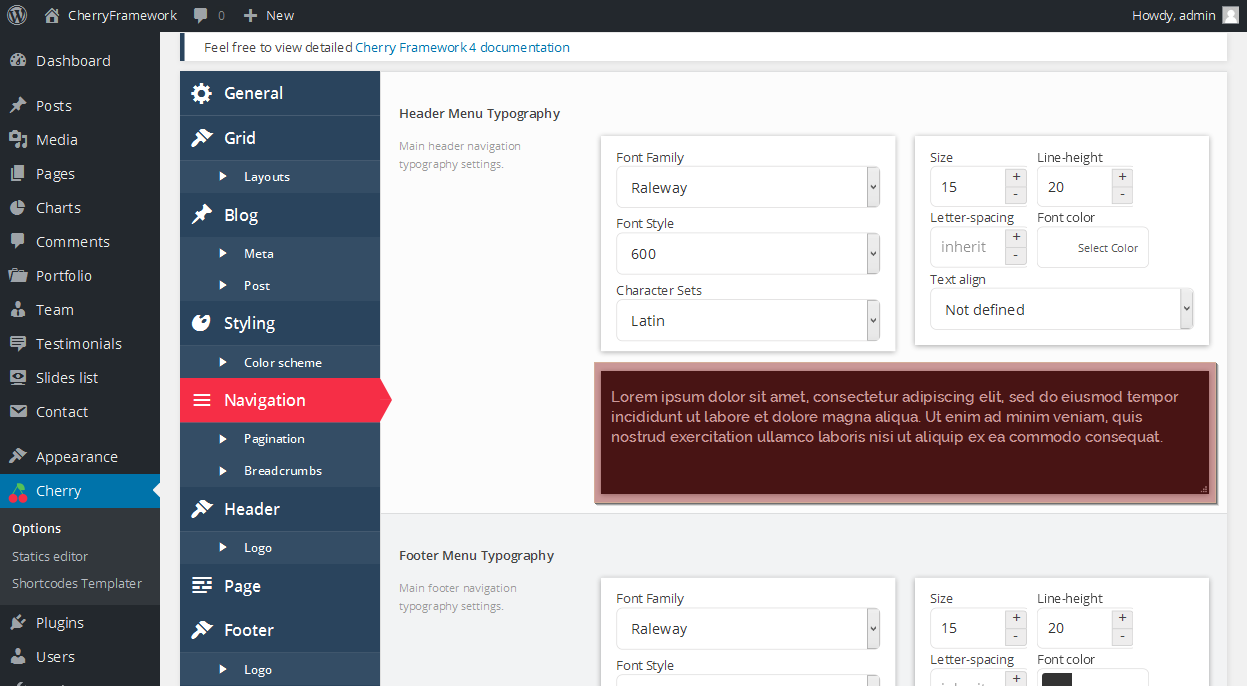
You do not have to navigate to your front-end each time some change is made – the font changes dynamically in the field as any kind of editing is performed.
You can also see the “Arrows markup” option at the bottom of the Navigation editing screen. It allows you to decide whether the menu item that owns sub-menus will have an indication arrow:
Now, let’s review the “Pagination” and “Breadcrumbs” options which appear to be a part of the “Navigation”.
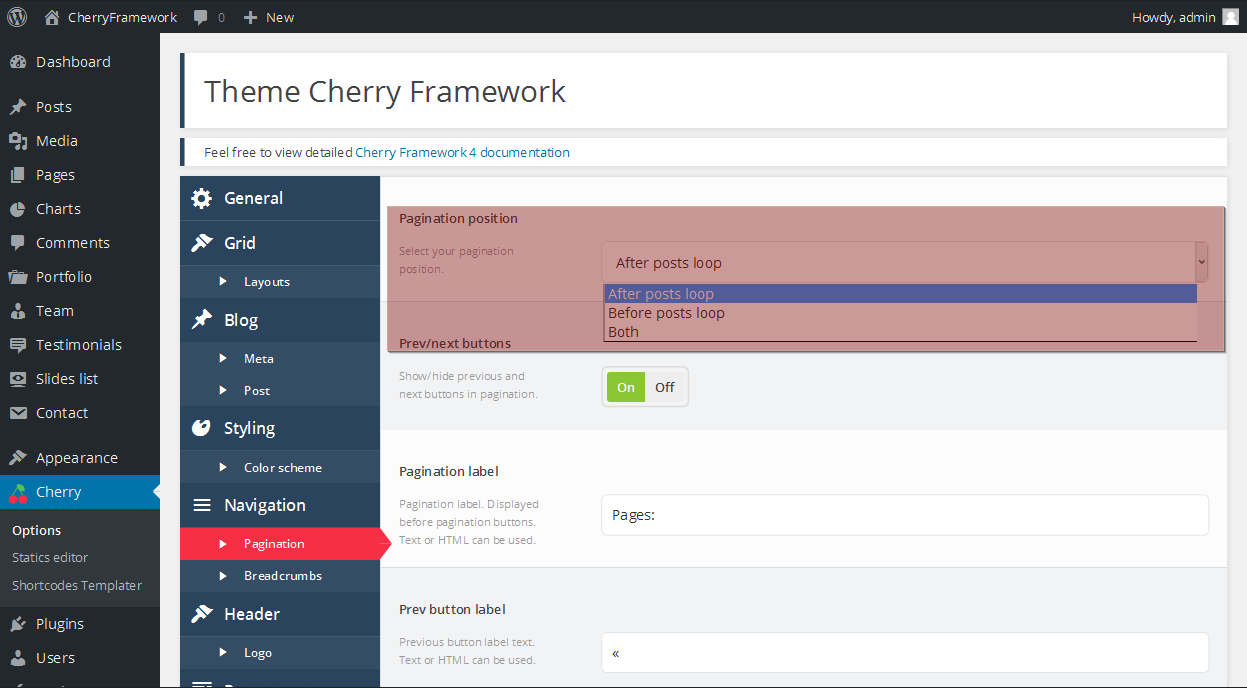
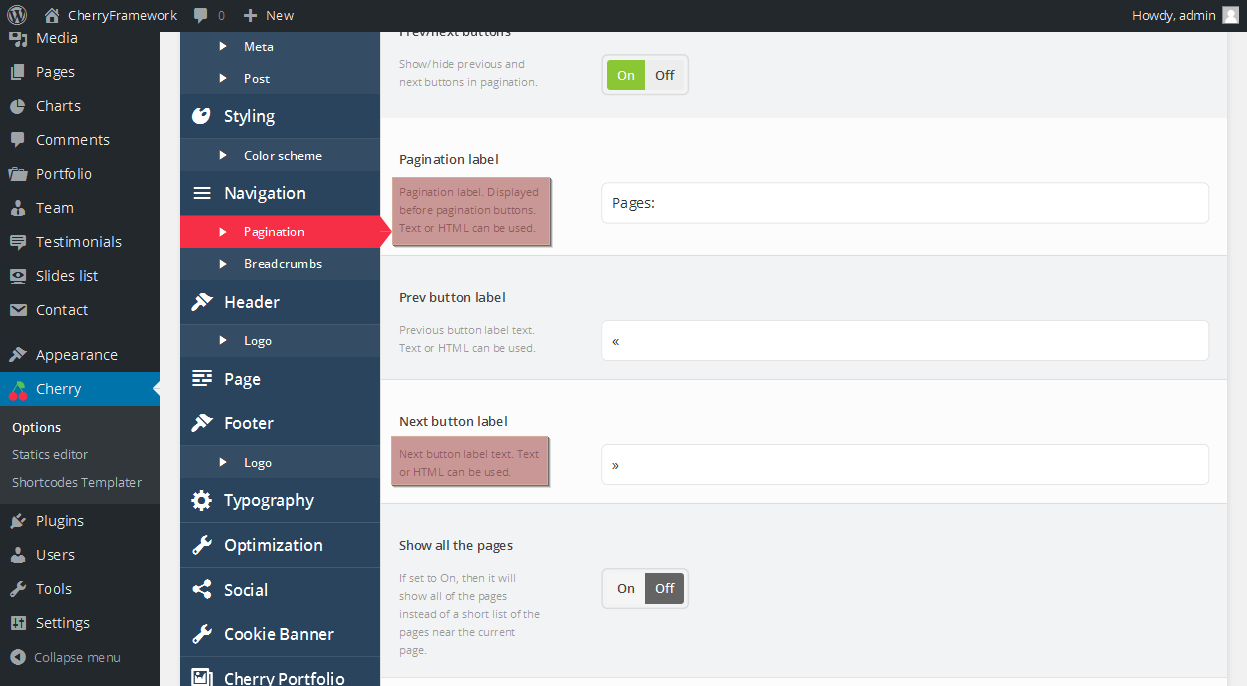
“Pagination” includes the followng settings: Pagination position, Prev/next buttons, Pagination label, Prev button label, Next button label, Show all the pages, End size and Mid size.
Pay attention to the “Pagination position” setting which is probably the most important one – you can choose where exactly you wish the pagination to be located at – “After posts loop”, “Before posts loop” or “Both”:
As for other settings you may check out the short description below each setting title to get a slight idea on what each setting does:
Let’s navigate to “Breadcrumbs” option now.
It includes the following settings: Breadcrumbs, Page title, Breadcrumbs mobile, Home page breadcrumbs, Item separator and Breadcrumbs prefix.
Breadcrumbs appear to be a powerful tool that eases the navigation process on your site for the site visitors.
Therefore you may want to enable it throughout your website:
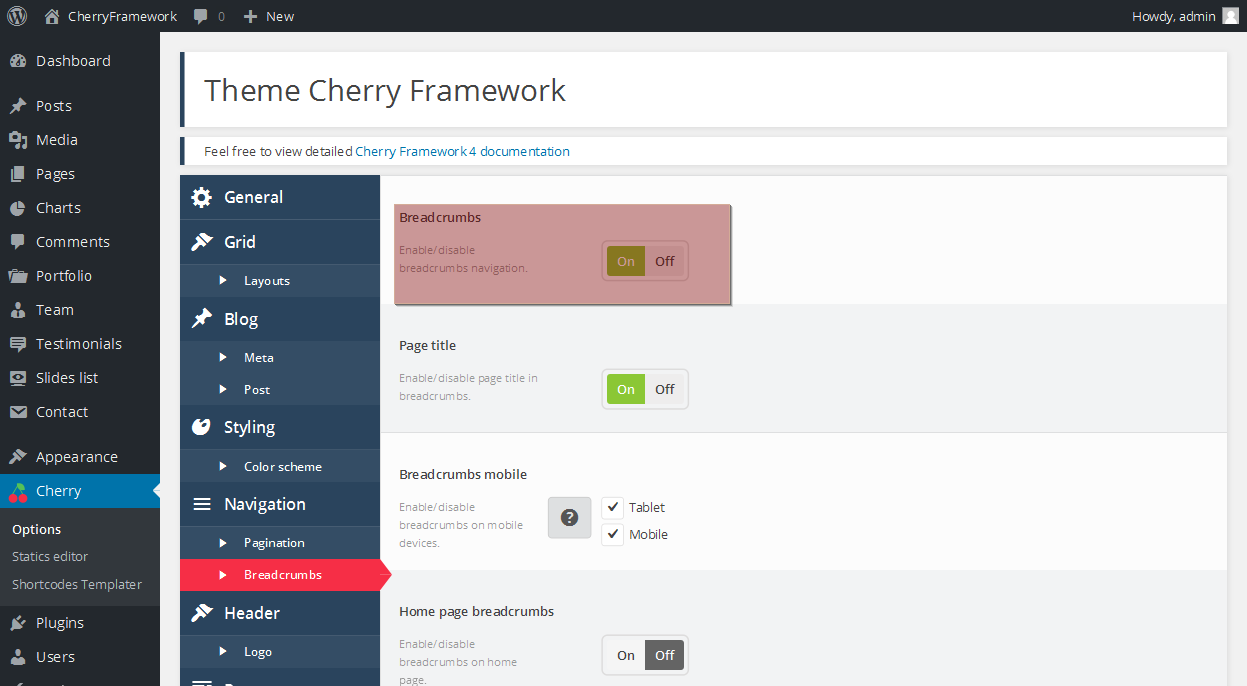
You may also control whether the breadcrumbs will be displayed on mobiles and tablets by editing the “Breadcrumbs mobile” setting:
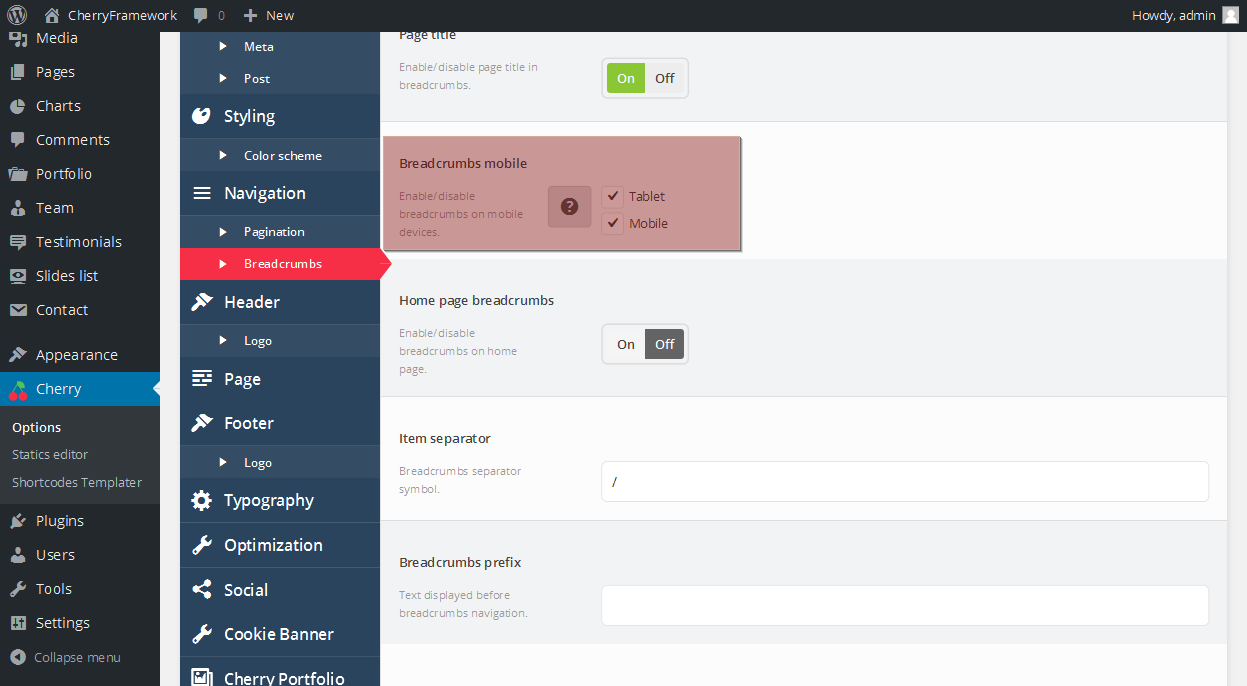
Again, you may see what each setting allows you to do by checking settings short description.
That’s it! We hope you enjoyed this tutorial on how to manage Navigation settings in your WordPress Cherry Framework 4 template.
Happy editing!
Feel free to check the detailed video tutorial below:
