


- Web templates
- E-commerce Templates
- CMS & Blog Templates
- Facebook Templates
- Website Builders
FAQs
General Tutorials
Featured templates
MonsterONE Subscrioption


This tutorial will show you simplified steps on how to install WordPress engine with GoDaddy automatic installation.
WordPress. How to install the engine to GoDaddy (automatic installation)
.jpg)
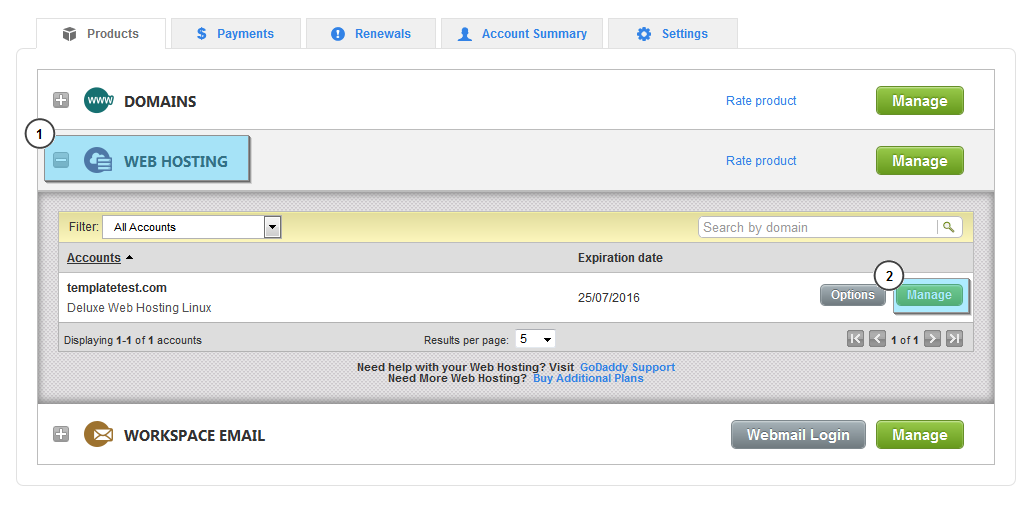
Log into your GoDaddy hosting control panel.
Click Web Hosting.
Click on Manage next to the hosting account you wish to install WordPress engine on:
In the Popular Apps section, click WordPress:

Click Install:

Complete the on-screen fields, and then click OK:
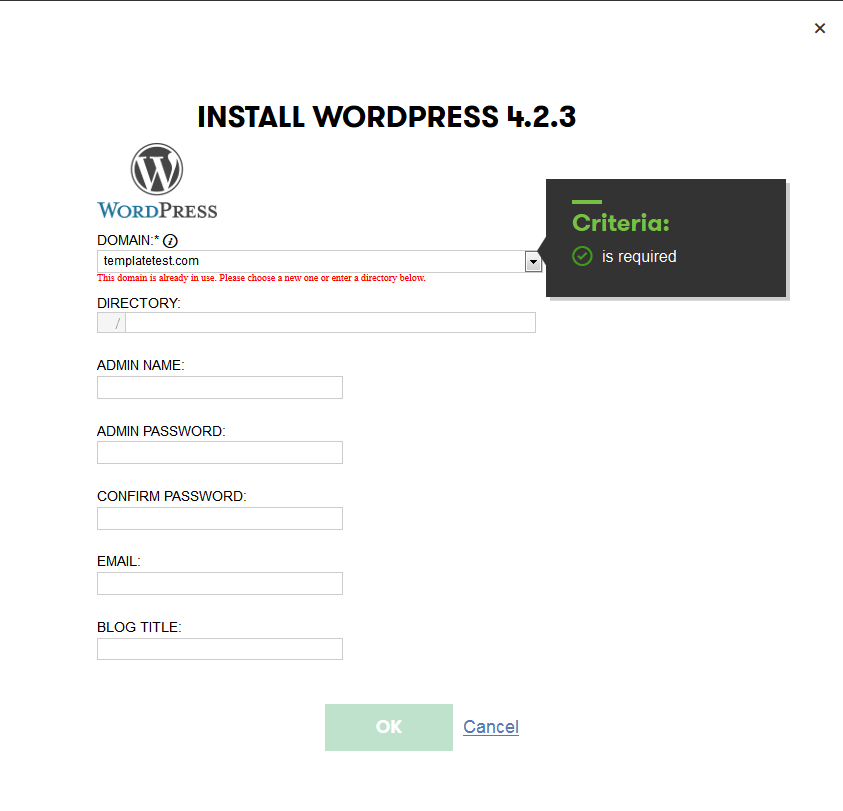
Domain – select the domain on your account you want to use.
Directory – enter the directory after the domain name where you want to install WordPress. If you want the domain name itself to use WordPress, the directory field should only have “/” entered.
Enter a Username, a Password (and its confirmation), and an Email Address.
WordPress will be installed to your hosting account with the options you selected within 24 hours. When it is complete, you will receive a confirmation email.
Feel free to check the detailed video tutorial below:
WordPress. How to install the engine to GoDaddy (automatic installation)
