


- Web templates
- E-commerce Templates
- CMS & Blog Templates
- Facebook Templates
- Website Builders
FAQs
General Tutorials
Featured templates
MonsterONE Subscrioption


This tutorial is going to show you how to configure Google+ login in “Joomla Social Login” component.
Joomla 3.x. How to configure Google login in “Joomla Social Login” component
Joomla Social Login is a component that allows to display login buttons to the social network accounts:

To configure Google+ Login, please do the following:
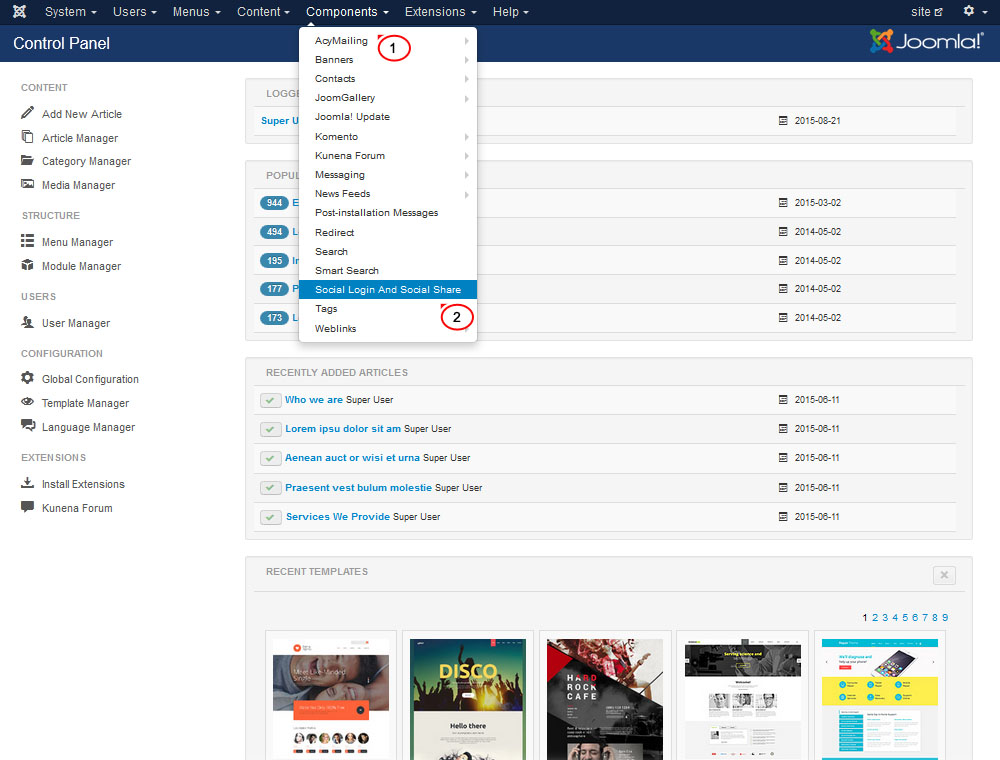
Open your Joomla admin panel and navigate to Components > Social Login And Social Share section:
You will see two tabs on the Social Login And Social Share page:
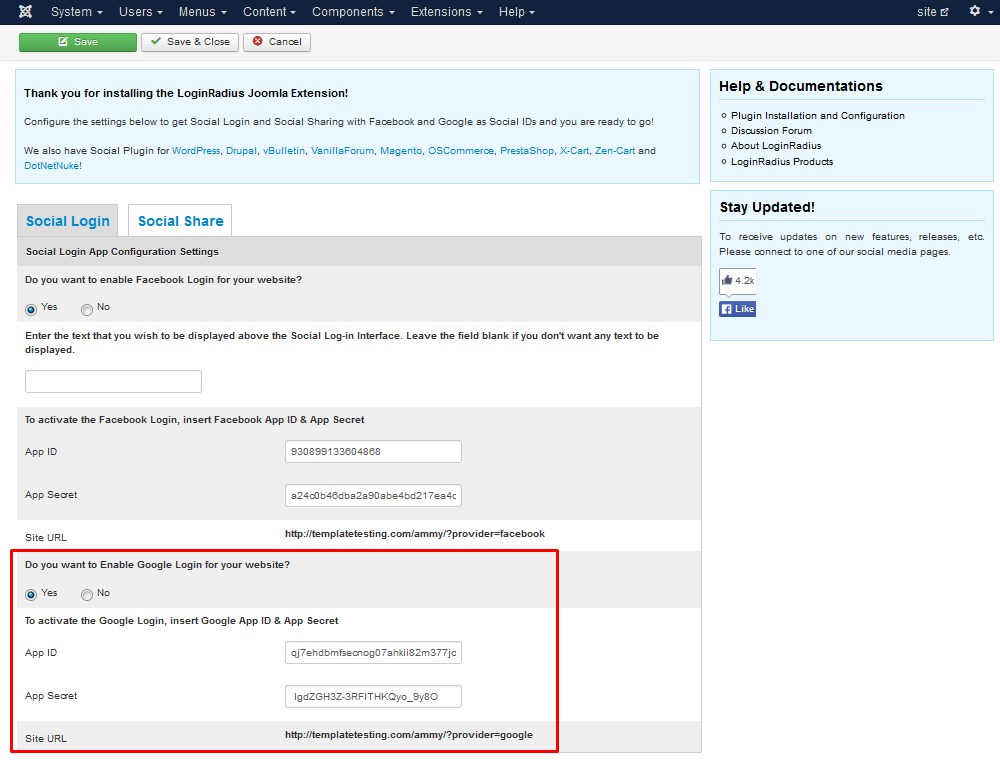
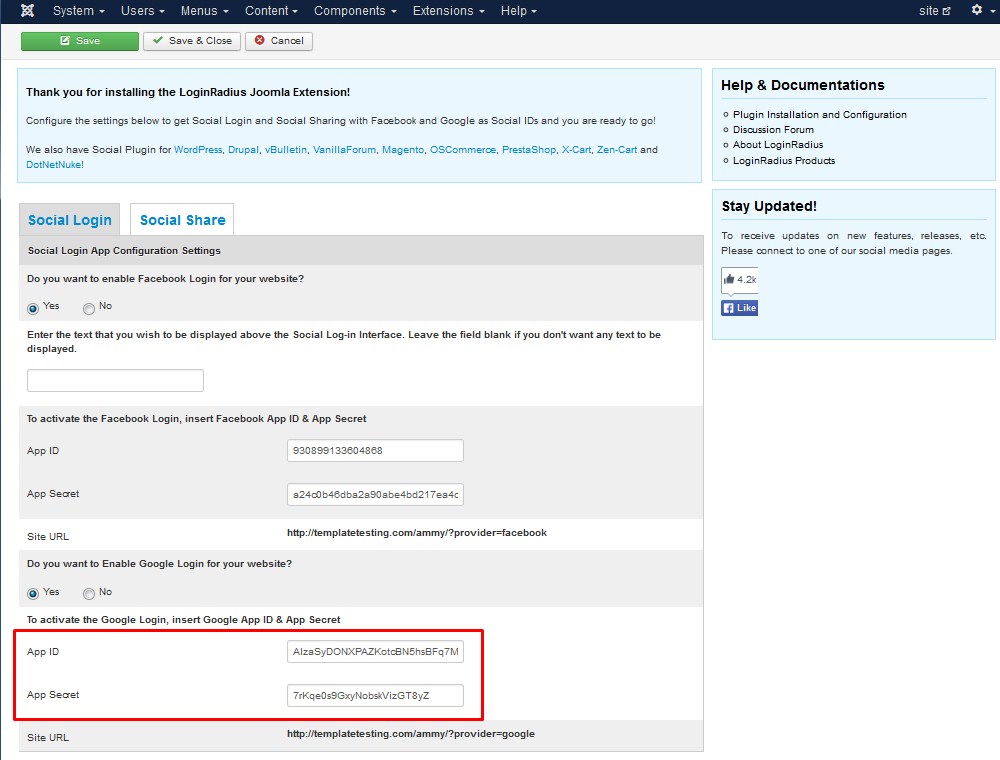
Social Login section allows you to enable/disable Google tab on your site frontend. Set Do you want to Enable Google Login for your website? to Yes to enable Google tab at your site frontend.
In order to activate Google+ login in Joomla Social Login component, you should do the following:
You will need to generate Google+ App ID and App Secret key:
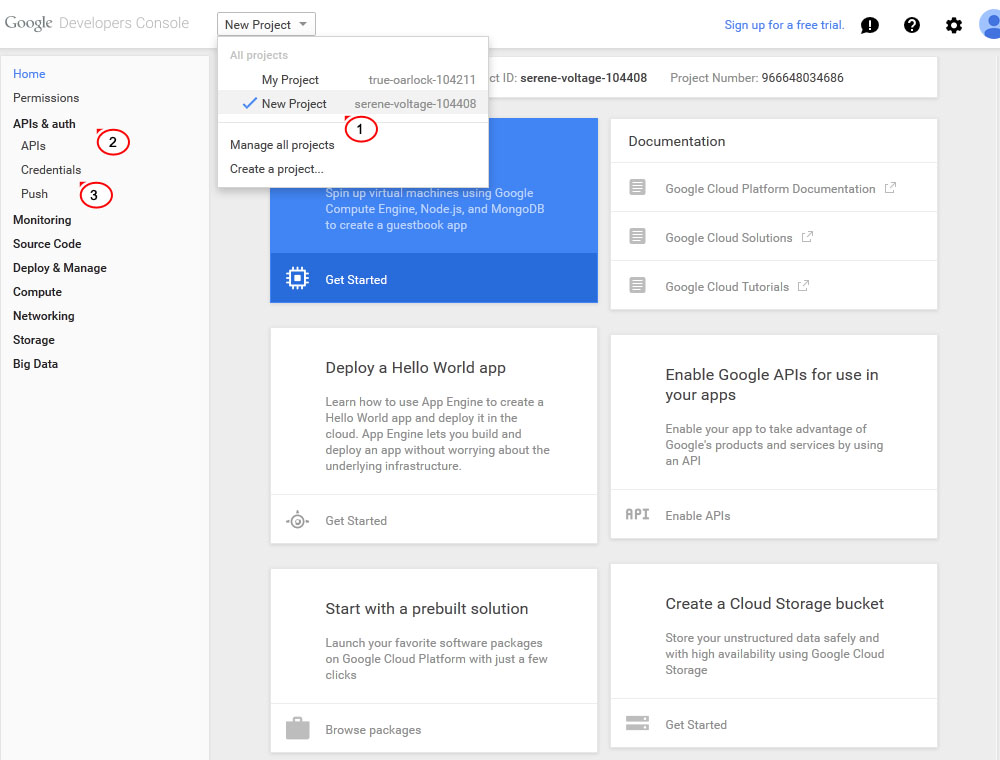
Go to the Google Developers Console.
Create/select a project.
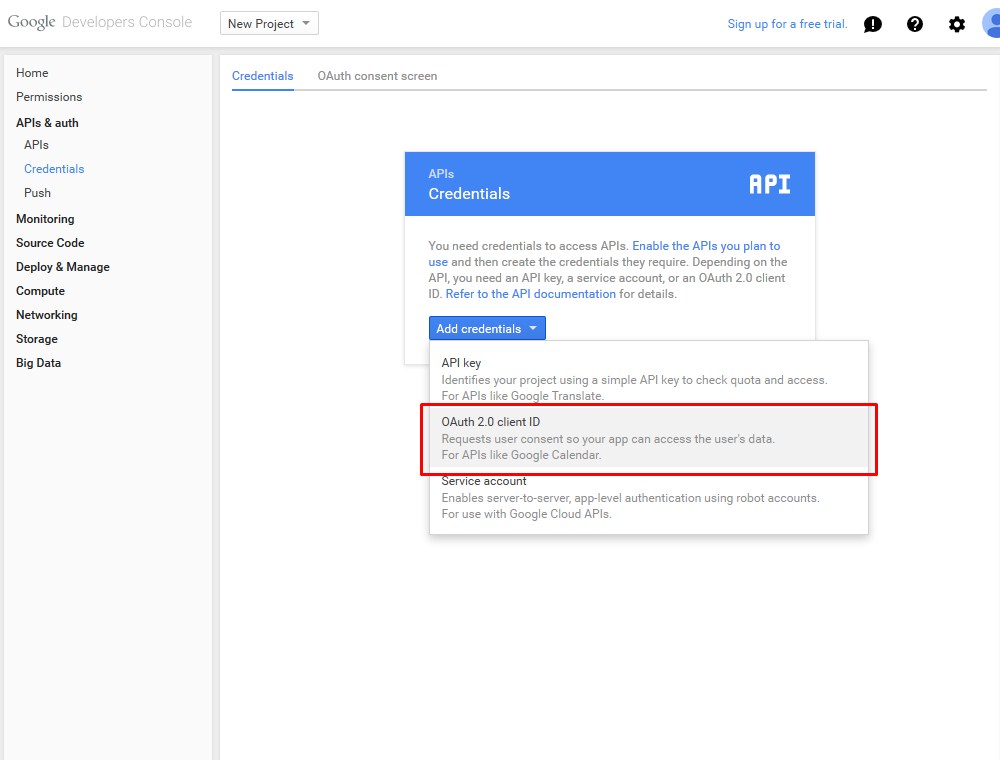
Select APIs & auth > Credentials on the left sidebar:
Navigate to Add Credentials > OAuth 2.0 client IDs section:
Select Web Application type, enter your Authorized JavaScript origins and Authorized redirect URIs. Click Create button:
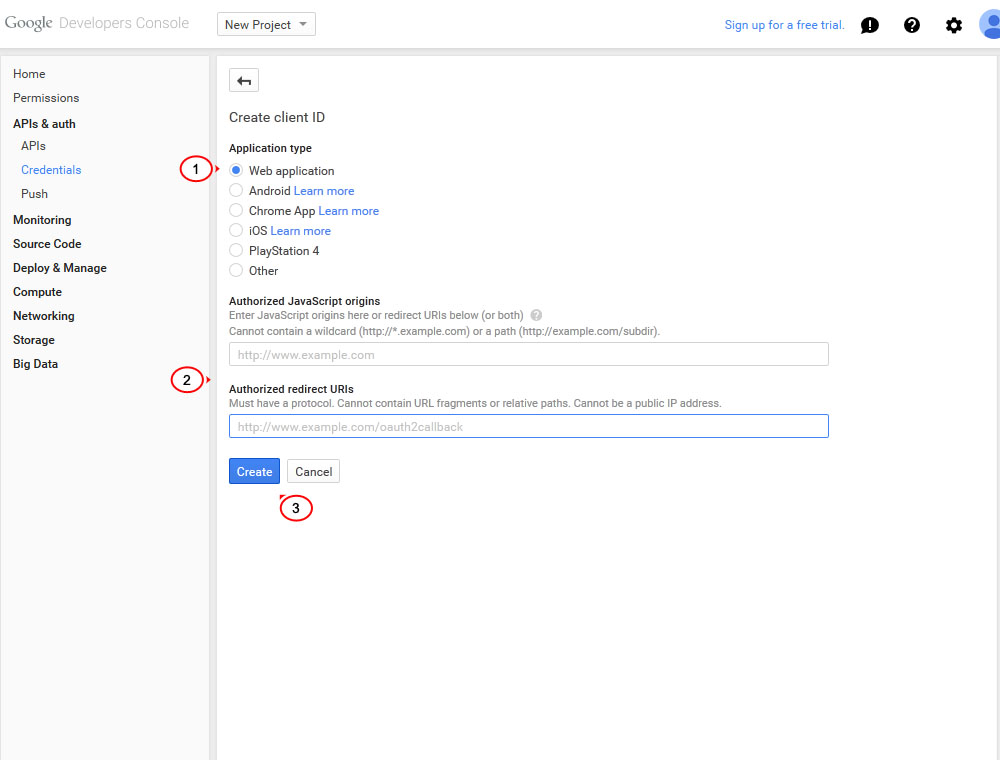
You will see your App ID and App Secret key on the next screen:

Insert Google App ID and App Secret on the “Joomla Social Login” component page in your Joomla admin panel:
Save changes and check your site.
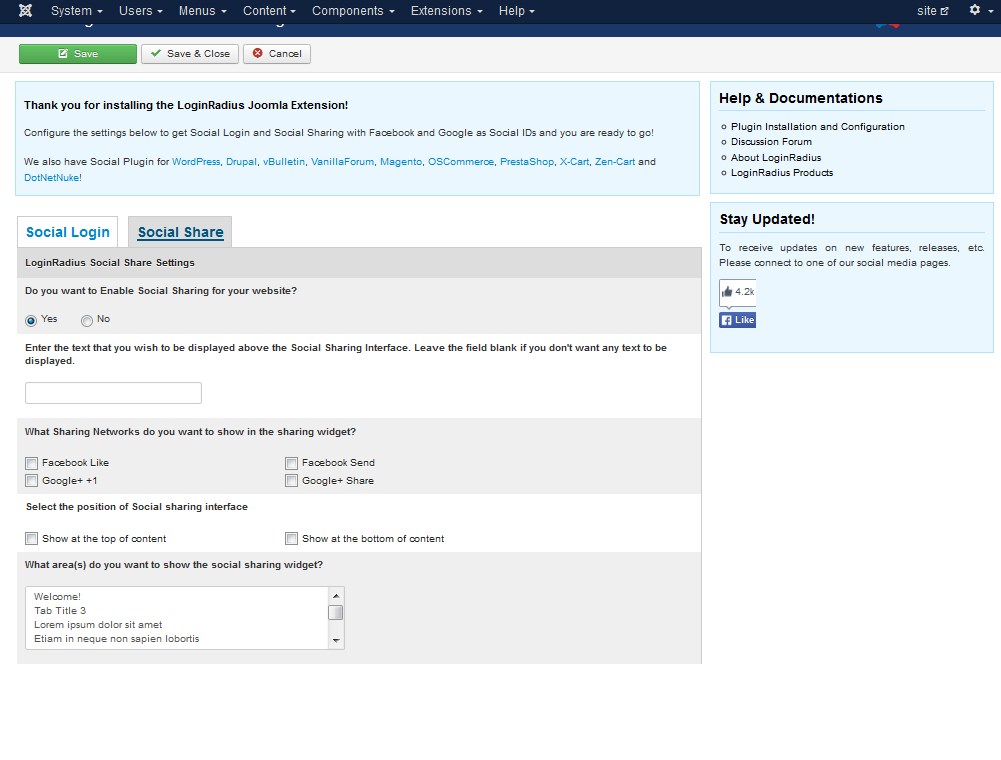
Social Share section allows you manage sharing settings on your site:
You can select which Sharing Networks you want to show in the sharing widget.
Choose the position of Social sharing interface.
Select what area(s) you want to show the social sharing widget in.
Feel free to check the detailed video tutorial below:
Joomla 3.x. How to configure Google login in “Joomla Social Login” component
.jpg)
