


- Web templates
- E-commerce Templates
- CMS & Blog Templates
- Facebook Templates
- Website Builders
FAQs
General Tutorials
MonsterONE Subscrioption


The following tutorial is going to show how to install the Loaded 7 engine to your hosting server.
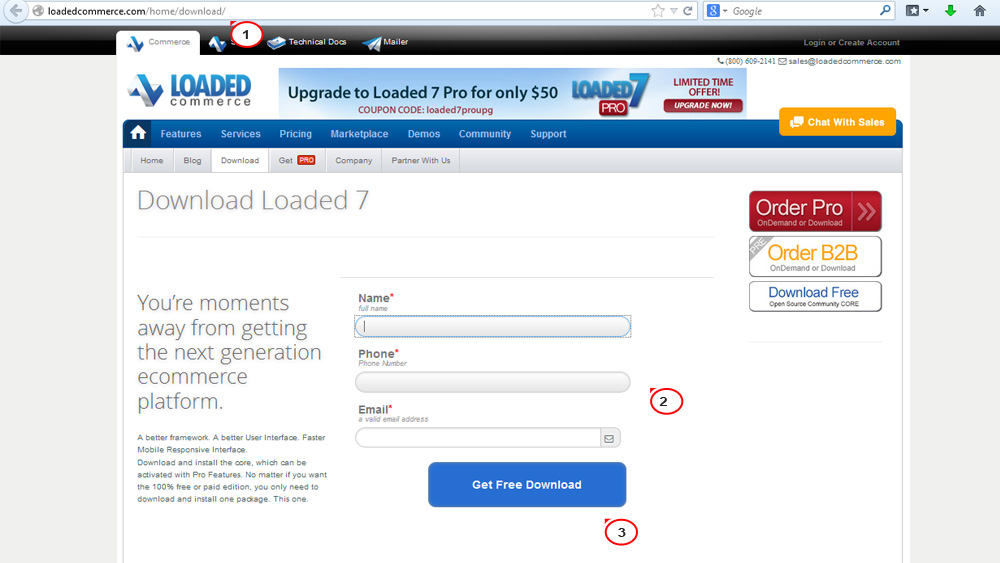
Loaded 7. How to install the engineTo install Loaded 7 you need to download the engine from the official website www.loadedcommerce.com/home/download. Type in your details and click the ‘Get Free Download’ button.
NOTE: Before downloading you should check whether this Loaded 7 engine release is compatible with your template. You can find all Loaded 7 releases on the GitHub website.
After downloading Loaded 7 you need to extract the .zip file. Feel free to check the following instructions for WinZip (Windows) and StuffitExpander (Mac) software.
Upload the content of the loadedXXX/catalog folder to your hosting server. You may find more details on how to upload files to the server in How to upload files to a server using cPanel (WebHost Manager, WHM) and How to upload files to a server tutorials.
The web based installation procedure is automatically started when you access the on-line store through a web browser. Just enter the WWW address of Loaded Commerce installation in your browser, for example: http://www.mysite.com/loadedcommerce/.
Step 1: Welcome page
The Loaded Commerce redirects to the installation procedure if the latter has not yet been performed. The welcome page displays the required configuration settings for PHP. It is recommended to update a PHP configuration value, or to install and activate a PHP extension, if it is marked as incorrect or unavailable.
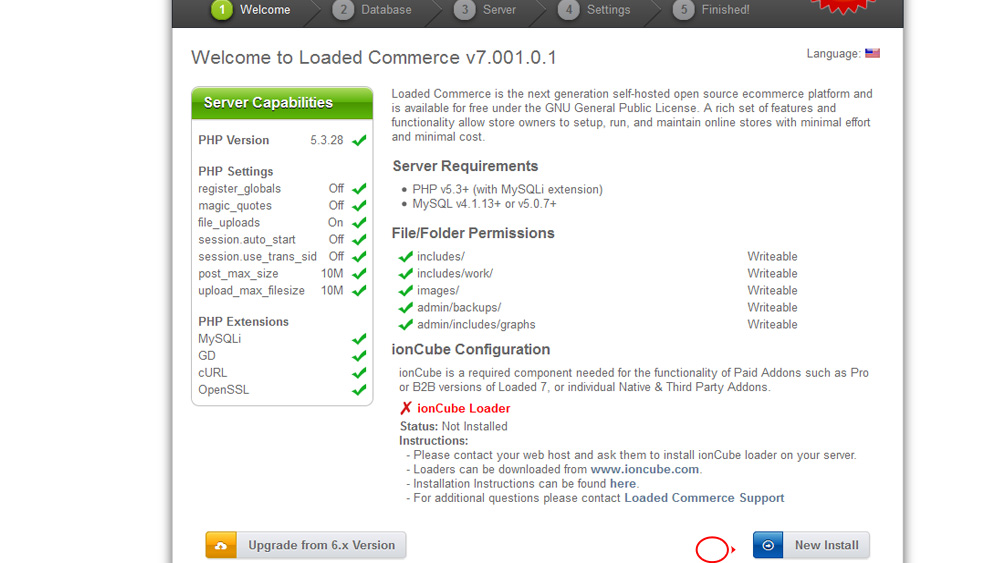
NOTE: If you get some warning messages concerning server configuration, you have to contact your hosting provider.
Click the ‘New Install’ button to start the installation.
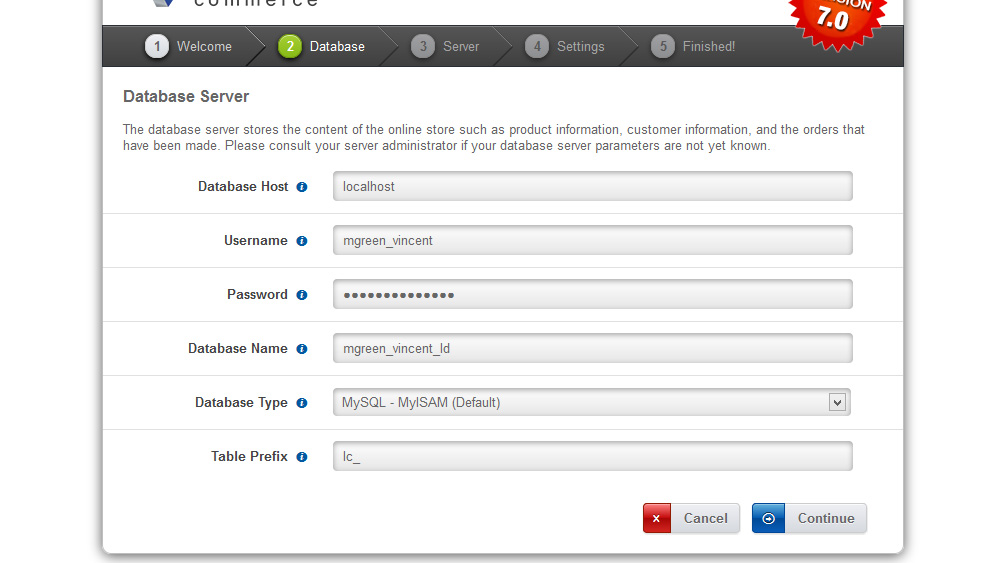
Step 2: Database Server
The second step sets the database connection parameters to successfully connect to the database server. You need to enter database name, user name, password and database host details. If you do not know these details, we recommend contacting the hosting provider. Click the ‘Continue’ button after filling in the data.
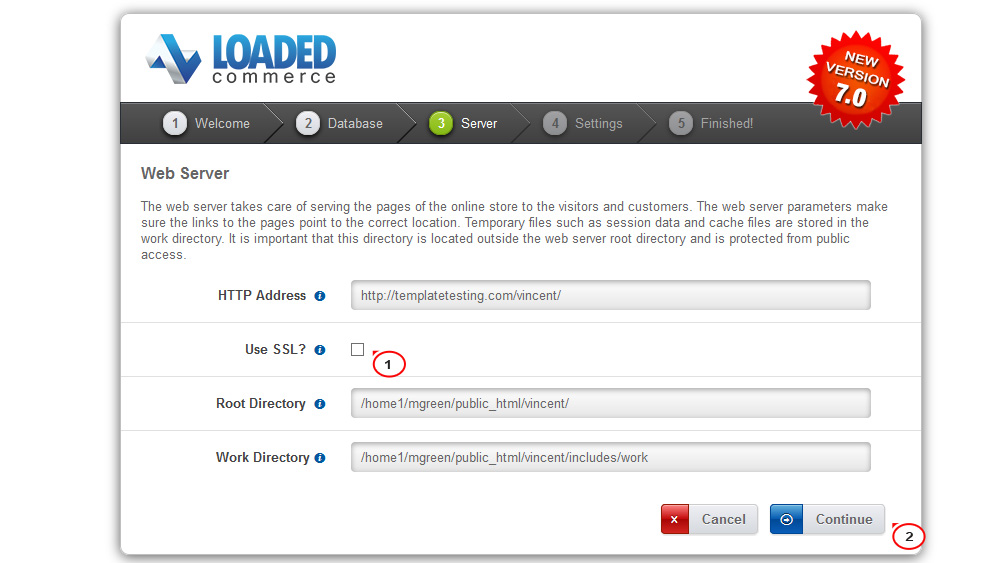
Step 3: Web Server
The third step sets the web server parameters to successfully serve the on-line store to users. The work directory is used for storing temporary files on the web server such as session files and database queries that are cached. This directory must be writable by the web server and it is checked by the installation procedure when proceeding to the next step.
Uncheck the ‘Use SSL?’ option (unless you have an SSL certificate for your domain and SSL configured) and click the ‘Continue’ button.
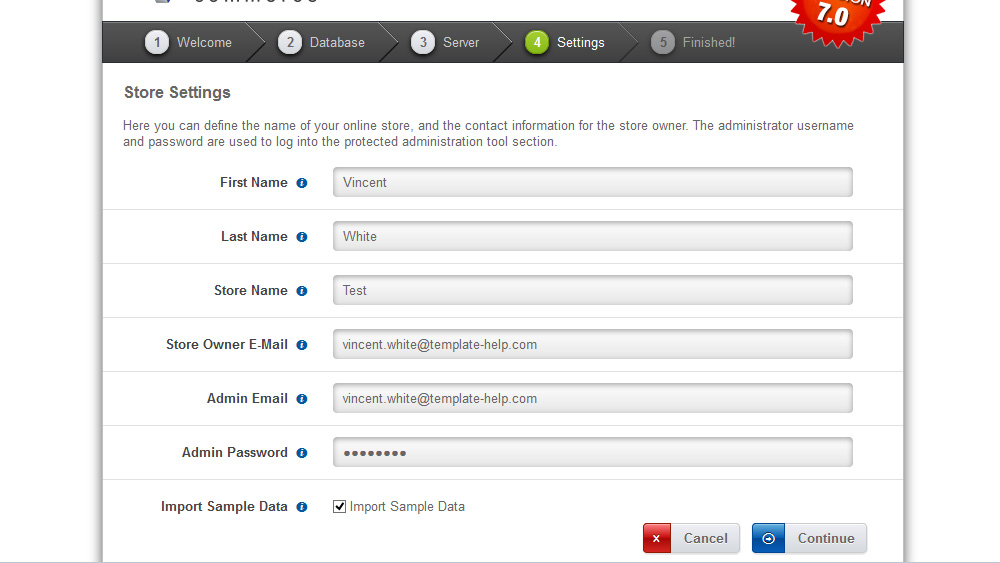
Step 4: Online Store Settings
The fourth step sets the store owner and administrator settings for the on-line store. It is important to keep note of the administrator username and password as these are used to log in and to access the Administration Tool. Additional administrators can be created in the Administration Tool after the installation procedure has been successfully completed. Fill in your personal data and press ‘Continue’ to finish installation.
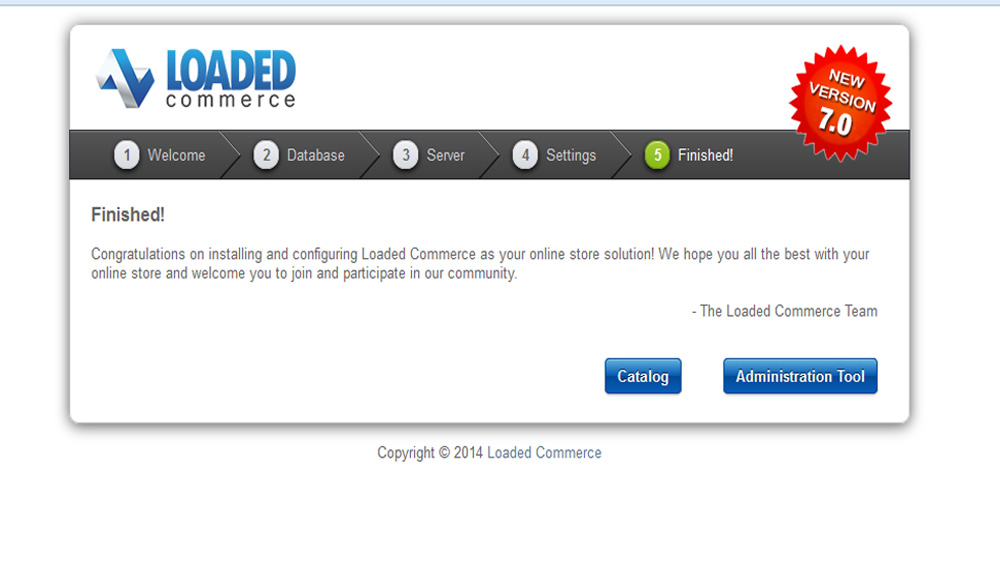
Step 5: Finished!
The last step in the installation procedure stores the database server and web server parameters to the configuration file on the web server. On successfully saving the configuration file, the installation procedure is finalized and the on-line store is ready to be used.
NOTE: Upon successful installation of Loaded Commerce, the following steps need to be performed to secure the installation of the on-line store.
Delete the loadedcommerce/install directory.
Reset the file permissions on loadedcommerce/includes/configure.php so the web server is only able to read it and not write to it. This is commonly performed by setting the permission flag to 444.
Create a directory called backups under loadedcommerce/admin/ and set the permission flag so the web server is able to write to it.
Go back to your website URL. We’ve installed the Loaded 7 engine successfully.
Feel free to check the detailed video tutorial below:
Loaded 7. Loaded 7. How to install the engine