


- Web templates
- E-commerce Templates
- CMS & Blog Templates
- Facebook Templates
- Website Builders
FAQs
General Tutorials
Featured templates
MonsterONE Subscrioption


This tutorial shows how to edit the Contact us page in Magento templates (starting from template 54689+).
Magento. How to edit Contact us page
Based on Type: Magento Theme Item: #55681. Differences in design are possible, though the process is pretty the same.
NOTE: We strongly recommend backing up each file before editing it, i.e. saving a copy on computer first.
You may need to clear the cache to check the changes made.
On your FTP/cPanel server in the folder where the Magento files are stored, go to \app\design\frontend\default\theme_number\layout\contacts.xml or app/design/frontend/tm_themes/theme_number/layout/contacts.xml in newer templates.
If you do not see the contacts.xml file in the theme folder, you should copy it from app\design\frontend\base\default\layout to the theme folder.
Open it with any code editor and change the name of the page around line 38:
			<reference name="head">
			<action  method="setTitle" translate="title"  module="contacts"><title>Contact Us</title></action>
		</reference>
Save the changes and refresh the page.
To change the title of the “Contact Us” footer menu, navigate to /app/design/frontend/tm_themes/theme_number/layout/local.xml on the server via FTP or hosting cPanel and locate this code around line 166:
<action method="addLink" translate="label title" after="return_link" module="contacts" ifconfig="contacts/contacts/enabled"><label>Contact Us</label><url>contacts</url><title>Contact Us</title><prepare>true</prepare></action>
Replace the title with the one you need and save the changes.
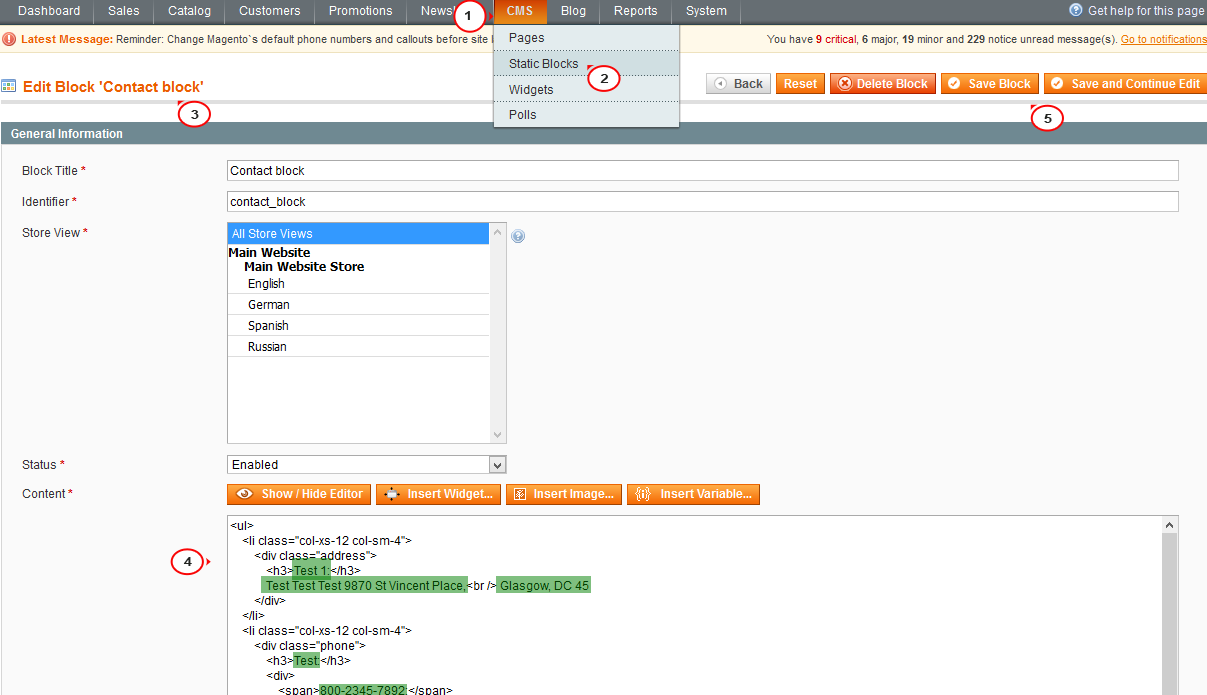
In older templates, you can edit the title from the admin in CMS -> Static Blocks -> footer_block. Find the title of the menu title in the Content to change it. Once you are done, click “Save Block” at the top.
To change the title of the “Contact Us” header menu, navigate to CMS -> Static Blocks -> header_block in older templates or edit its title in Catalog -> Manage Categories if it is in the category menu in your theme.
You can do it in the admin section in CMS -> Static Blocks -> contact_block -> Content tab. The block name can vary within templates:
Navigate to app/design/frontend/tm_themes/theme_number/template/contacts/form.phtml on the server or \magento\app\design\frontend\base\default\template\contacts\form.phtml in older templates.
Open the file with any code editor and change the needed text between the quotes. For example:
Replace:
<div class="field">
			<label for="name" class="required"><em>*</em><?php echo Mage::helper('contacts')->__('Name') ?></label>
			<div class="input-box">
			<input name="name" id="name" title="<?php echo Mage::helper('contacts')->__('Name') ?>" value="<?php echo $this->escapeHtml($this->helper('contacts')->getUserName()) ?>" class="input-text required-entry" type="text" />
			</div>
		</div>
with
<div class="field">
			<label for="name" class="required"><em>*</em><?php echo Mage::helper('contacts')->__('New text') ?></label>
			<div class="input-box">
			<input name="name" id="name" title="<?php echo Mage::helper('contacts')->__('New text') ?>" value="<?php echo $this->escapeHtml($this->helper('contacts')->getUserName()) ?>" class="input-text required-entry" type="text" />
			</div>
		</div>
Save your changes once you are done.
Navigate to app/design/frontend/tm_themes/theme_number/template/contacts/form.phtml via FTP/cPanel or \magento\app\design\frontend\base\default\template\contacts\form.phtml in older templates.
Open the file with any code editor. For example:
<div class="field">
			<label for="email" class="required"><em>*</em><?php echo Mage::helper('contacts')->__('Email') ?></label>
			<div class="input-box">
			<input name="email" id="email" title="<?php echo Mage::helper('contacts')->__('Email') ?>" value="<?php echo $this->escapeHtml($this->helper('contacts')->getUserEmail()) ?>" class="input-text required-entry validate-email" type="text" />
			</div>
		</div>
Removing class="required"><em>*</em> will make the field not mandatory.
Your template may not have a css class for the “required”, so it may differ.
Adding class="required"><em>*</em> will make the field required.
Save the changes.
Open app/design/frontend/tm_themes/theme_number/template/contacts/form.phtml via FTP/cPanel or \magento\app\design\frontend\base\default\template\contacts\form.phtml in older templates.
Open the file with any code editor and add the following:
		<div class="field">
		<label for="fax" class="required"><em>*</em><?php echo Mage::helper('contacts')->__('Fax') ?></label>
		<div class="input-box"> <input name="fax" id="fax" title="<?php echo Mage::helper('contacts')->__('Fax') ?>" value="<?php echo $this->escapeHtml($this->helper('contacts')->getUserEmail()) ?>" class="input-text required-entry validate-email" type="text" />                        </div>                    </div>
where Fax is the name of your new field.
Save the changes.
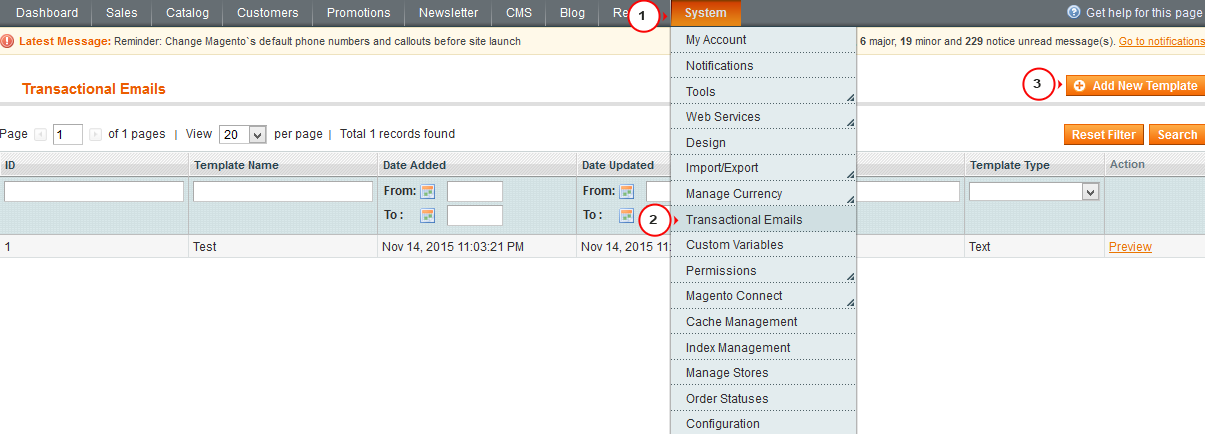
In your Magento admin you need to go to System -> Transactional E-mails -> Add New Template:
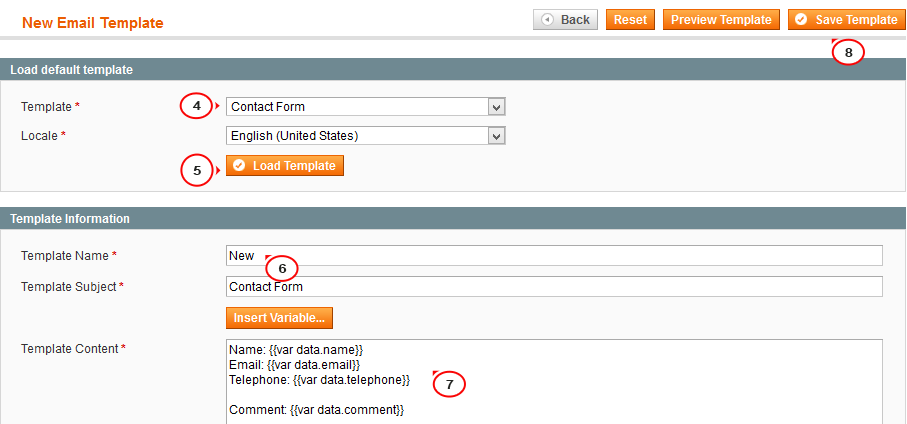
Choose ‘Contact Form’ from the “Template”drop-down and click ‘Load Template’.
Under the “Template Information” give a new name to your form template and add a new field to the current email content. For instance:
Fax: {{var data.fax}}
Click on “Save template”:
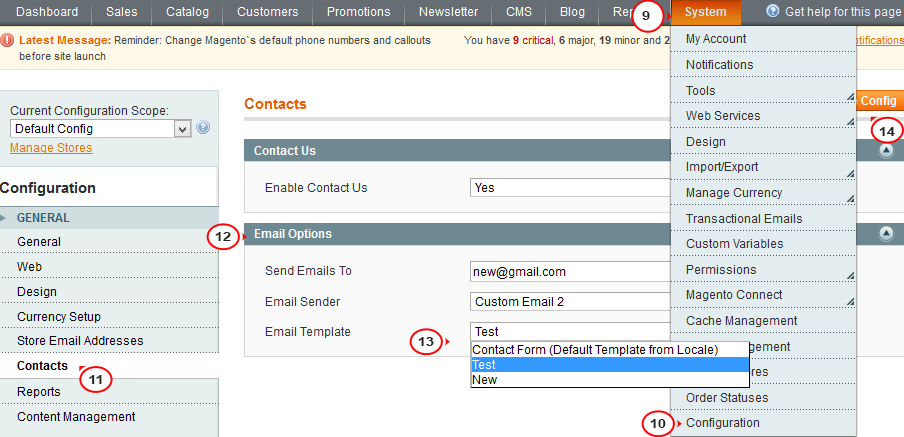
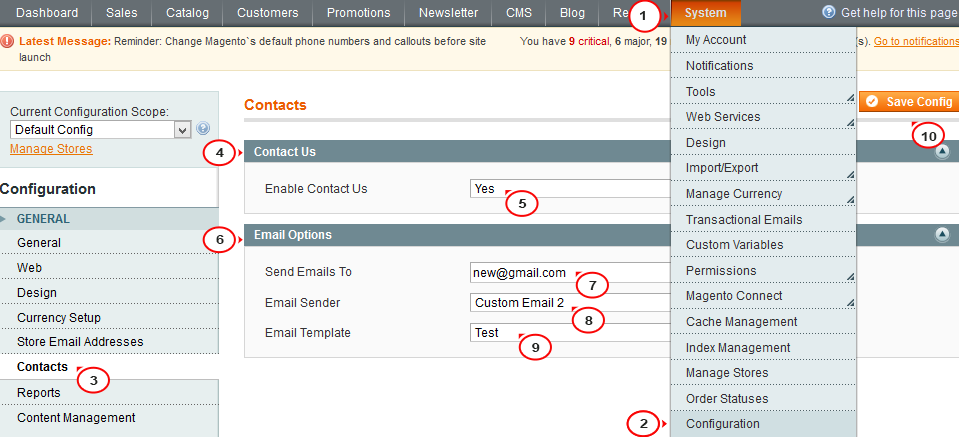
In System -> Configuration -> Contacts and in the ‘Email Options’ select your new template name under the ‘Email Template’ dropdown menu.
Click on “Save Config”:
Log into your Magento admin panel and go to System -> Configuration -> Contacts (left-side panel).
Under Contact Us -> Enable Contact Us make sure that “Yes” is selected.
Under Email options -> Send Email To specify the e-mail address that you want to use for receiving feedbacks when the form on the “Contacts” page is used.
There are two more options below:
The Email Sender — Indicates the name on the from: line of comments sent using the ContactUs form;
Email Template — Template used when customers’ comments are sent to the email address specified in the Send emails To field.
Magento allows you to maintain multiple email addresses for your store, according to the role.
Navigate to System -> Configuration -> Store Email Addresses in Magento admin panel.
In this section you can specify the Sender Name (from whom the emails are sent) and Sender Email (used for sending emails). Any unused fields can be left blank.
Note that these settings are applied to the whole website. If you run multiple stores on a Website, you may set different Email addresses for each store.
To enter the email address for an individual store that differ from those specified for entire Website:
Select the desired store in the Current Configuration Scope dropdown menu in the upper-left portion of the system configuration screen.
Click the Store Email Addresses section.
Clear the Use website check box next to the field you want to change and replace the value in the field with the desired one.
Click on Save Config to save your changes:

Feel free to check the detailed video tutorial below:
