


- Web templates
- E-commerce Templates
- CMS & Blog Templates
- Facebook Templates
- Website Builders
FAQs
General Tutorials
Featured templates
MonsterONE Subscrioption


Our support team is ready to present you a new tutorial on how to build a timeline page using TM Timeline plugin.
First, make sure TM Timeline plugin is installed and activated at the Plugins section of your WordPress Dashboard. You can also download it at WordPress official website via the following link: TM Timeline plugin
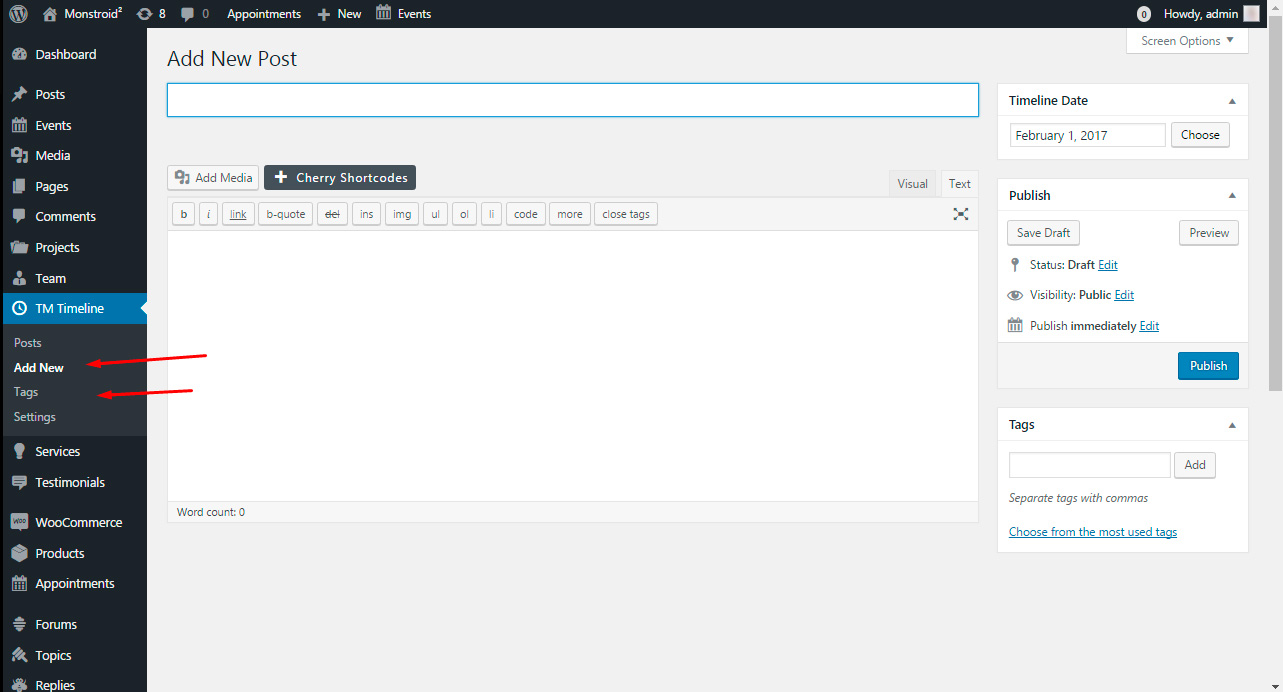
The next step would be creating the entries you need to display. Navigate to TM Timeline > Add new and create several posts you would like to have displayed on a timeline page. You can also create a taxonomy (classification, grouping by categories) of your new posts with the help of the Tags option.
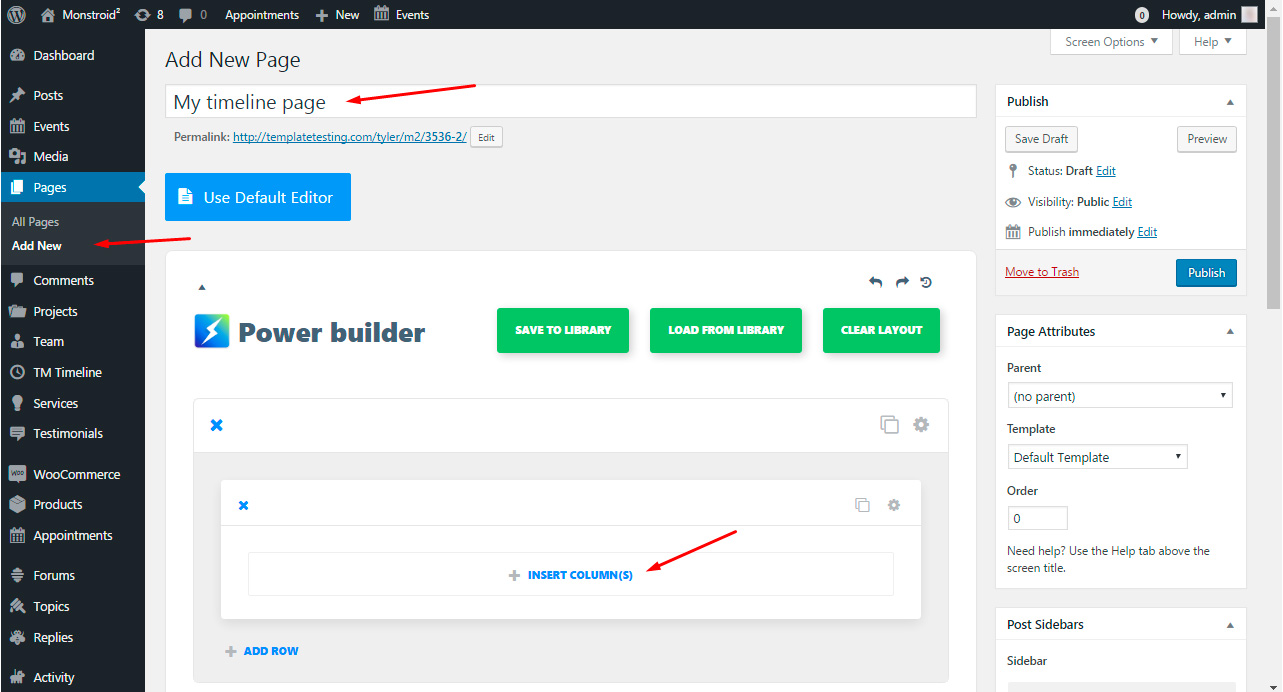
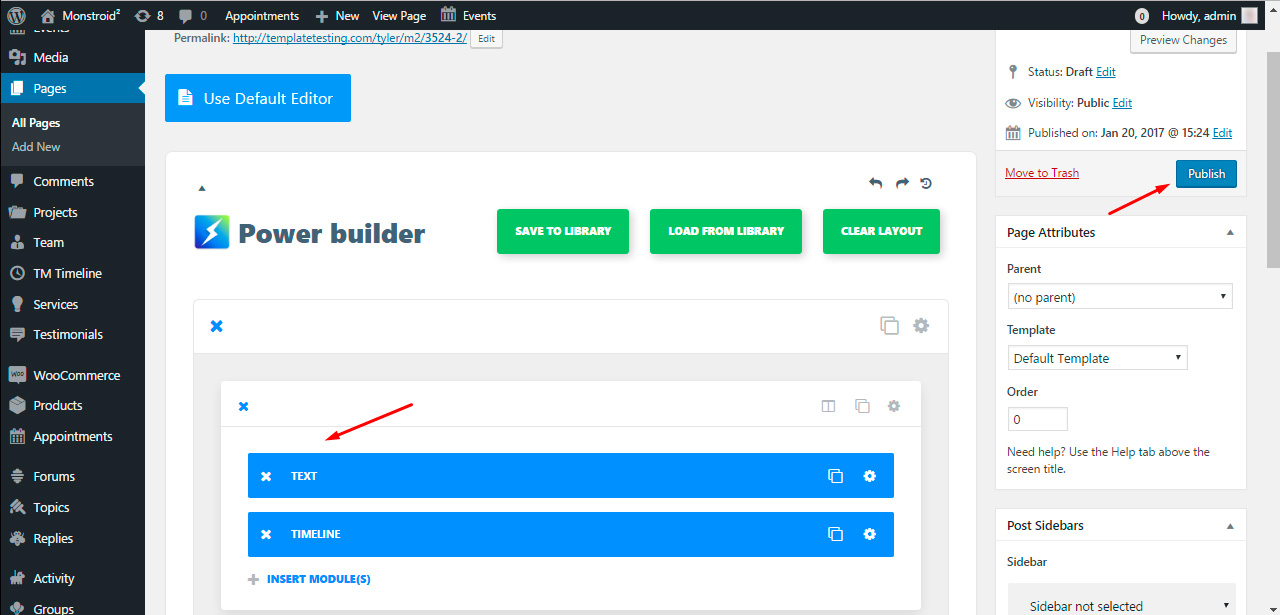
When the posts are created, create a new page where the posts will be displayed in ‘timeline’ fashion. Go to the Pages > Add new, specify new page title, click ‘Use power builder’ and proceed to power builder settings. Create a column inside a section.
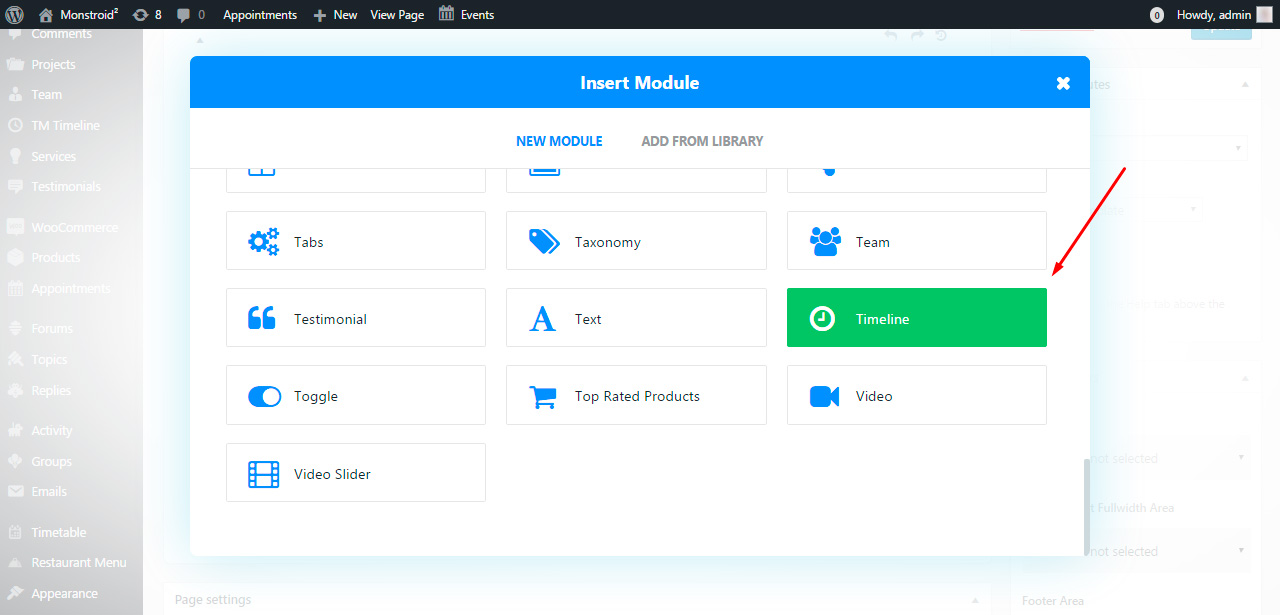
Click ‘Insert module‘ and choose Timeline option.
You will be taken to the module configuration page. The settings are described below the screenshot.
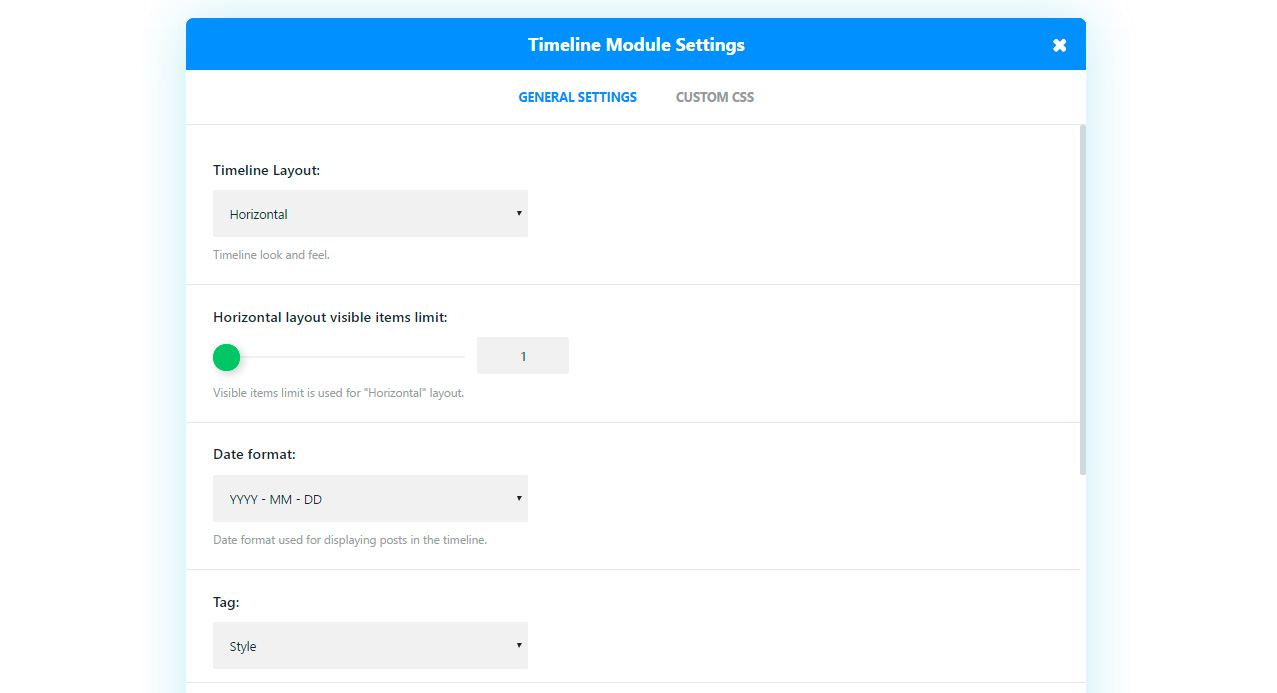
Timeline Layout – here you should specify the layout of your entries. By default there are three options: horizontal, vertical, and vertical staggered order.
Horizontal layout visible items limit – this stands for the number of items you would like to have displayed.
Date format – here you can choose how exactly the entry publication date will be displayed.
Tag – if you create a taxonomy in plugin settings, you will be able to either display posts with a certain tag or show all the posts.
Sort order – choose ascending or descending order for your timeline posts.
Display anchors – if set to ‘yes’, than timeline post title will be clickable and will lead user to the post’s single page.
If you happen to need a title for your timeline, add a ‘text’ module with your title and place it above the timeline module. It should result as following:
Now feel free to publish the page.
We have chosen vertical staggered layout and the result looks this way:

That’s it. Now you know how to set up a timeline using TM Timeline plugin.
Feel free to check the detailed video tutorial below:
Monstroid 2. How to setup a timeline using “TM Timeline” pluginAlso, make sure to look through the collection of other WordPress themes.
