


- Web templates
- E-commerce Templates
- CMS & Blog Templates
- Facebook Templates
- Website Builders
FAQs
General Tutorials
Featured templates
MonsterONE Subscrioption


This tutorial shows how to install OpenCart 2.x engine and a template using fullpackage.zip file:
OpenCart 2.x. How to install OpenCart engine and a template (using fullpackage)

When template is downloaded and unzipped, open the themeXXX folder. You will find the themeXXX(full).zip and unzip.php files which should be uploaded on server. Upload files on server using cPanel file manager or FTP mananger.
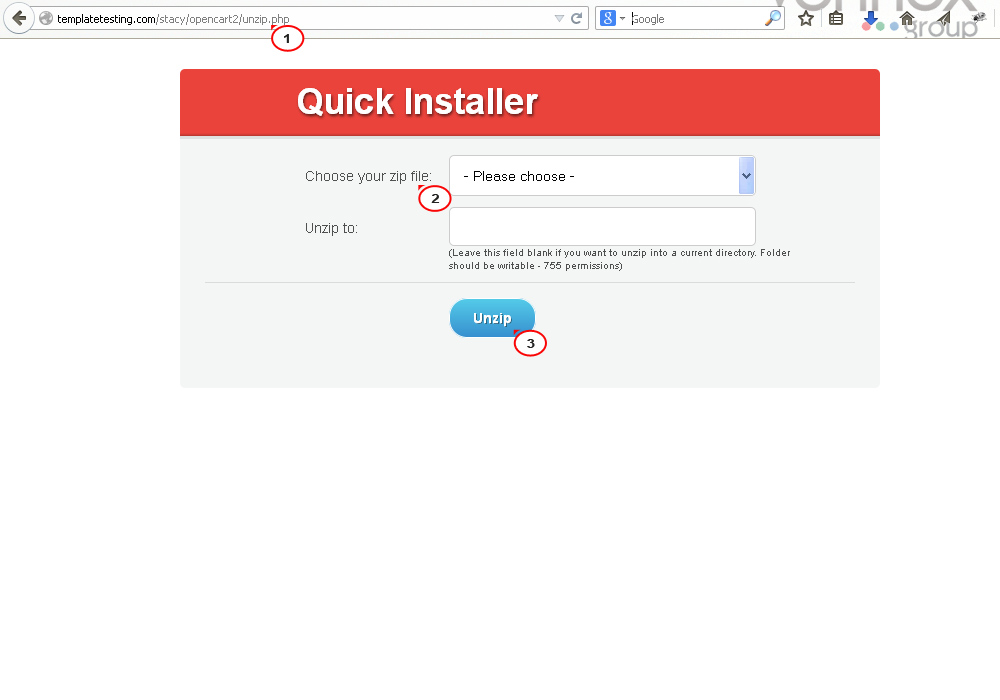
Extract files using unzip.php file: add /unzip.php to your domain name. Choose themeXXX(full).zip from the drop-down link and click the Unzip button:
With that done, open domain name in your browser to start installation. Make sure to check License agreement and if you agree with terms, click the Continue button.
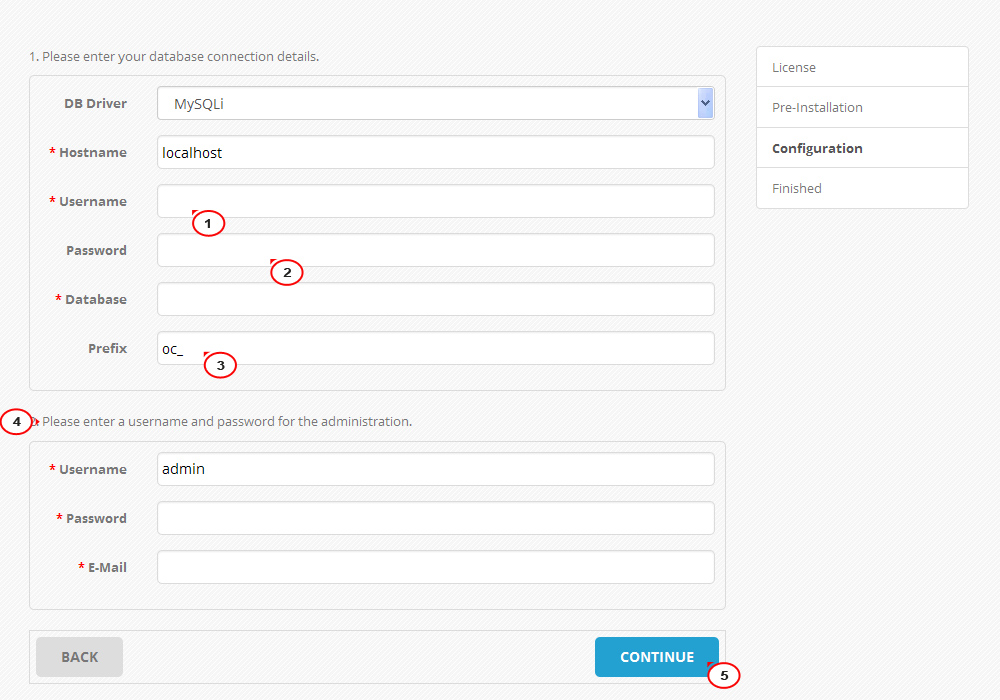
Next, you will see the Database Configuration page. Create database name, user and password for OpenCart site.
Fill out Username, Password and Database fields with details of the database you’ve just created. Make sure to use oc_ prefix in the Prefix field. In case you use other than oc_ prefix, sample content won’t appear on the site after installation. Type in Username, Password and Email address you’re going to use for OpenCart site. Click the Continue button to complete installation:
For security reasons make sure to delete or rename install folder in the root folder of OpenCart installation.
When install folder is completed or renamed, installation is completed. You can enter site admin panel by adding /admin to your site address.
Feel free to check the detailed video tutorial below:
OpenCart 2.x. How to install OpenCart engine and a template (using fullpackage)
