- Web templates
- E-commerce Templates
- CMS & Blog Templates
- Facebook Templates
- Website Builders
OpenCart 1.5.x. How to install engine
March 7, 2012
This tutorial shows how to install OpenCart e-commerce solution to your hosting server.
Preparations
Before you proceed please make sure you have fulfilled the following requirements:
1. First of all you should have a hosting and domain name
2. OpenCart as any other E-commerce engine requires a MySQL database to store data. So you should open your hosting control panel and create a database. Feel free to check the detailed video tutorial on how to create database In case of any issues please contact your hosting provider.
3. As we are going to install OpenCart to the hosting we need to have FTP access to the hosting server. You can gain FTP access using the file manager application from your hosting control panel or using some third party FTP manager like FileZilla, CuteFTP, TotalCommander etc.
4. Make sure your hosting meets the OpenCart requirements
Downloading OpenCart
First of all you need to visit the official website at opencart.com and download required version of OpenCart engine. Please check the template preview page for the required version of the OpenCart engine.
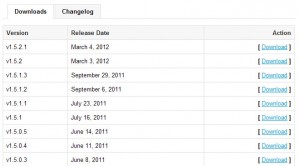
At opencart.com from the top menu select Download. Scroll down and in the Downloads section choose the necessary version.
The OpenCart engine is distributed as a .zip archive so you should have opencart_v#.#.#.#.zip file downloaded to your computer.
Extracting and uploading Engine Files
When the download is complete you need to extract files from the downloaded ZIP package. Feel free to check the detailed video tutorials on how to extract files on MAC and PC.
After extracting files you should see the following files structure:
- upload
- install.txt
- license.txt
- upgrade.txt
Open the upload folder and upload all files and folders to your hosting server. Learn more about upload files
Engine Installation
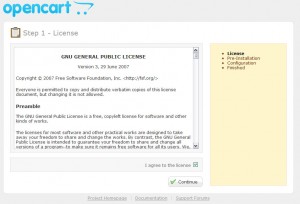
When you are done upload all engine files to the hosting server please open your browser and in the address bar type your domain name. You should see OpenCart initial installation screen.
Check the license agreement and click Continue button to proceed.
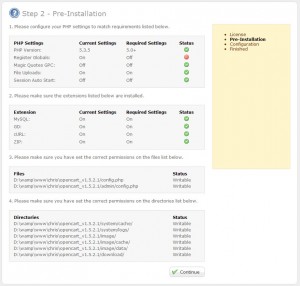
Step 2 – Pre-Installation
At this step OpenCart checks if your hosting server fits it’s requirements. In case of any issues please contact your hosting provider.
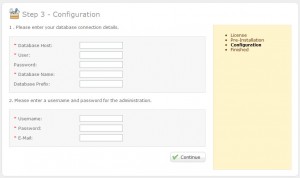
Step 3 – Configuration
At this step you need to input the database details and create OpenCart store administrator account. In case of any issues please contact your hosting provider.
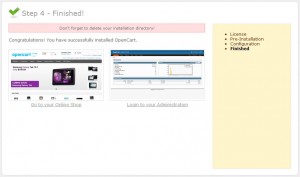
Step 4 – Finished!
You are almost done. Open the OpenCart installation directory on your server and delete install directory.
In the browser address bar type your domain name to access OpenCart store frontend.
To access administration panel (OpenCart backend) in the browser address bar type http://your_domain_name/admin
Feel free to check the detailed video tutorial below:


