


- Web templates
- E-commerce Templates
- CMS & Blog Templates
- Facebook Templates
- Website Builders
FAQs
General Tutorials
Featured templates
MonsterONE Subscrioption


In this tutorial we will shown you how to work with TM Collections module, which allows shop visitors to create collections of your products and share them on Facebook. With this module you can significantly boost your sales and see which products are most popular to set a discount on them or supply your inventory with more similar items.
The module can be found in all the themes of our Eveprest template.
Installation and configuration of the module
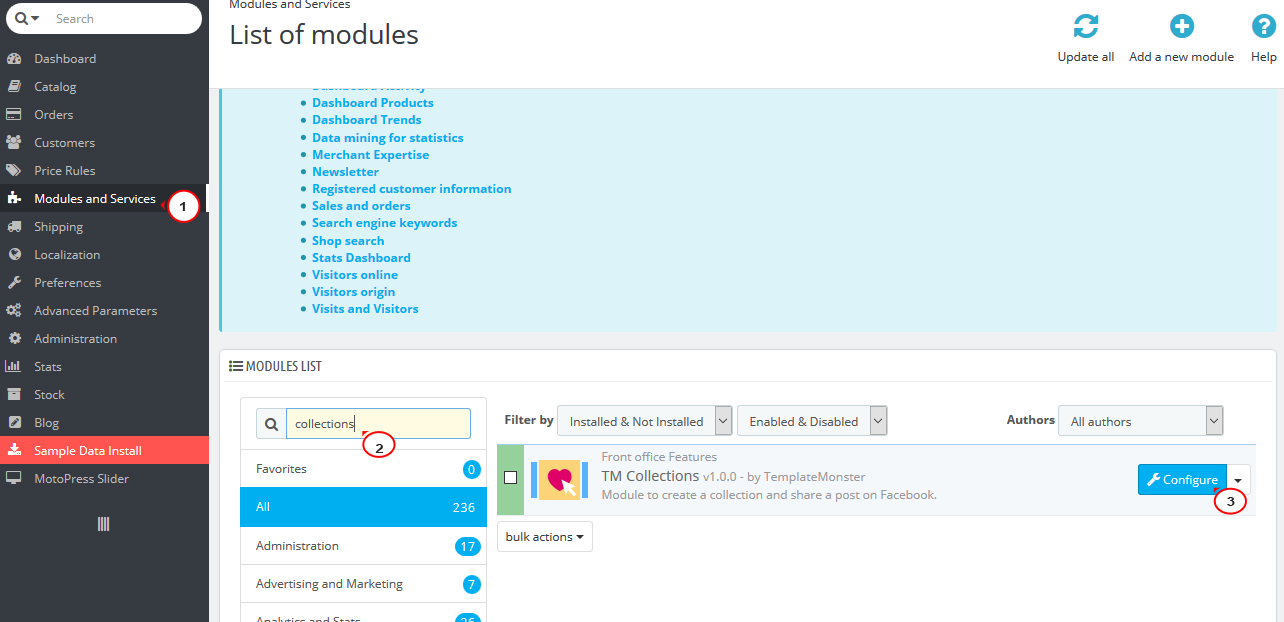
In order to install the module, use the “Add New Module” button in the top right of Modules and Services section in your admin panel, and browse the archive or upload the unzipped folder of it to the “modules” folder, located in the root of your installation on server. In case the module is included into a template, it will be automatically installed after the theme activation.

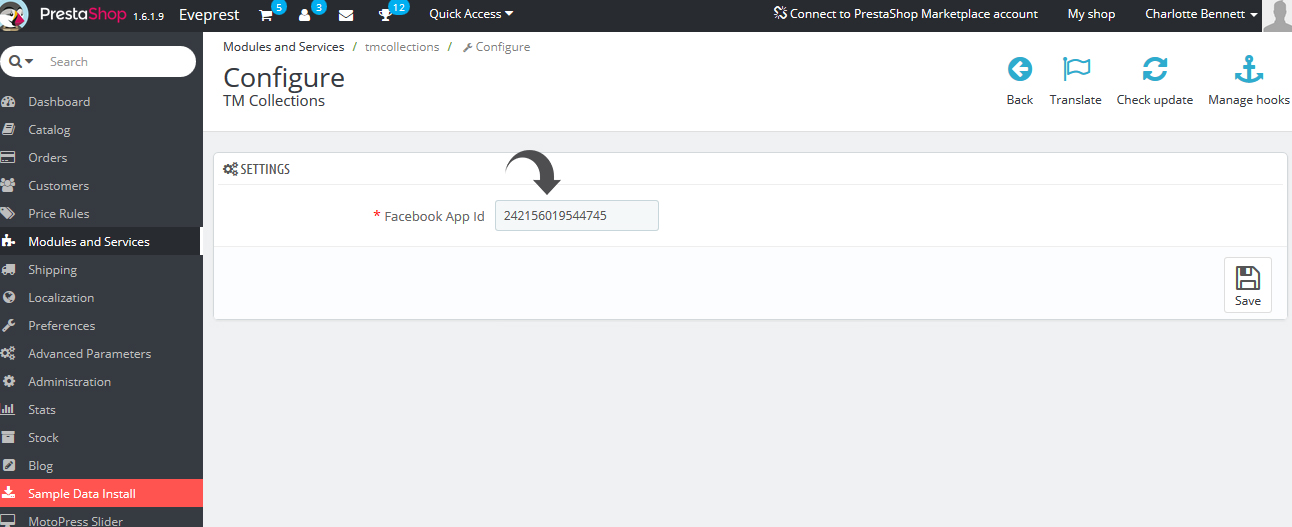
To access the module’s settings, press the “Configure” button.
Add your Facebook App Id to the required field and save settings. Follow this guide to get the app ID.
Using TM Collections Module
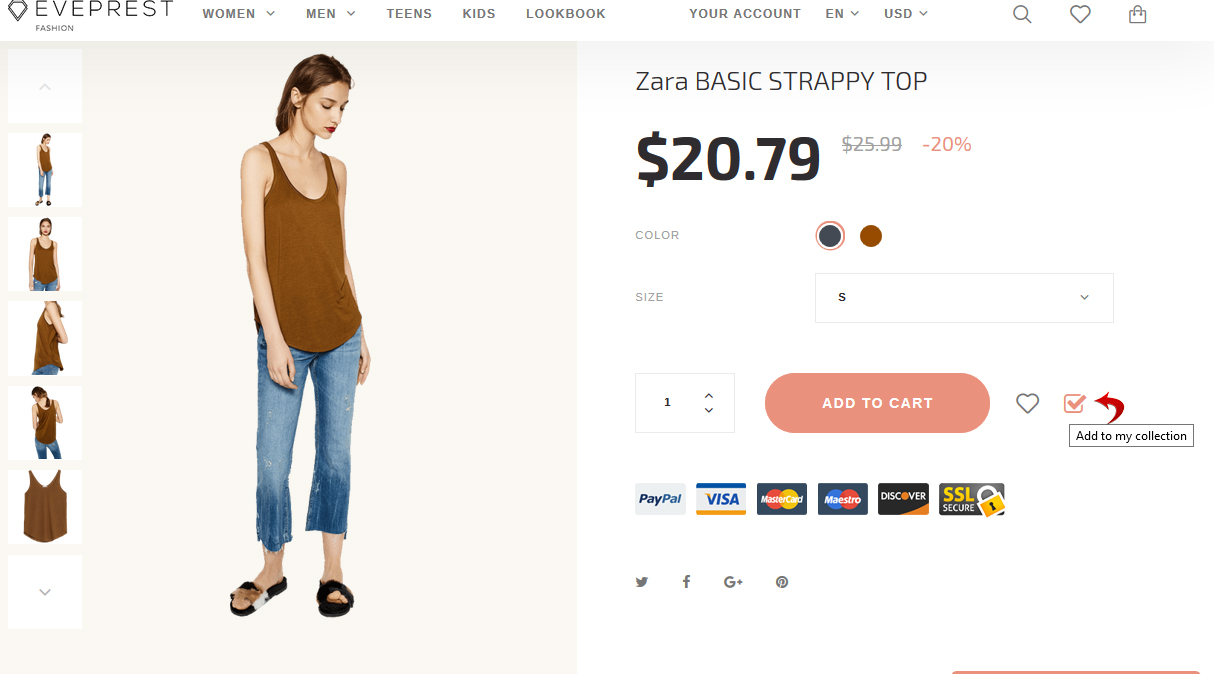
As soon as the module is installed, the “Add to collection” button appears on each product page
Note: only the logged in visitors can add products to collections.
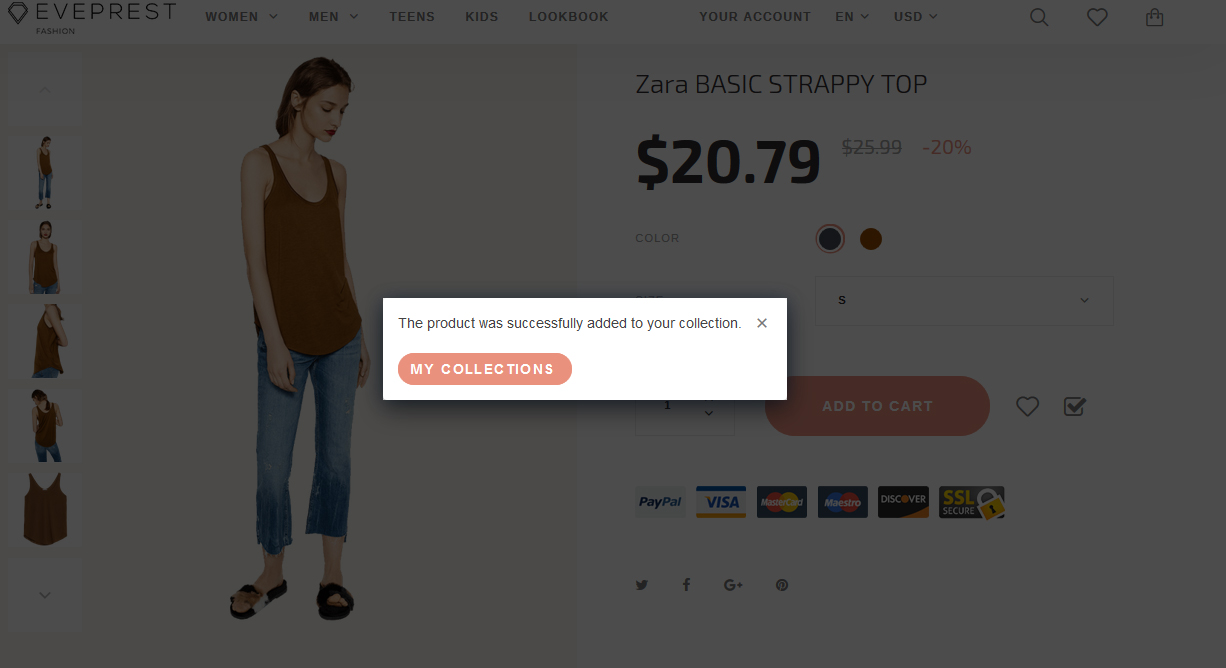
After clicking this button, a shop visitor will see a notification: “The product was successfully added to your collection”. It can be closed or skipped to collections view by clicking “My collections’ button.
You can also access “My Collections” page from the menu in your account.
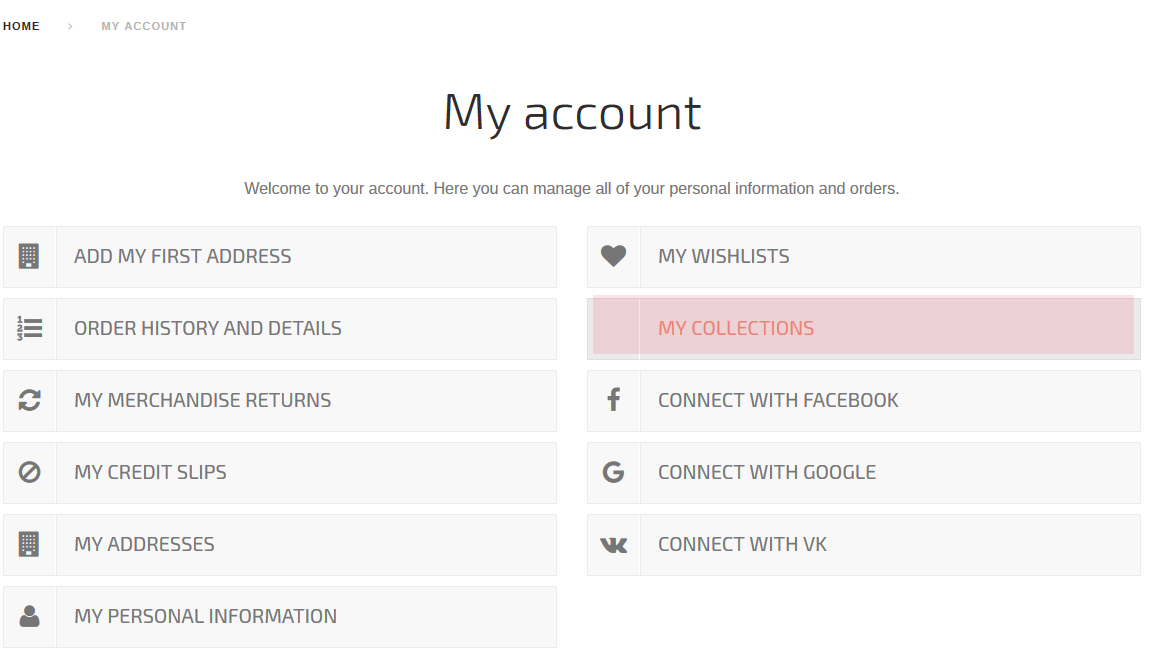
On this page you can view and edit the existing collections or create a new one.
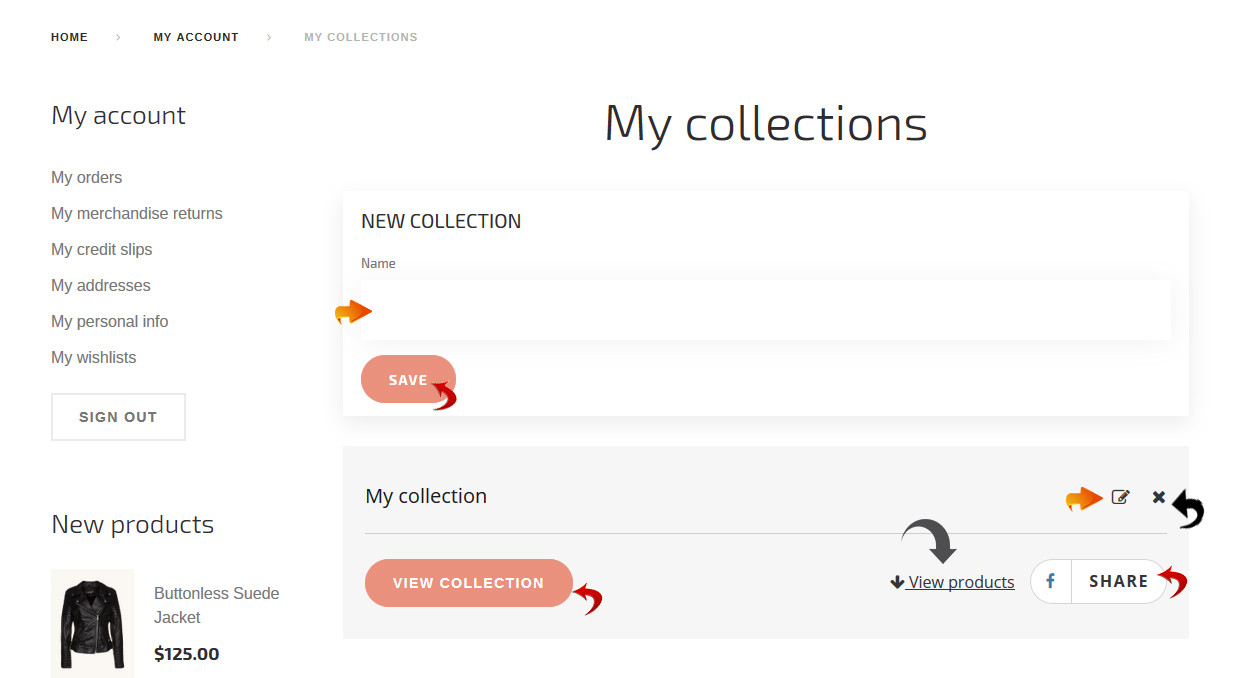
By clicking the “View collection” button you will access the collection page, the “View products” button gives a possibility to see the products list of this collection on current page. To share the collection, visitor should press the “Share” button.
You can delete any of the products from a collection.

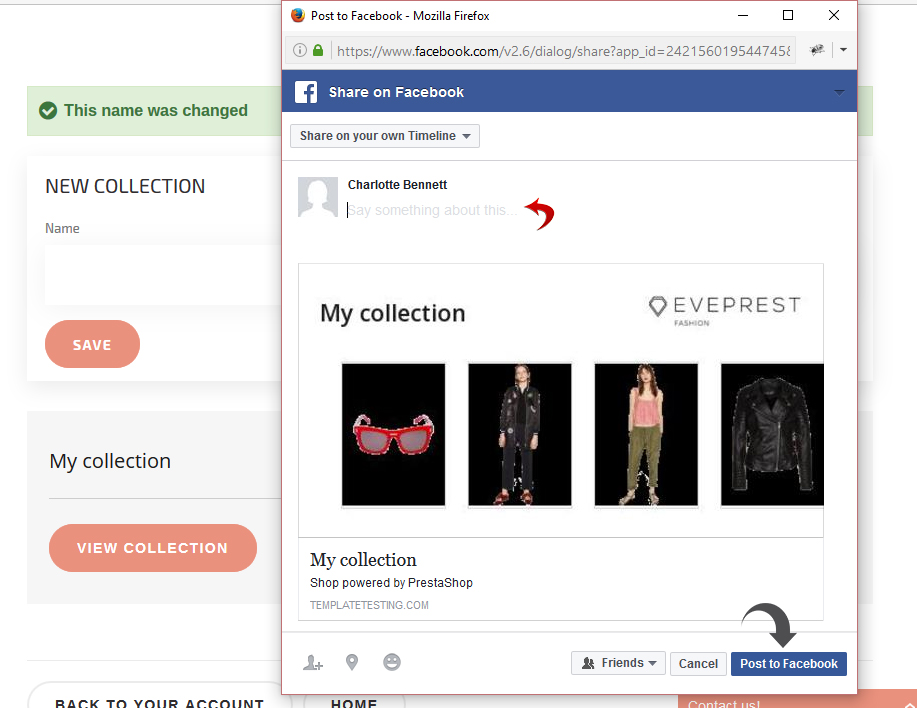
Sharing Collections
To share the collection site visitor should press the ‘Share’ button.
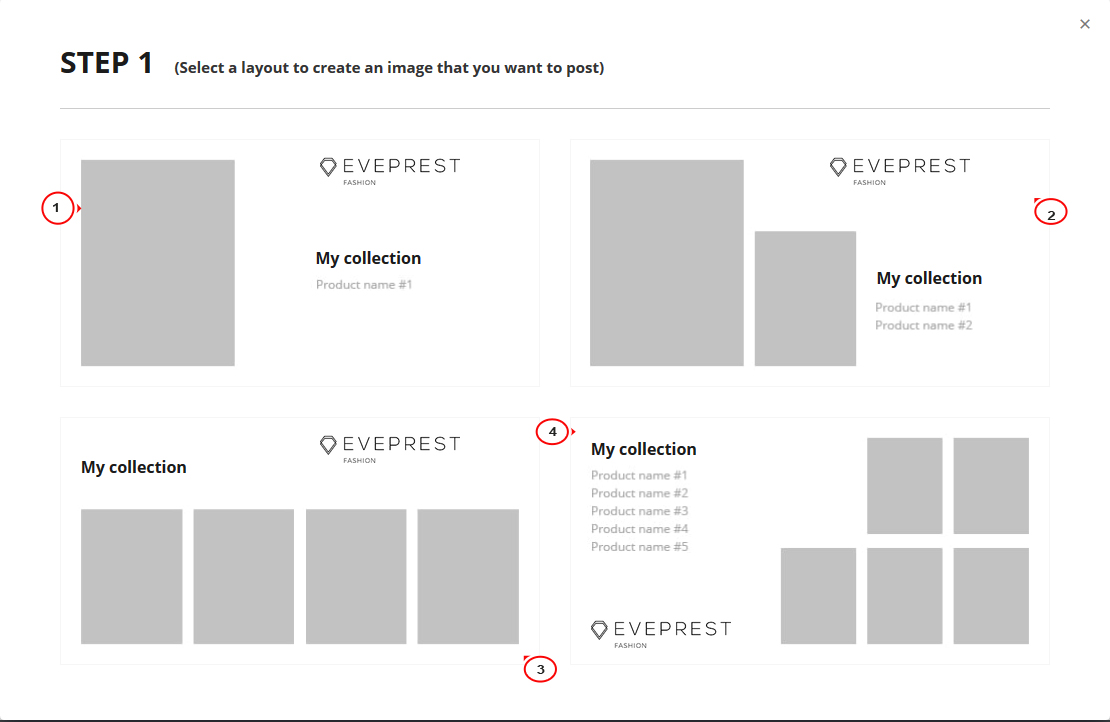
Select a layout for collection that will be posted. There are four grid layouts to choose from.
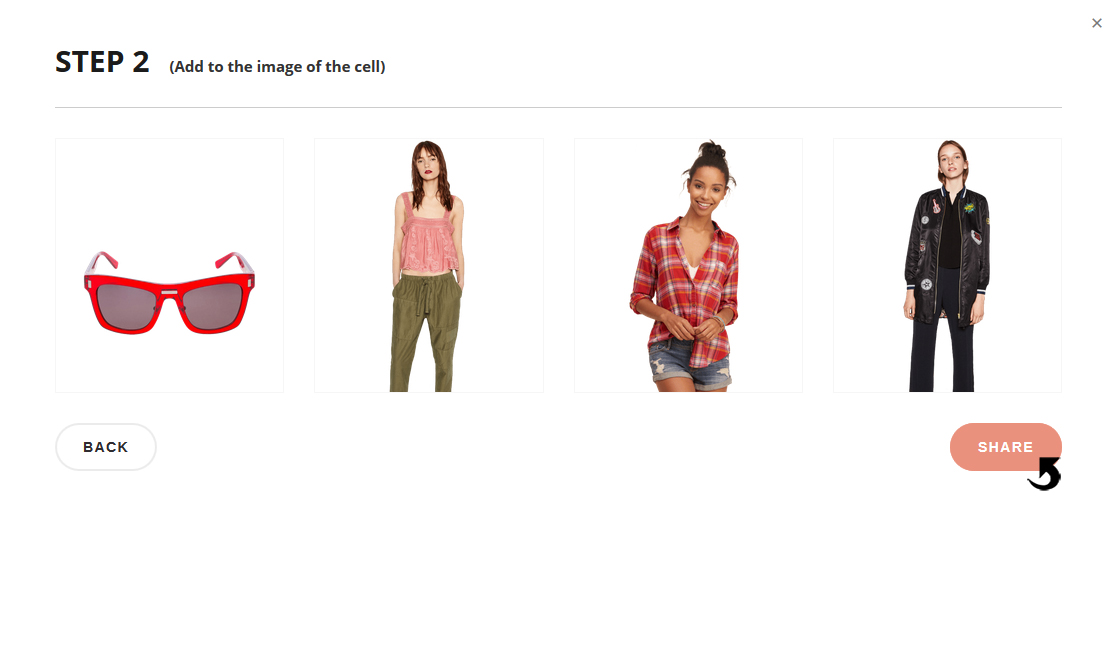
Select images for each product cell by pressing “+”.

Once again press the “Share” button after all images are selected.
Type some text to accompany your collection, and click the “Post to Facebook” button. Then it will be published.
Statistics
TM Collections module allows to get the statistics collected while the products are added to collections. Thus you will know which products are currently popular and be able to use this information for applying discounts to these products or making sure they are available in your inventory.
To view the statistics, navigate to Stats -> Stats -> TM Collections section in your admin panel.

You can select the period for viewing the statistics from the specified time.
In the first column there’s a number of product addings.
The second column is created for your convenience. You can use it to see how many of added products were sold.
The statistics can be exported into a CSV file.
We hope the tutorial was useful for you.
Feel free to check the detailed video tutorial below:
PrestaShop 1.6.x. How to manage “TM Collections” moduleAnd don’t forget to browse our brand new PrestaShop 1.6.x. Templates that extend the functionality of your website.
