


- Web templates
- E-commerce Templates
- CMS & Blog Templates
- Facebook Templates
- Website Builders
FAQs
General Tutorials
Featured templates
MonsterONE Subscrioption


This tutorial is going to show you how to add theme localization in WooCommerce.
Before adding theme localization, WordPress needs to be told which language it should run under. Please perform the following steps:
To change language in WordPress, you need to reach wp-config.php file. This file is located in the root directory of the WordPress installation on your server.
Open wp-config.php file and modify the line "define ('WPLANG', '');", or add it if it’s missing in your file. Insert your locale into the quotes. For example, if you want to translate your site into German language, you should edit this line the following way:
define('WPLANG', 'de_DE');
NOTE: You can check the list of locales at the following link.
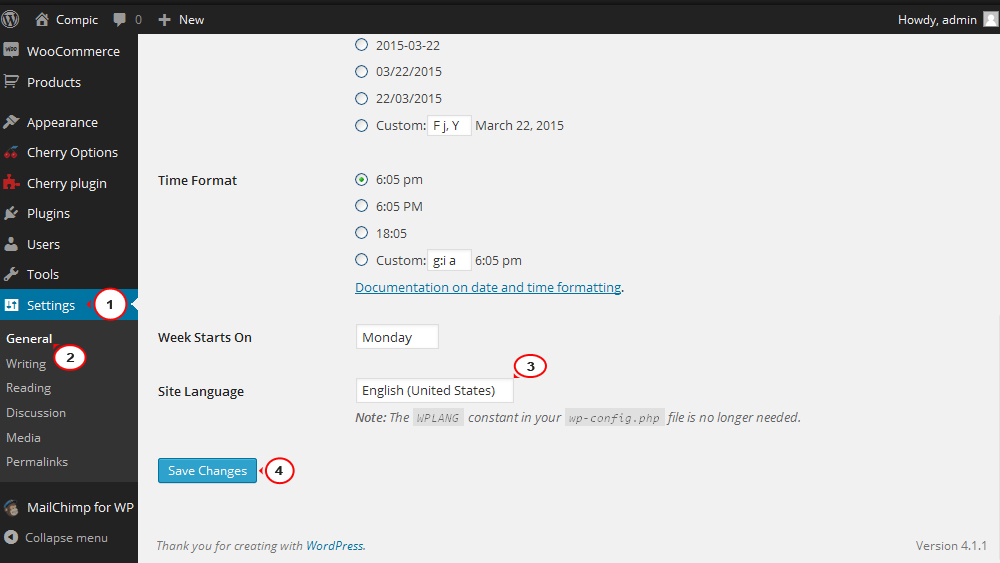
Then in your WordpPress admin panel navigate to Settings -> General menu and at the bottom (where you can see Site Language) select the language that you’ve inserted locale for. Don’t forget to save the changes:
Feel free to check the detailed tutorial: WordPress. How to change site language (starting from WordPress 4).
WooCommerce comes localization ready out of the box – all that’s needed is your translation.
Poedit is a free program that you can use to write translations for any software or web site that uses Gettext for localization – like WordPress. WordPress uses PO files for everything: WordPress core, themes and plugins.
Go to http://www.poedit.net/download.php and download Poedit for your operation system (Wndows/MAC).
Install it on your computer: double click the downloaded file and follow the steps it suggests. At the end of the installation, make sure the Open Poedit After Installation option is checked and click Finish.
WooCommerce comes with 2 POT files which can be imported into PoEdit to translate:
woocommerce.pot – contains frontend strings;
woocommerce-admin.pot – contains admin strings.
These files are broken up to make the frontend more efficient.
Connect to your FTP account or open File Manager of the Hosting Control Panel and go to wp-content/plugins/woocommerce/i18n/languages directory. You will find woocommerce.pot and woocommerce-admin.pot files there. Download them to your computer.
Each file is translated separately. To get started open installed PoEdit, navigate to File -> New from POT/PO file… menu and choose either woocommerce.pot or woocommerce-admin.pot file:

In the appeared Translation Language window select the language you are going to add translations for:

Look for the text string you want to translate in the left column called Source Text. You can hit Ctrl + F hot-keys to look for a specific string of text.
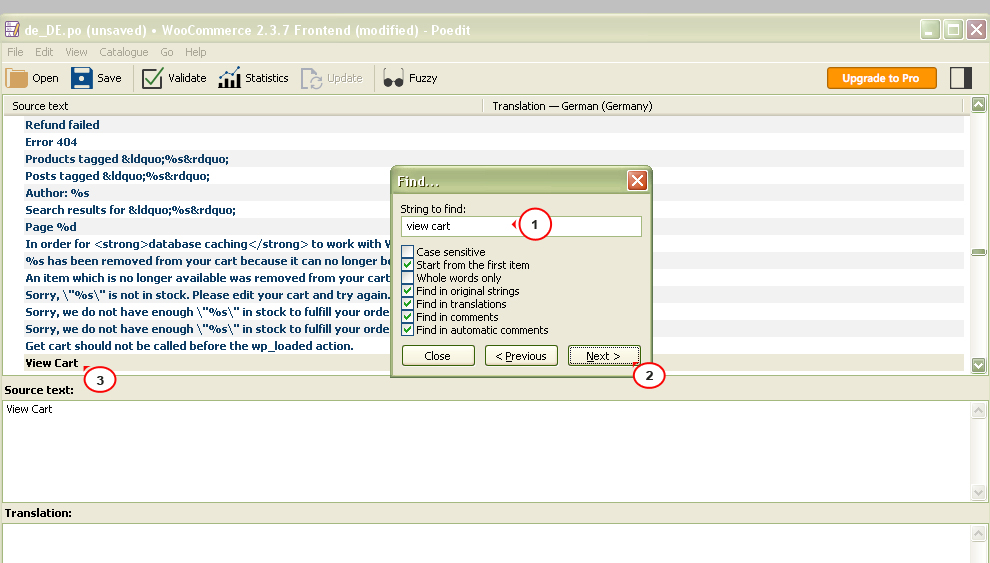
Click the text string to select. It will appear in the Source Text lower field. Change the text in the Translation bottom field:
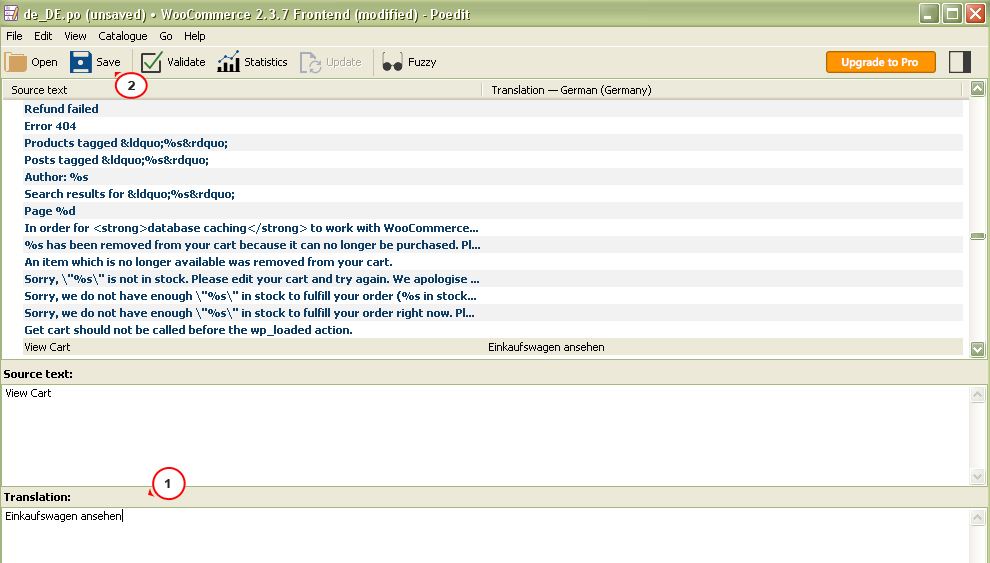
When you are done, click Save button. You will be prompted to save your .po file – name it based on what you are translating to, for example, a DE translation should be saved as woocommerce-de_DE.po or woocommerce-admin-de_DE.po respectively.
The .mo file will be generated automatically.
Upload both .po and .mo files to the wp-content/languages/woocommerce/ directory on your server using FTP software or File Manager. If you don’t have woocommerce folder under wp-content/languages directory, please create it.
NOTE: If you keep your custom translations in woocommerce/i18n/languages (WooCommerce 2.2+ version) directory, they can be lost after WooCommerce upgrading. To make them upgrade safely, instead place them in wp-content/languages/woocommerce/. All translations will be automatically added to wp-content/languages/woocommerce/ with WooCommerce 2.2+ version.
Now refresh your site and check if the text strings you’ve changed in Poedit are now updated on your site.
More information about WooCommerce Localization can be found on the WooCommerce official site.
This is the end of the tutorial. Now you know how to add theme localization in WooCommerce.
Feel free to check the detailed video tutorial below:
