


- Web templates
- E-commerce Templates
- CMS & Blog Templates
- Facebook Templates
- Website Builders
FAQs
General Tutorials
Featured templates
Featured templates
MonsterONE Subscrioption


Our Support team is ready to present a new tutorial that will become an indispensable guide for Woocommerce template installation.
WooCommerce. How to install a theme
This tutorial is going to show you how to install a WooCommerce CherryFramework 3 theme.

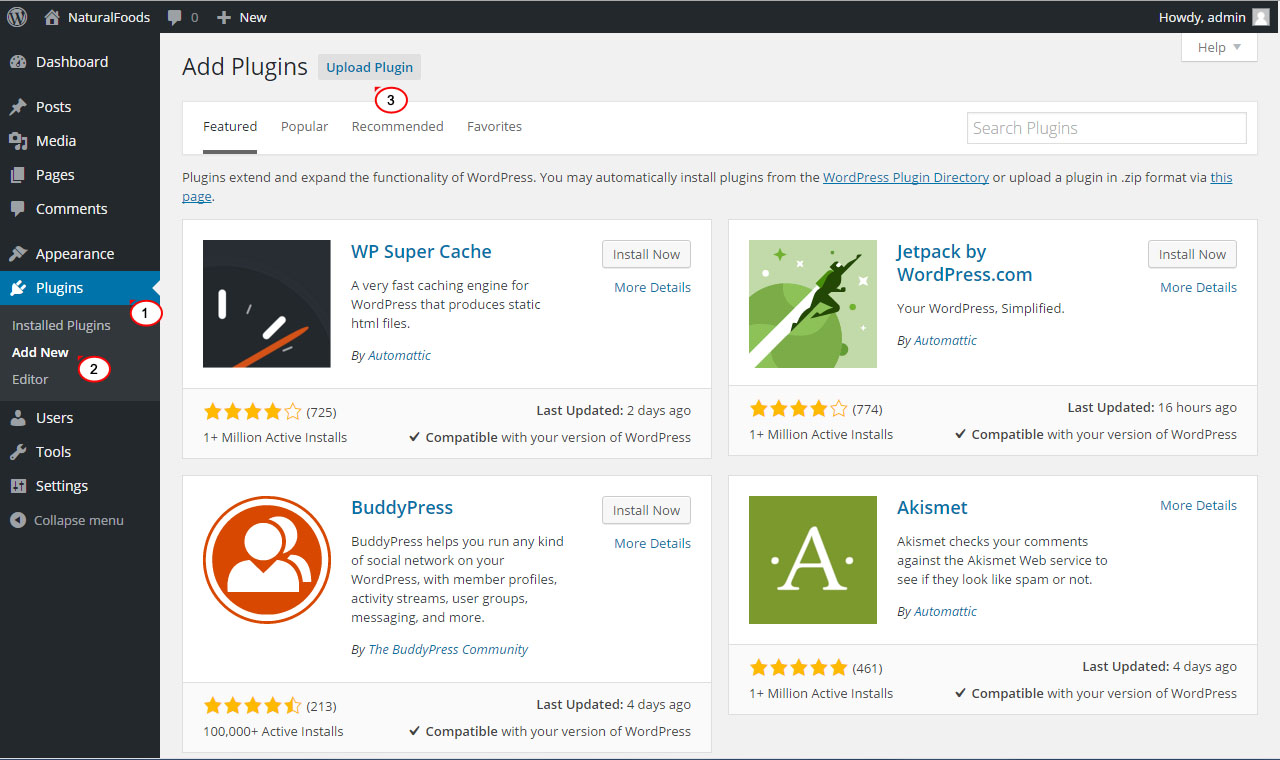
Navigate to Plugins > Add New section in your WordPress admin panel.
Click Upload Plugin button to upload your plugin file:
Browse plugin file and click Install Now.
Activate plugin after upload.
Theme installation process includes two steps:
CherryFramework installation is the first step of WooCommerce theme installation:
Log into your WordPress admin panel (add /wp-admin to your site URL in the browser address bar).
Navigate to Appearance > Themes section and click the Add New tab:
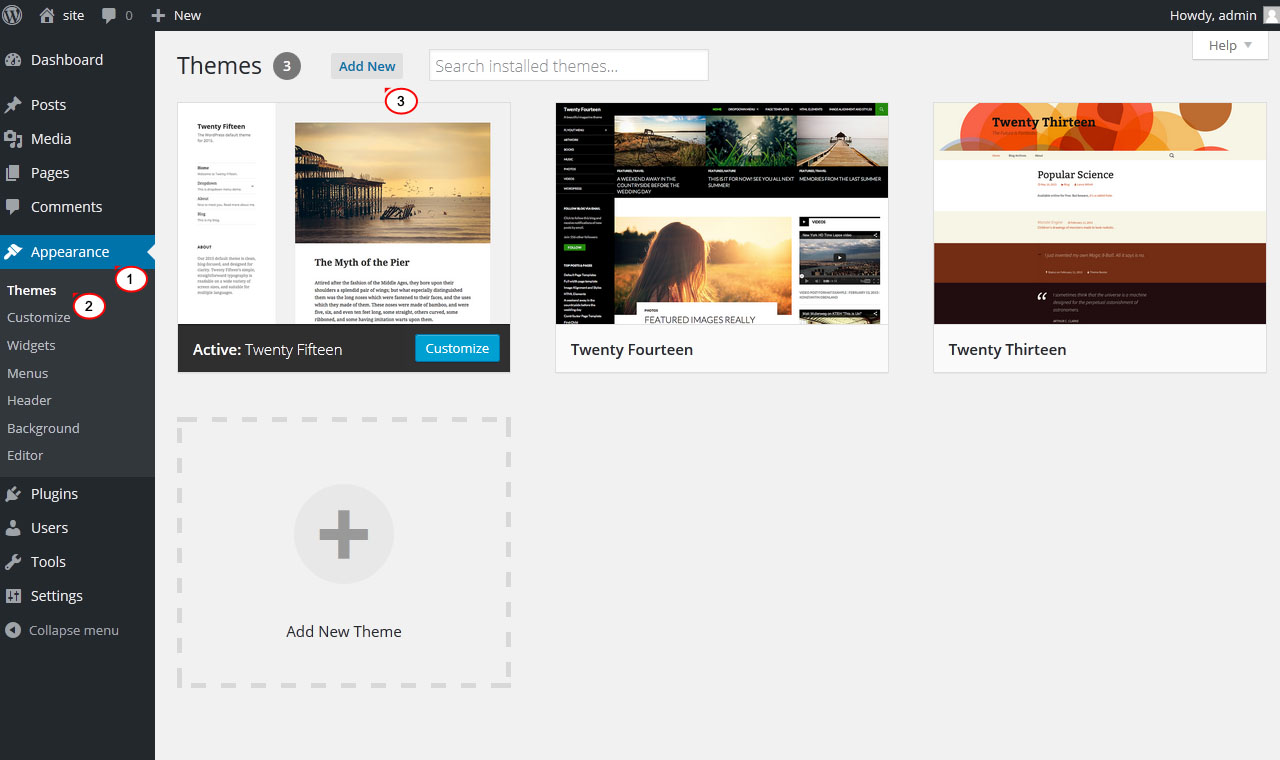
Click Upload Theme button on the next screen.
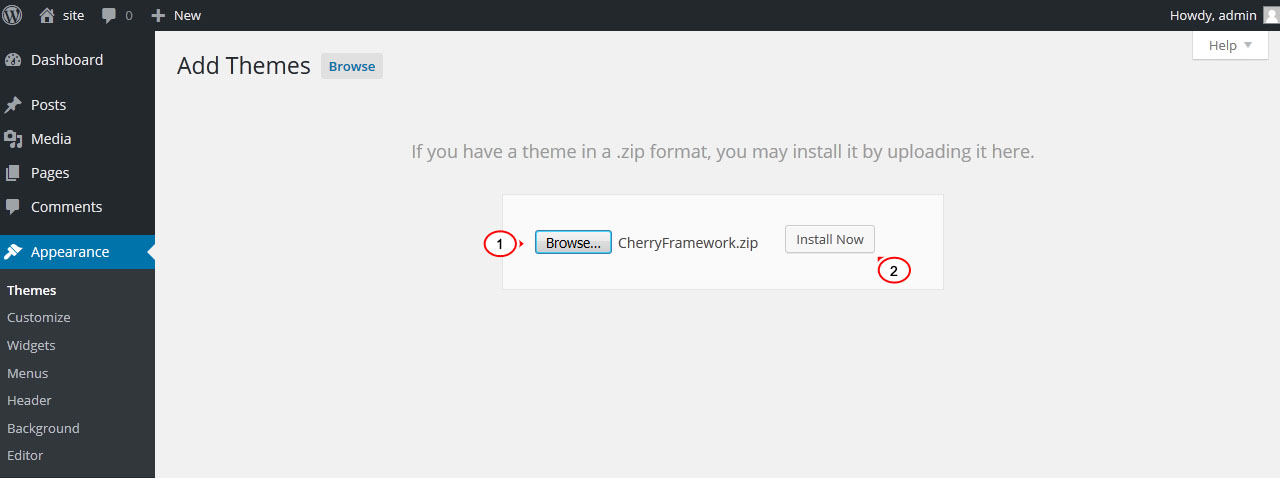
Browse CherryFramework.zip file from theme folder located in your template pack.
Click Install Now button to install uploaded theme:
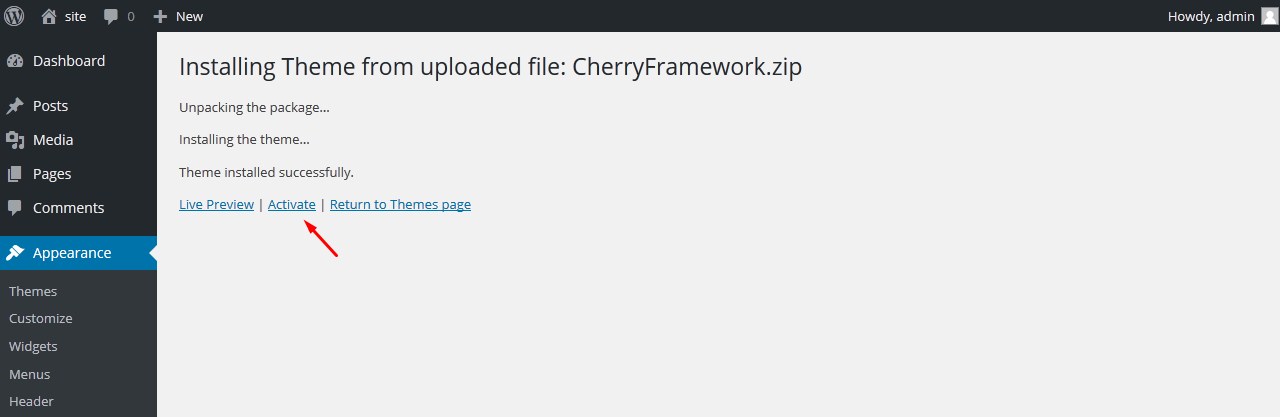
Activate Cherry theme after upload:
You have CherryFramework theme installed now. The next step is Child theme installation. The steps are the same:
Open Appearance > Themes page in your admin panel.
Click the Add New tab to upload child theme.
Click Upload Theme button.
Click the Browse button and navigate to unzipped template pack.
Search for the file called theme######.zip (######. is a number). theme######.zip file is located in theme folder.
Click on Install Now button and wait while theme installation is complete.
Click Activate when theme file is uploaded.
Theme installation is completed now. If you check your site you will notice that it does not look like demo template preview page. To make it look like demo template, you need to upload template sample data. Follow steps described on the next step to complete template installation.
Now, when theme is installed, you can proceed to sample data installation. There are two ways to install sample data. You can use one of the ways described below.
Note that there is no need to install sample data using both methods.
Sample data installation using Cherry plugin:
Open theme/sample_data folder in your template pack. Select all files you see there.
Navigate to Cherry Plugins > Import Content section in your WordPress admin panel.
Drop files from theme/sample_data folder to the window you see in your admin panel now:
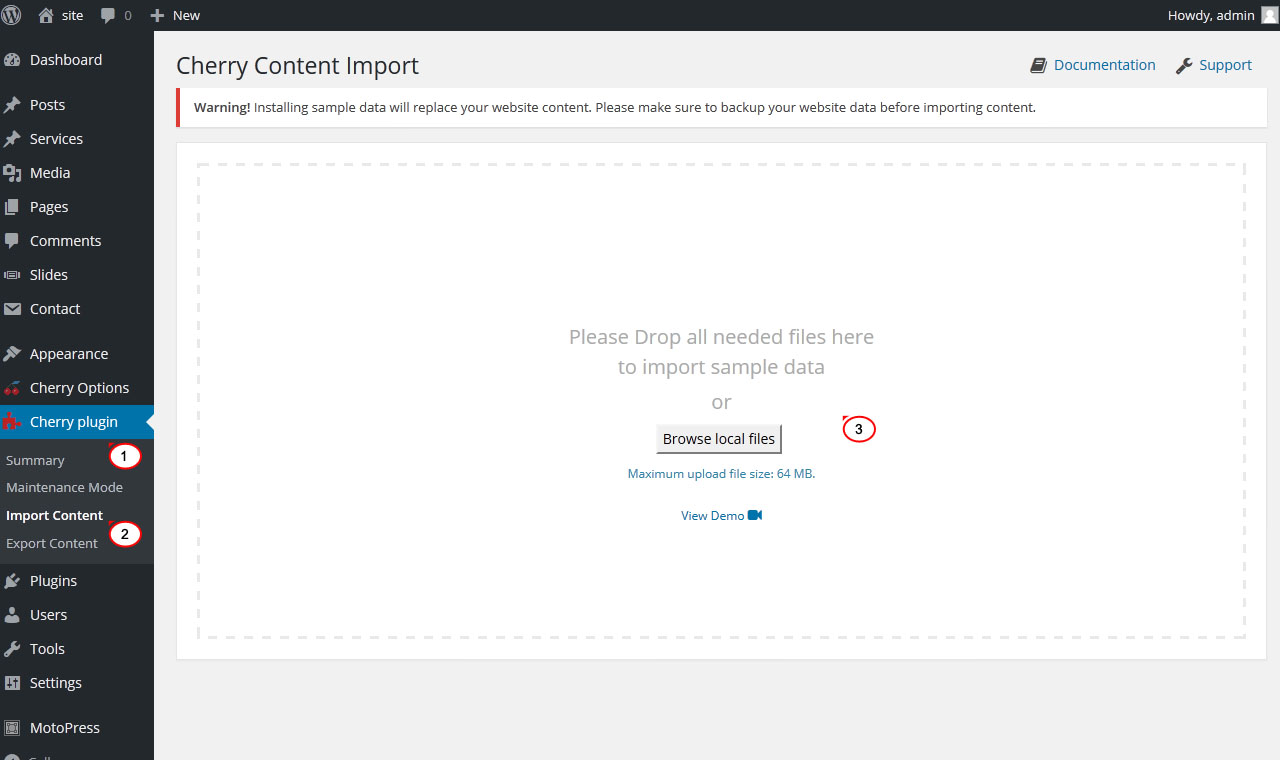
Wait while files are uploaded.
When files are uploaded click Install Content button to finish sample data installation.
Wait while sample data is installed and check your site.
Manual sample data installation:
Open the theme\manual_install folder of your template package.
Upload the uploads folder to the wp-content directory of your WordPress installation. You can upload files using FTP or hosting Cpanel.
Open theme######.sql file (###### is the template number) in any code editor on your computer (we recommend using Notepad++ or Dreamweaver) and use the search function (Hot key CTRL + F on Windows or Command + F on a Mac) to find all instances of your_website_url_here and replace it with your website address (URL). Make sure there is no slash at the end of site URL (for example http://yoursite.com).
Locate PhpMyAdmin tool in your hosting Cpanel. Open database used for your site in PhpMyAdmin.
Click on the Import tab.
Browse theme######.sql file and click Go.
Wait while .sql file is imported and check your site.
You can check our video tutorial on importing sample data manually for more details.
Feel free to check the detailed video tutorial below:
