


- Web templates
- E-commerce Templates
- CMS & Blog Templates
- Facebook Templates
- Website Builders
FAQs
General Tutorials
Featured templates
MonsterONE Subscrioption


In this tutorial you will learn the way to embed a MailChimp form to the required place on the page/post in Cherry Framework 4 based templates.
CherryFramework 4. How to embed a MailChimp form to the required place on the page/post
There are 3 methods to insert your MailChimp form into a page/post:
NOTE: You should have MailChimp plugin set up in your admin panel in order to access its settings and forms.
.jpg)
In your WordPress admin panel navigate to the MailChimp for WP -> Forms menu. Here you can edit your form styles, add new fields and select lists of subscribers:

When the form is configured, copy shortcode and paste it in the required place of a post or page Visual content editor.
Don’t forget to save the changes. Then you can preview the changes on the page/post.
In your WordPress admin panel navigate to Appearance -> Widgets menu.
Drag & Drop MailChimp Sign-Up Form widget from the Available Widgets section to the required widgets area:
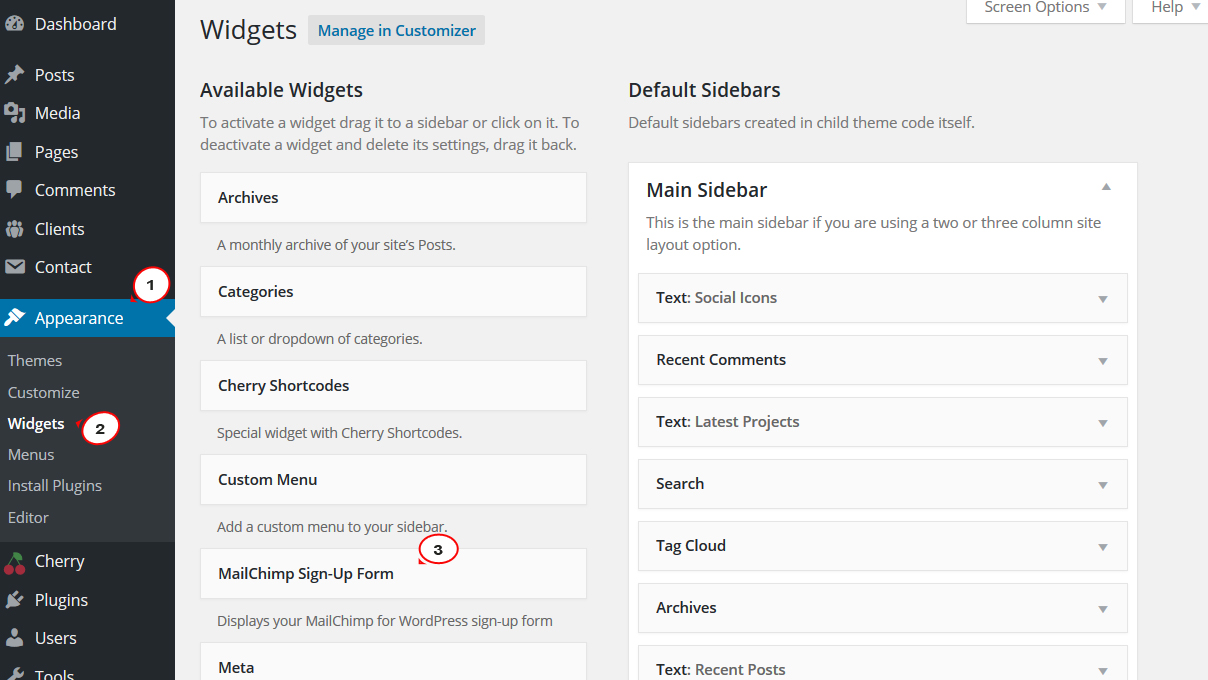
Change the widget title if you need it, and save the change. Then open the page/post that uses the selected widget area to preview the changes.
Log into your MailChimp account, open Lists menu and select the required list of subscribers:
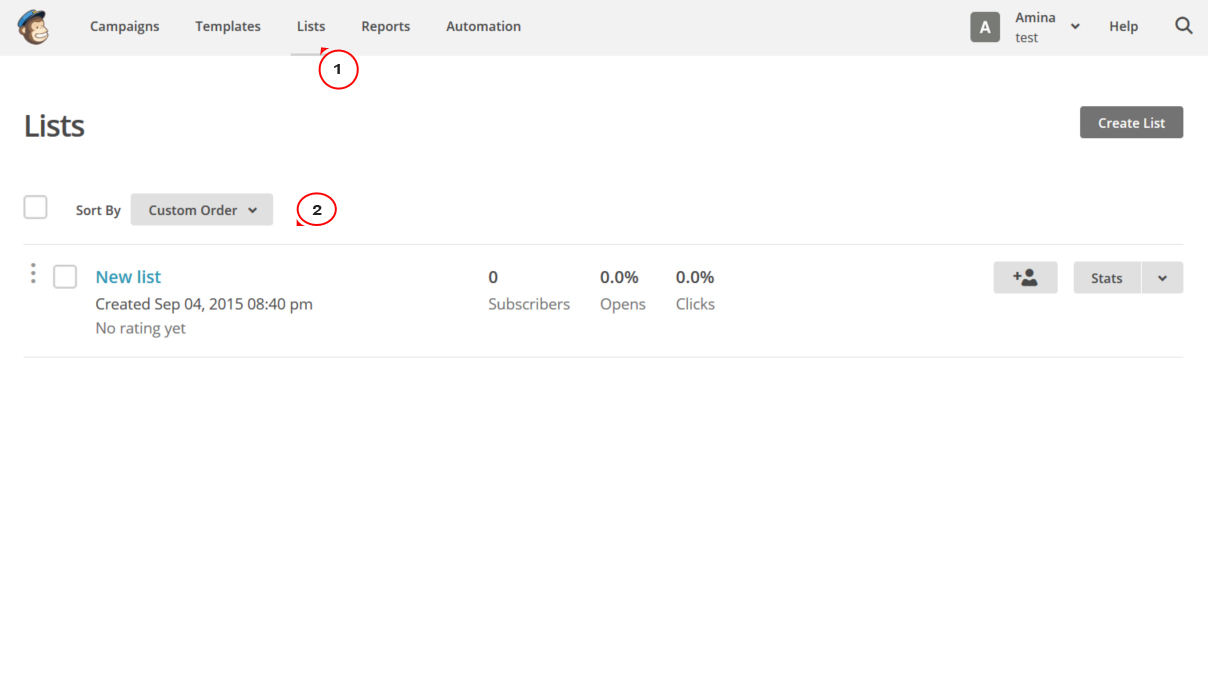
Then click the Signup forms tab and select Embedded forms from the list:

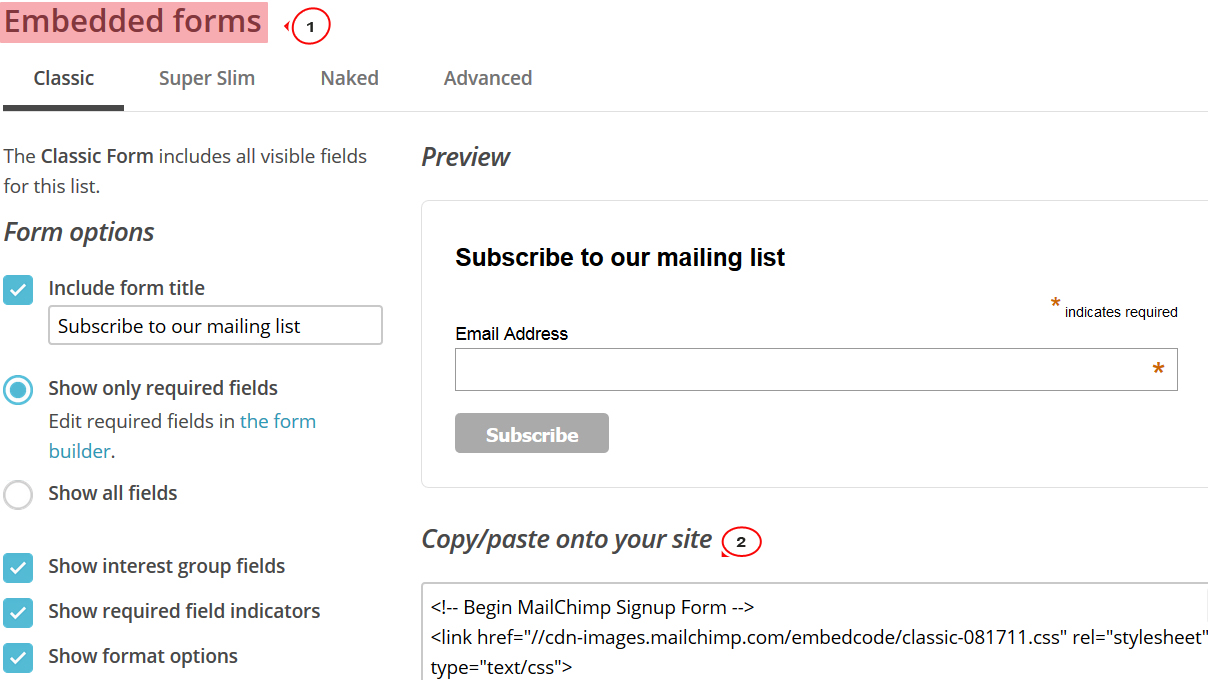
Here you can edit your form styles, add new fields and modify other form settings.
When the form is configured, highlight all the code in the Copy/paste onto your site field and use your preferred method to copy it to your clipboard. Paste the embedded form code into the required place of a post or page Text content editor:
NOTE: Make sure to switch to the Text editor in a page/post settings before pasting the MailChimp form code, otherwise the form will not be displayed and work properly:
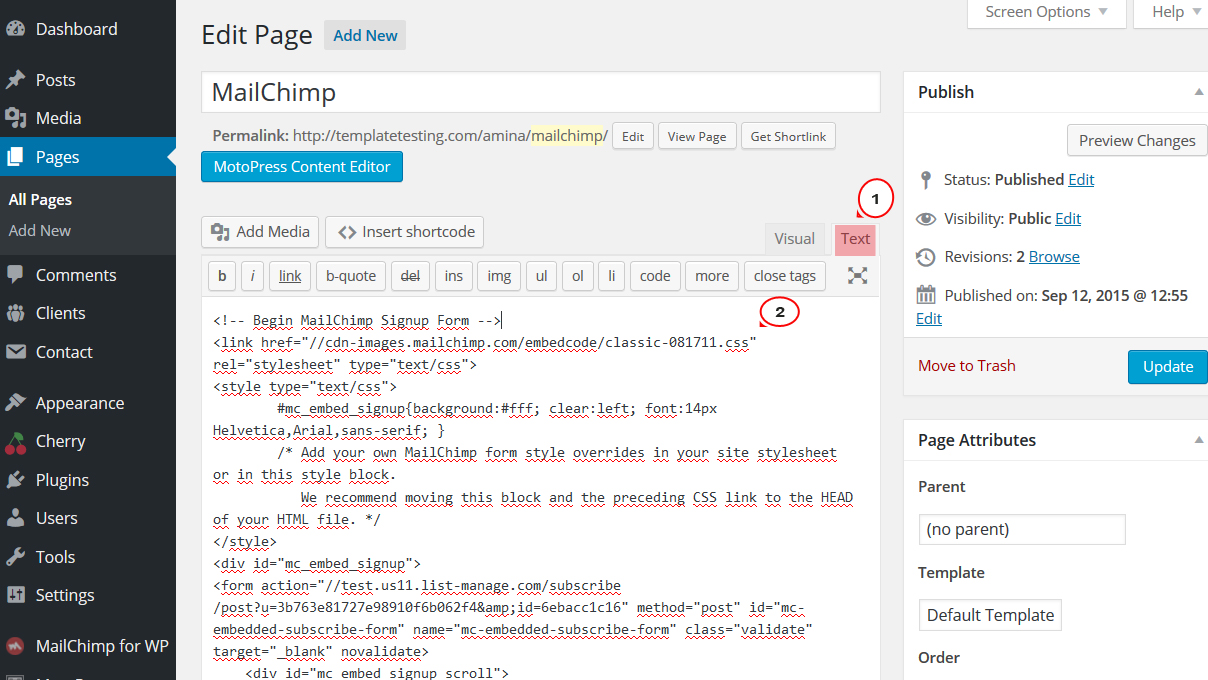
Don’t forget to save the changes. Then you can preview the changes on the page/post.
More information about MailChimp configuration you will find at the following link.
This is the end of the tutorial. Now you know how to embed a MailChimp form to the required place on the page/post in Cherry Framework 4 based templates. Feel free to check the detailed video tutorial below:
CherryFramework 4. How to embed a MailChimp form to the required place on the page/post
