


- Web templates
- E-commerce Templates
- CMS & Blog Templates
- Facebook Templates
- Website Builders
FAQs
General Tutorials
Featured templates
MonsterONE Subscrioption


In this tutorial you will learn how to work with Gallery component in Joomla 3.x.
Joomla 3.x.How to work with Gallery component
If you have installed your Joomla website using fullpackage , JoomGallery component is already installed, so you can reach it at Components -> JoomGallery in the top menu. If you don’t see the component in this dropdown, you should perform these steps to install it:
Go to Extensions -> Extension manager.
Press Browse button in the Upload Package File section and select component file from unzipped sources folder that is included to your template package. In our case it is com_joomgallery_3_1_1_stable_build_20140208.zip file.
Refresh your site, component is there.
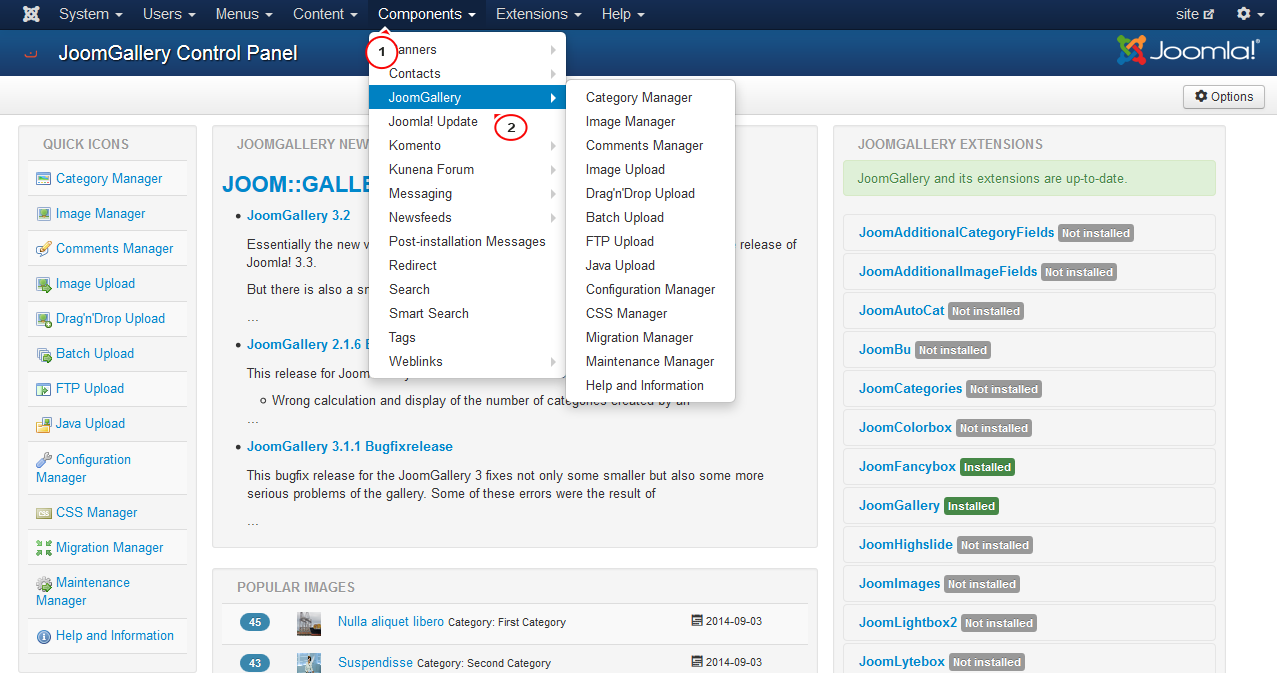
Now you can start working with component directly. Go to Components -> JoomGallery -> Category Manager.
Press on New button in the top left corner:
Input category Title and Description and Save settings. You can also specify Meta Description for this category and set access restrictions if needed.
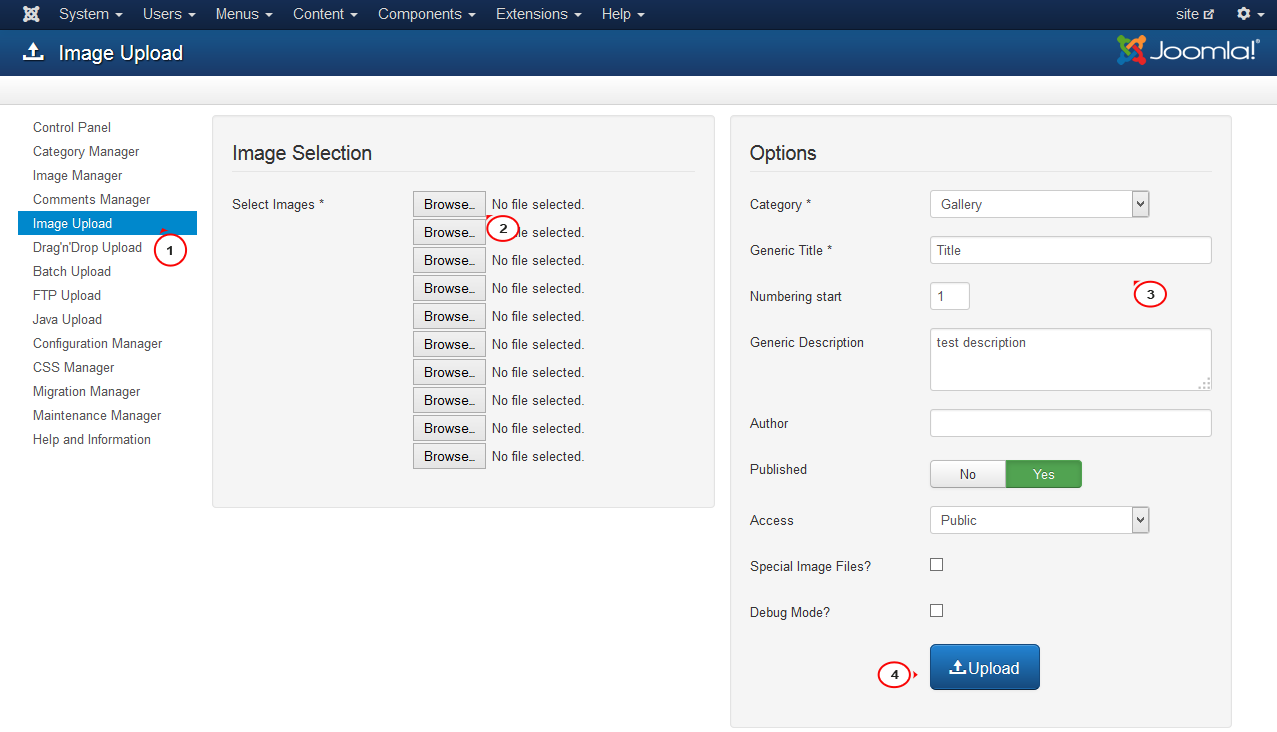
Choose the most convenient way for image uploading. You may use Image Upload, Drag’n’Drop Upload, Batch Upload, FTP Upload or Java Upload. Let’s try Image Upload.
Press Browse button in the Image Selection section and select media files on your computer.
Specify Category for these images (you can upload bunch of images for each category this way), Generic Title for these images (for example, if you upload 3 files with generic title “test”, they will appear in your Image manager as test_1, test_2 and test_3).
Set Numbering start for your images, specify Generic Description and additional information if needed and click on Upload button at the bottom:
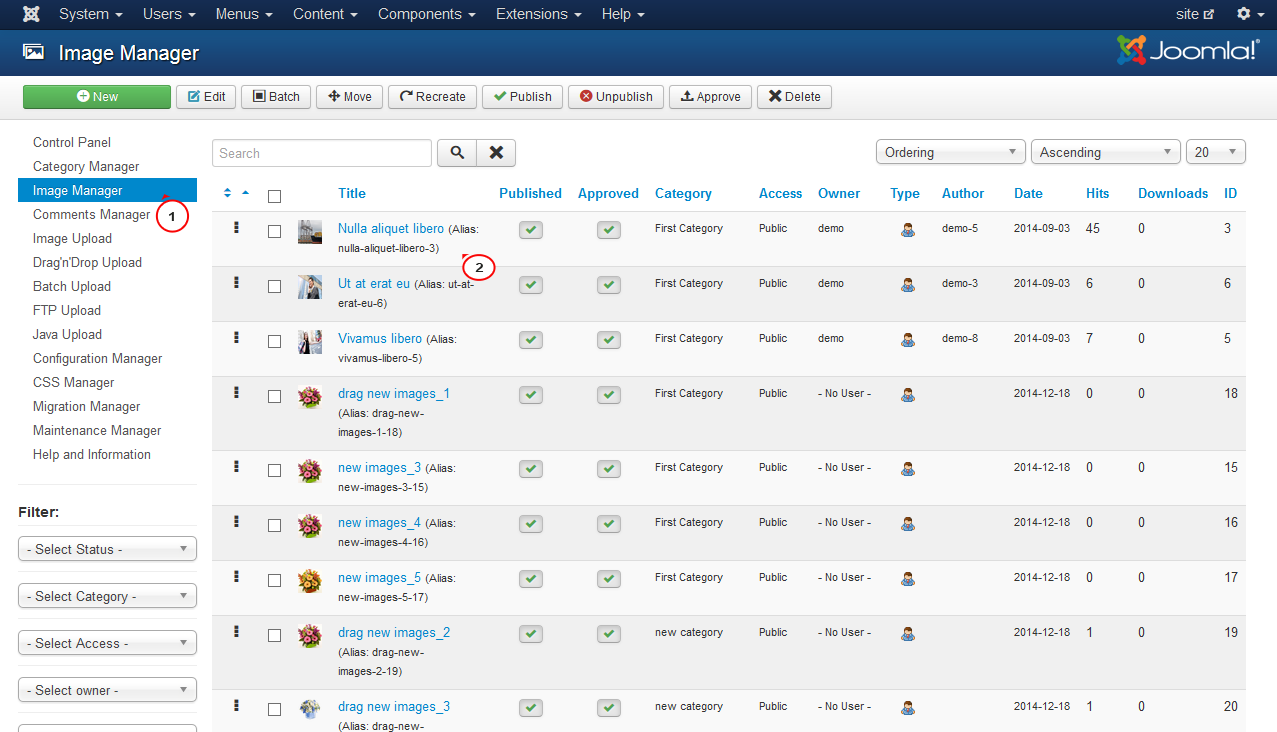
Your images will appear at Components -> JoomGallery -> Image Manager section. Every image is a separate gallery item.
Go to Components -> JoomGallery -> Image Manager section. Here you may find list of images that were already uploaded, so that you can edit the existing ones:
In case you need to modify them, you should perform the following:
Open any item from the list.
Change Title, Category, Description, Hits, etc. in the Image tab. Scroll down to check the Thumbnail preview and Image preview:

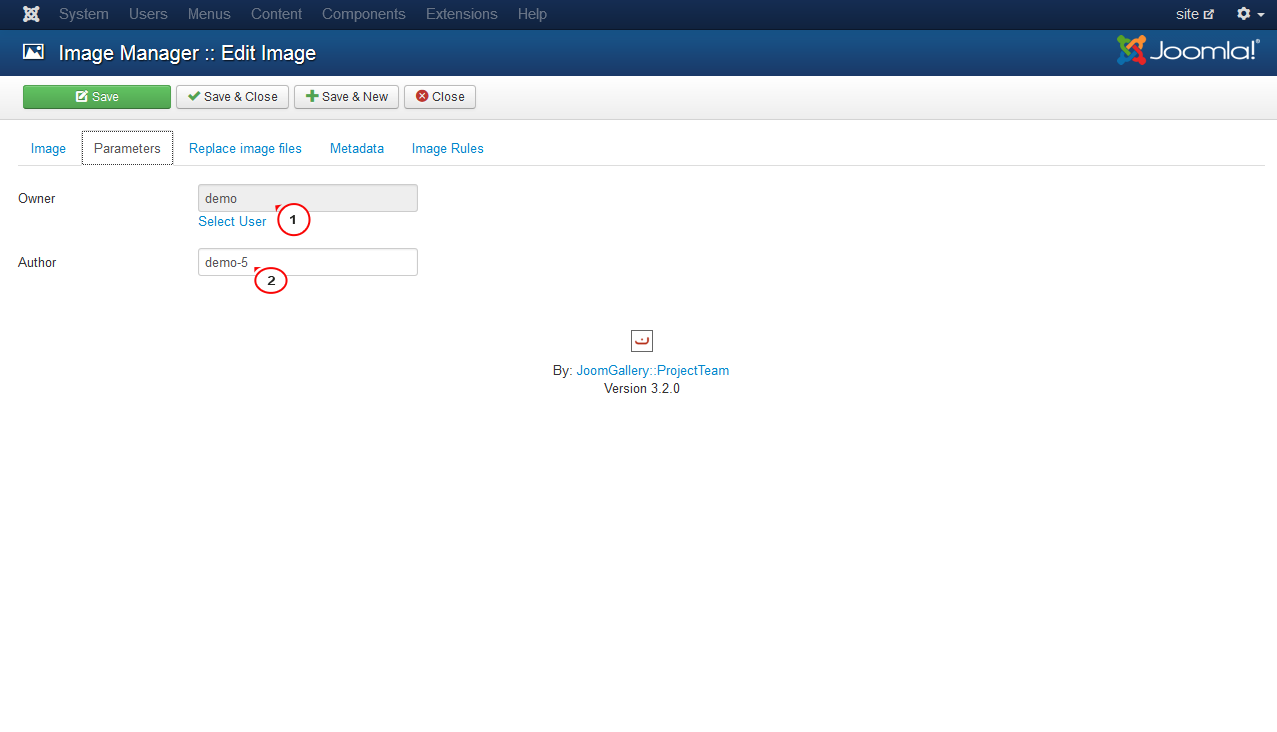
Go to Parameters tab to change Owner and Author for this gallery item.
Navigate to Replace image files tab to change Thumbnail, Detail image and Original image (upload new images using Browse button).
You can also change Description and Keywords at Metadata tab and manage permissions at Permissions tab.
Go to Menus -> Main menu. Press on New button in top left corner:
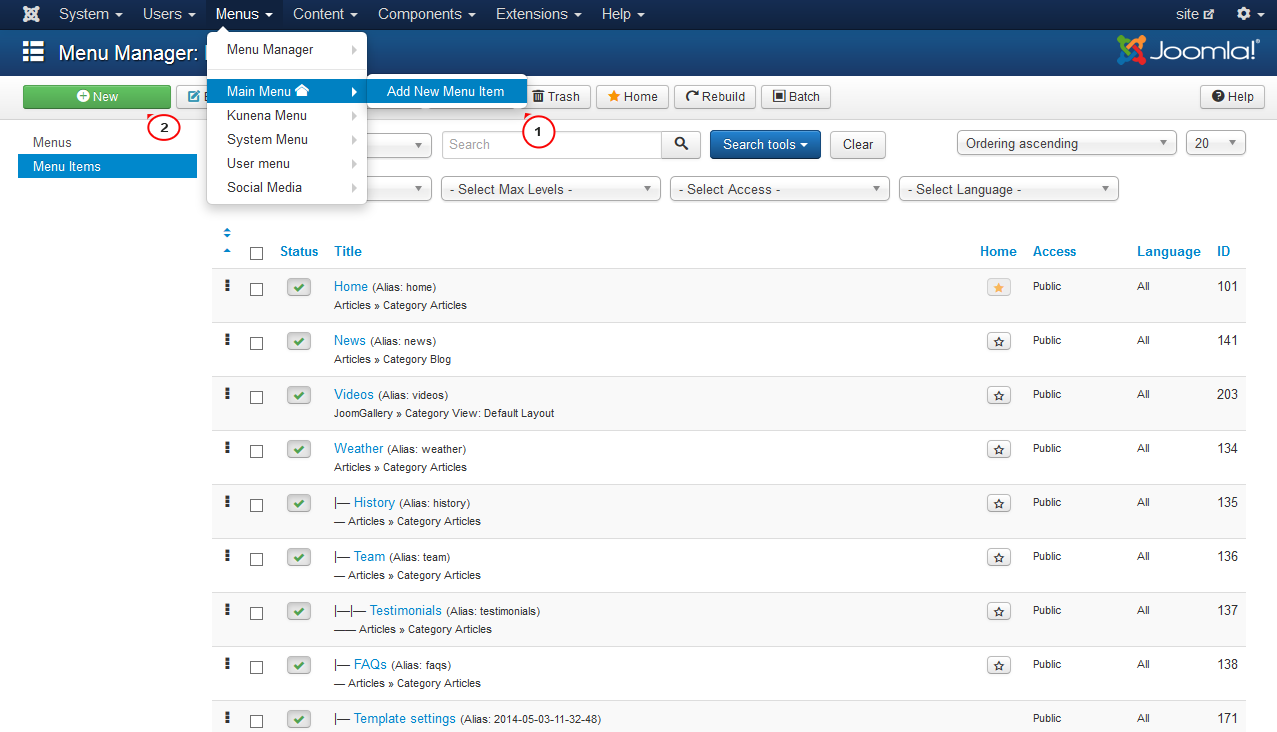
Enter Menu item Title.
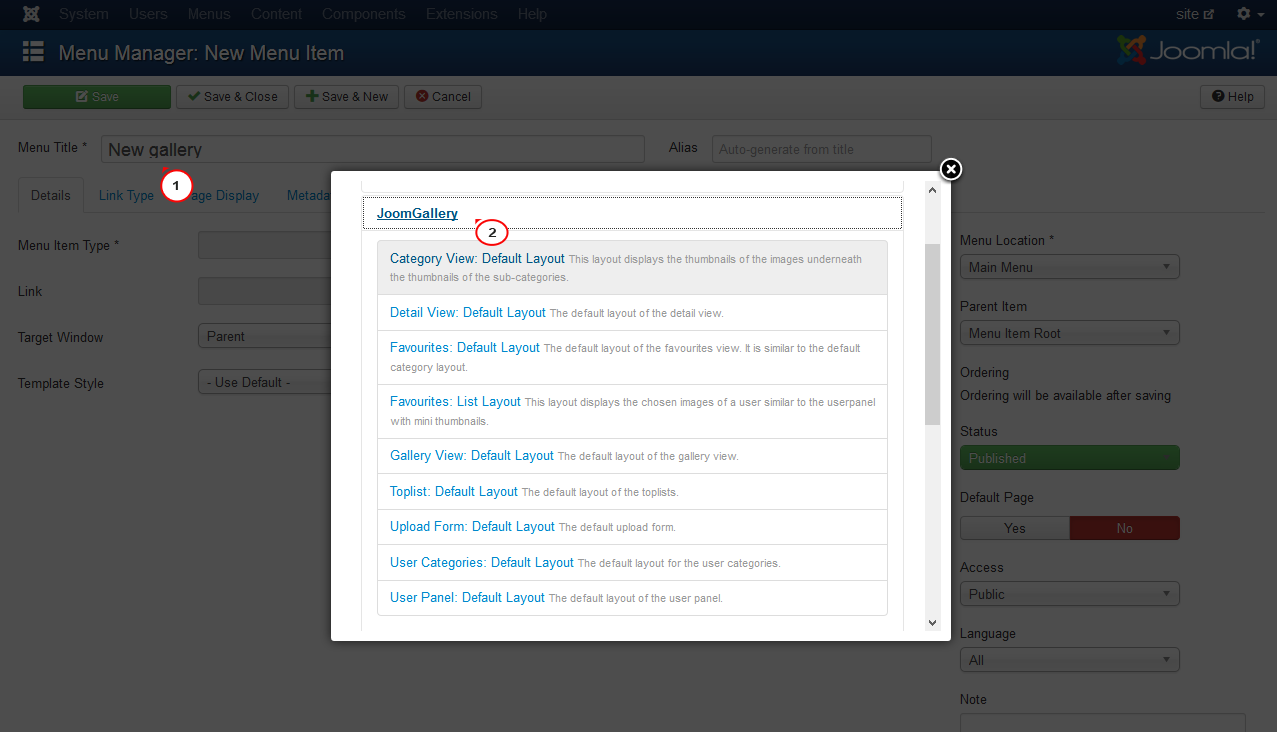
Press Select near Menu Item Type and choose JoomGallery.
Choose one of variants available that meets your needs best:
Category View: Default Layout. This layout displays the thumbnails of the images underneath the thumbnails of the sub-categories.
Detail View: Default Layout. The default layout of the detail view.
Favourites: Default Layout. The default layout of the favourites view. It is similar to the default category layout.
Favourites: List Layout. This layout displays the chosen images of a user similar to the userpanel with mini thumbnails.
Gallery View: Default. Layout The default layout of the gallery view.
Toplist: Default Layout. The default layout of the toplists.
Upload Form: Default Layout. The default upload form.
User Categories: Default Layout. The default layout for the user categories.
User Panel: Default Layout. The default layout of the user panel:
Let’s select Gallery View: Default Layout as an example. Specify the needed category in the dropdown list.
Press Save&Close button, visit your site and refresh it, new Gallery menu button was added.
Thanks for reading this article! Feel free to check detailed video tutorial below:
Joomla 3.x.How to work with Gallery component
.jpg)
