


- Web templates
- E-commerce Templates
- CMS & Blog Templates
- Facebook Templates
- Website Builders
FAQs
General Tutorials
Featured templates
MonsterONE Subscrioption


This tutorial will guide you through adding Google Analytics code to Monstroid templates.
Sign into your Google Analytics account.
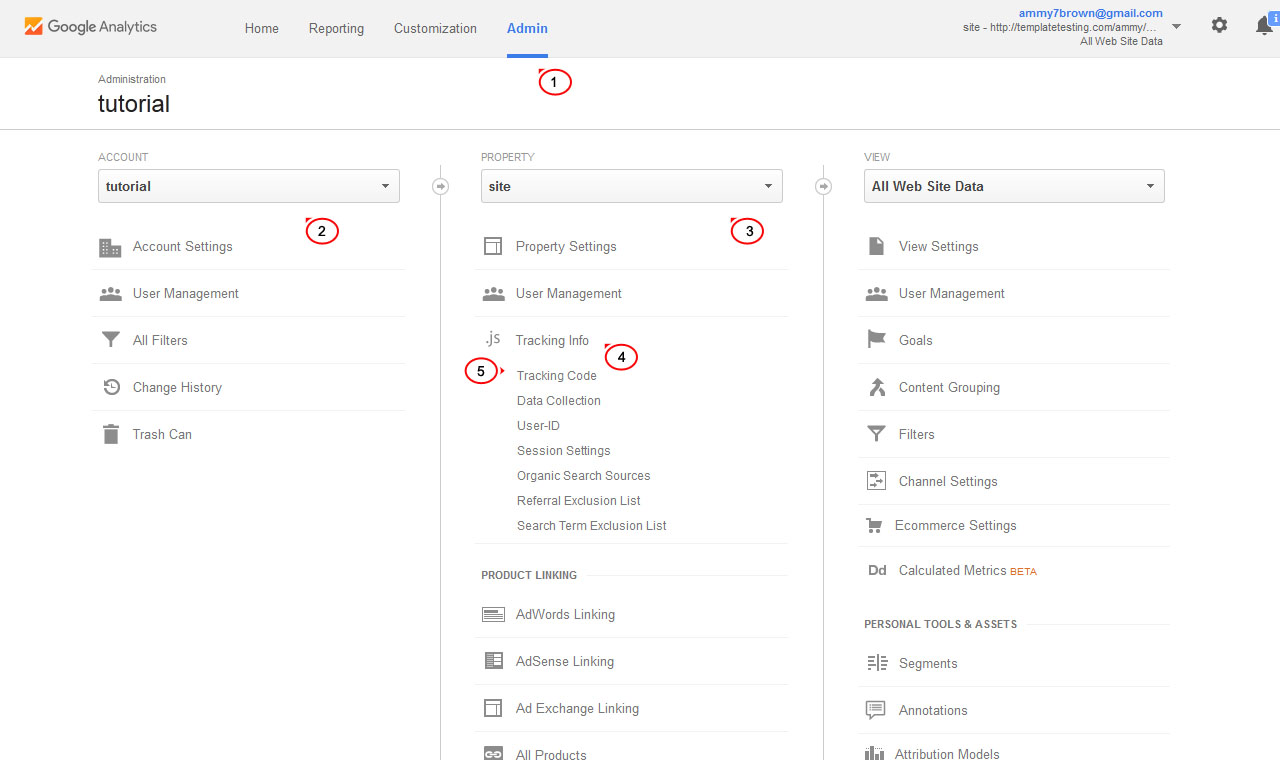
Click the Admin tab.
Select Account from the Account column.
Select Property on the next column.
Under Property select Tracking Info > Tracking Code option:
Copy Tracking code:
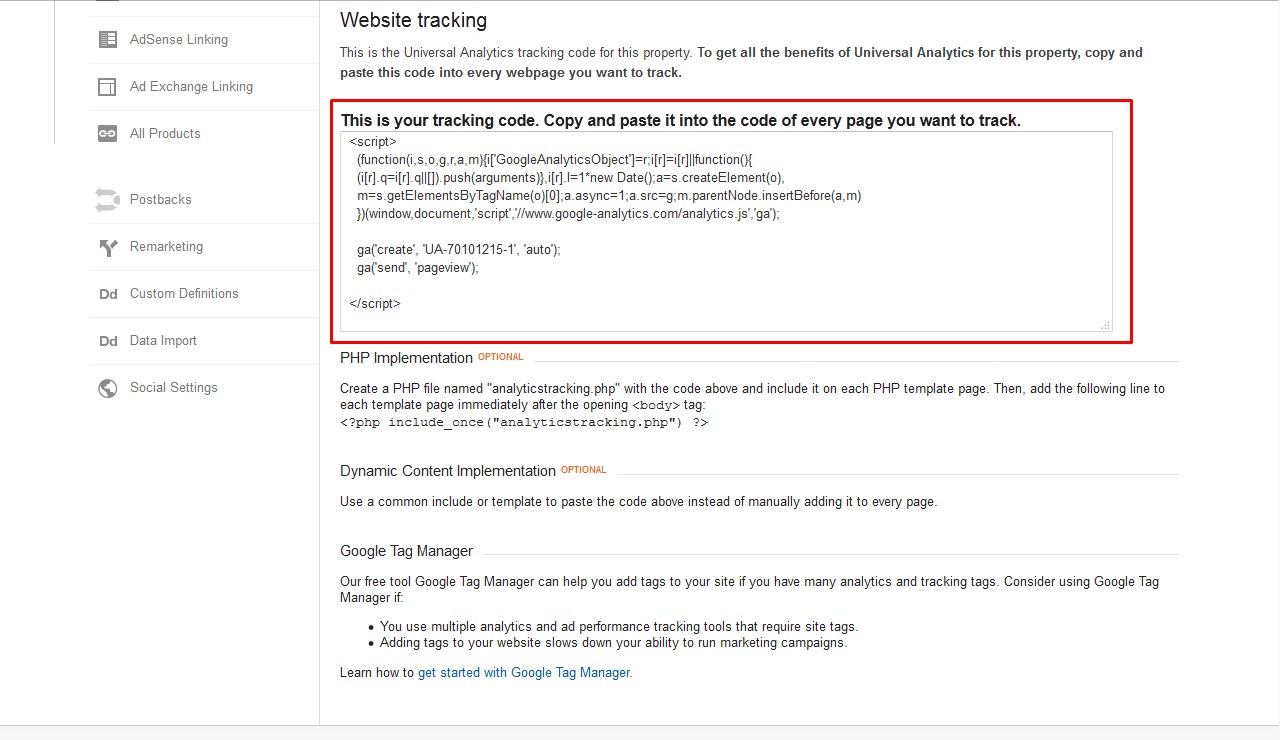
.jpg)
Log into your WordPress admin panel.
Navigate to Cherry > Options section:

Enter you Tracking code to the Google Analytics code field under General tab:
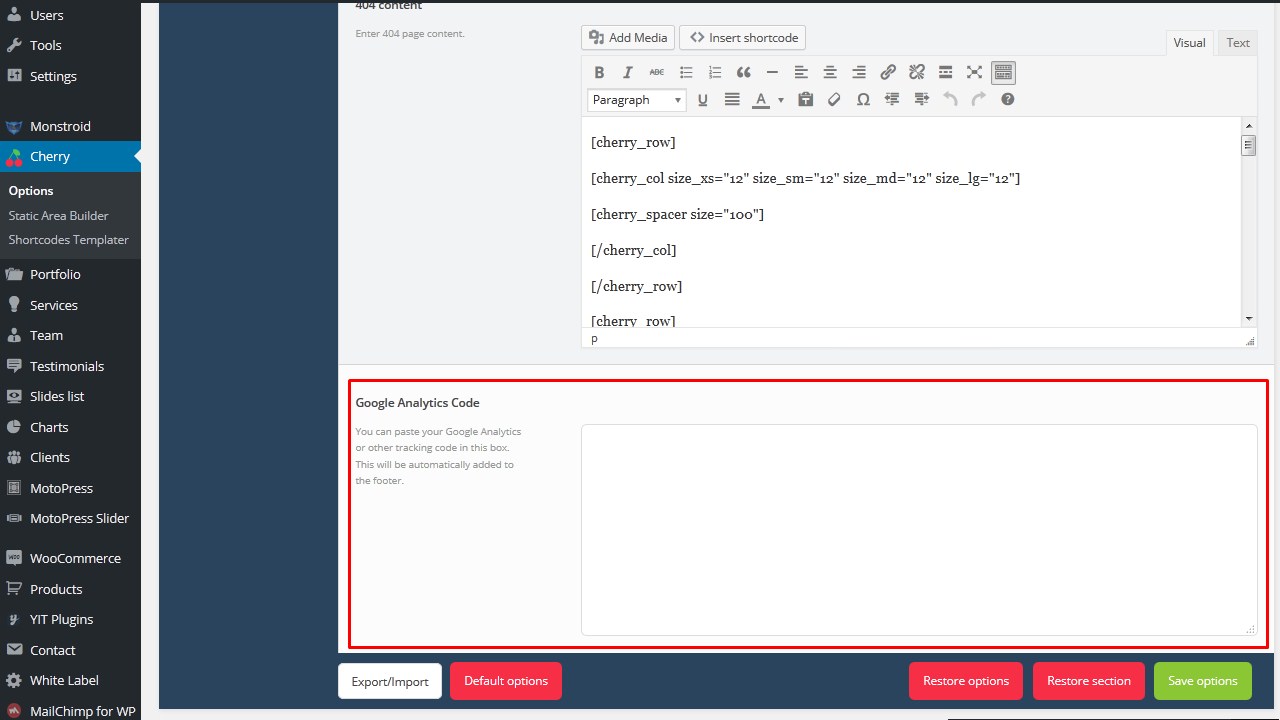
Click Save options.
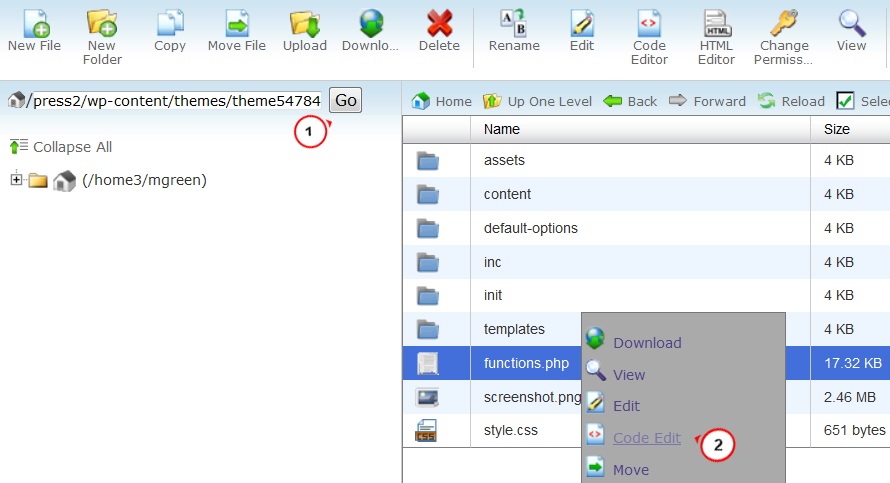
Note that Google Analytics block was added into Cherry Options starting from the template 55966 +. In case your template number is lower than 55966, follow the steps below:
Open ‘wp-content/themes/themeXXXXX/functions.php’ file:
Add the following code to the very end of the file:
add_filter( 'cherry_general_options_list', 'themeXXXX_new_settings' );
  function themeXXXX_new_settings( $options ) {
  $new_options = array(
  'google_analytics' => array(
  'type'        => 'textarea',
  'title'       => __( 'Google Analytics Code', 'themeXXXX' ),
  'description' => __( 'You can paste your Google Analytics or other tracking code in this box. This will be automatically added to the footer.', 'themeXXXX' ),
  'value'       => '',
  )
  );
  $options = array_merge( $options, $new_options );
 return $options;
  }
add_filter( 'wp_footer', 'themeXXXX_google_analytics', 9999 );
  function themeXXXX_google_analytics () {
  if ( cherry_get_option( 'google_analytics' ) ) {
  echo '<script>'.cherry_get_option( 'google_analytics' ).'</script>';
  }
  }
Save the changes.
Clear your browser cache and navigate to Cherry Options > General tab. Google Analytics block should appear at the very bottom of the page.
Enter you Tracking code to the Google Analytics code field under General tab:
Click Save options.
Feel free to check the detailed video tutorial below:
Monstroid. How to add Google Analytics code