


- Web templates
- E-commerce Templates
- CMS & Blog Templates
- Facebook Templates
- Website Builders
FAQs
General Tutorials
Featured templates
MonsterONE Subscrioption


This tutorial is going to show you how to manage Layered Navigation in PrestaShop 1.6.x.
PrestaShop 1.6.x. How to manage the “Layered Navigation” module
Layered navigation block module serves like a product filter on category pages. That allows your customers to select the products they look for quickly. It can be only displayed on products list pages.
Log into your admin panel.
In order to manage the module, you should go to Modules -> Modules and search for the Layered Navigation module. You can enter the module technical name blocklayered in search input to find it, if your admin panel is not in English:
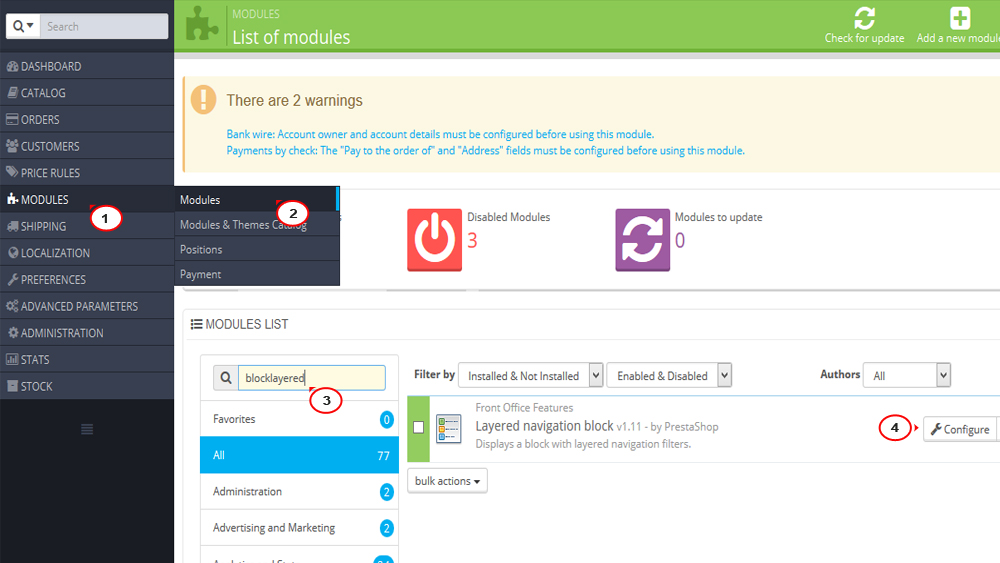
If the module is not installed, click Install button. When the module installed, press Configure.
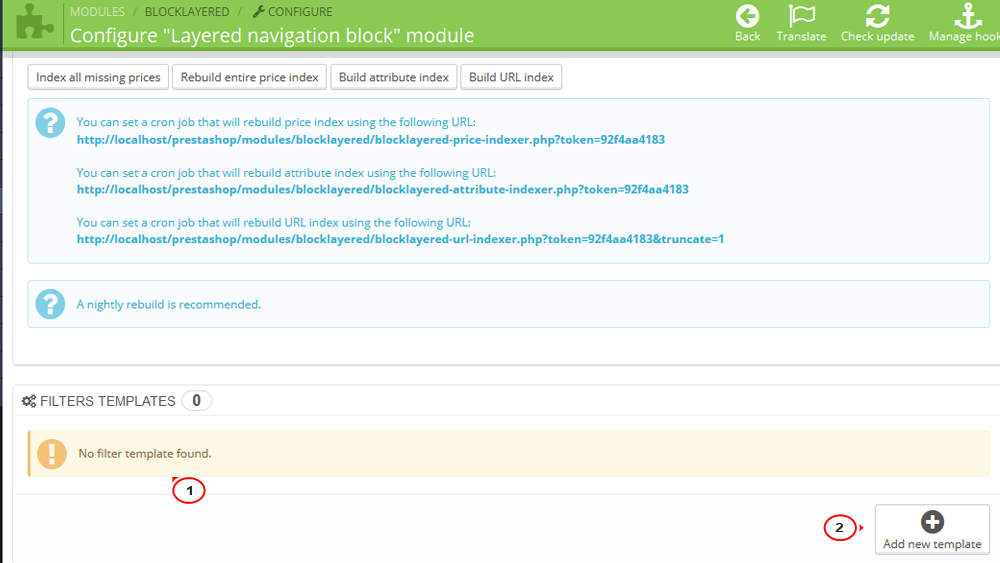
You can use the existing Filter template if you have it or add a new one. We are going to build a new filter template.
Click Add new template button:
Enter the new filter title into Template name field:
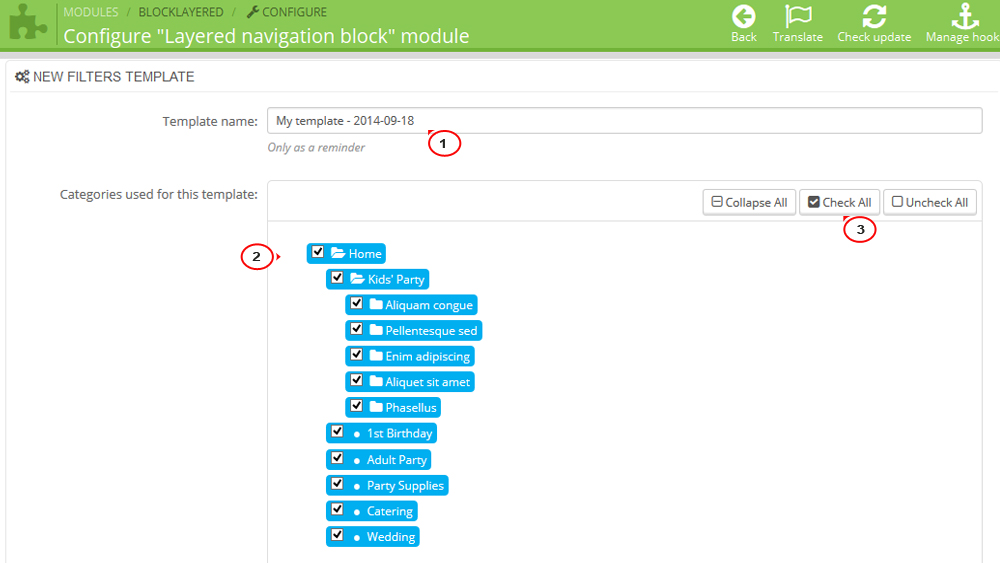
In the Categories used for this template section, you can set the categories for which the filter will appear. In our case, the filter template will be applied to all categories.
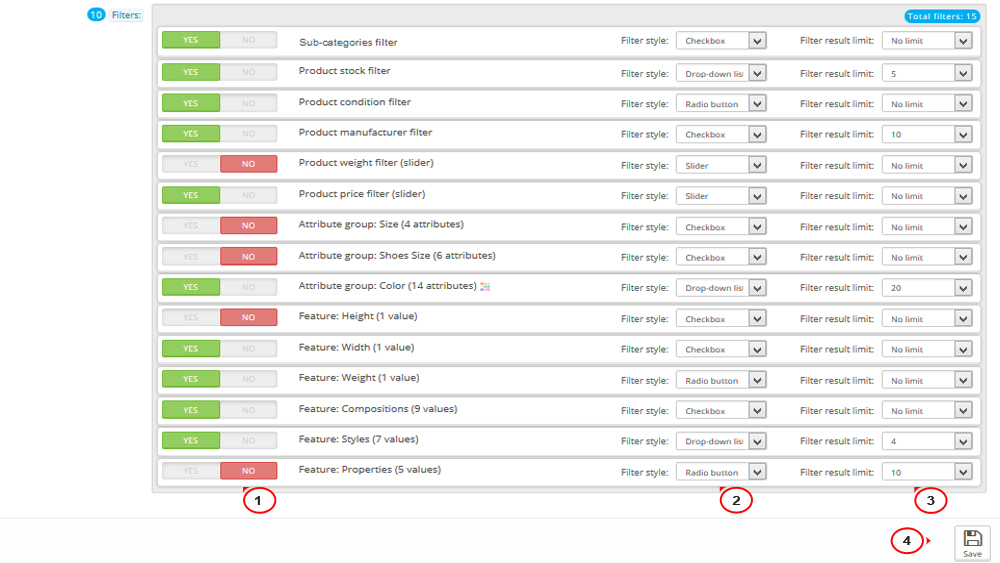
Select the appropriate filter in Filters section and it will be added to your filter template. Each filter has corresponding options. Please select the suitable style to each filter: Checkbox, Radio button or Drop-down list. You can also set the limit value – the limit of items. For example, you may set the limit for sub categories that will appear in your Layered Navigation.
Click Save button to apply the filter template:
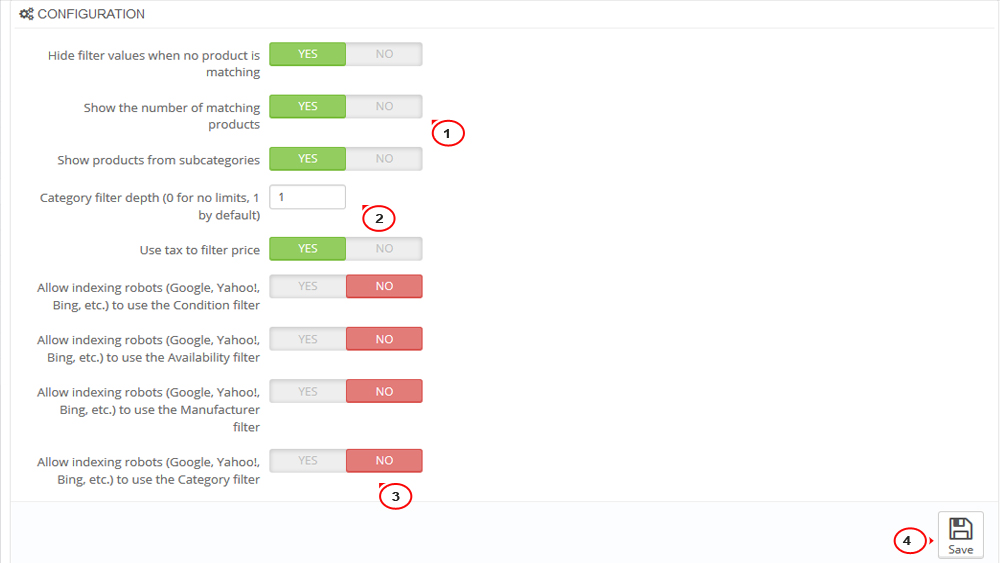
In the Configuration section, you can set module configuration. Here you can decide whether to hide filter values or not, when no product is matching, show the number of matching products, show products from subcategories, use tax to filter price, allow indexing robots and define category filter depth.
NOTE: Robots.txt is a text (not html) file you put on your site to tell search engines which pages you would like them not to visit.
Save changes after all modifications are done:
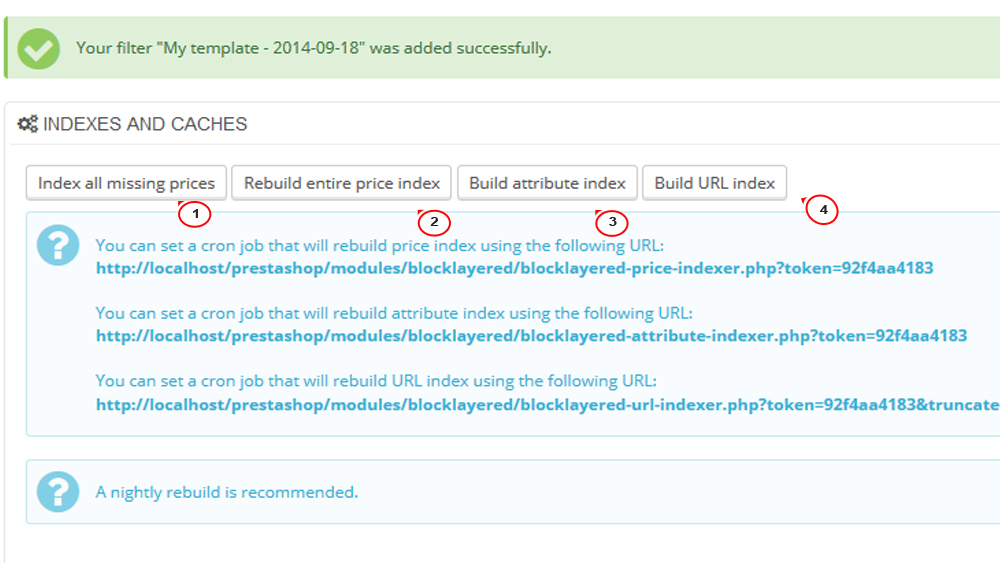
Scroll up and re-build all indexes:
You need to place the module in the appropriate position in case it does not appear on your PrestaShop. Go to Modules -> Positions in order to check and set the module positions. Please find the information on how to manage module positions in the PrestaShop 1.6.x. How to manage modules positions tutorial.
Refresh the page and check how your site looks. We have added navigation filters successfully:
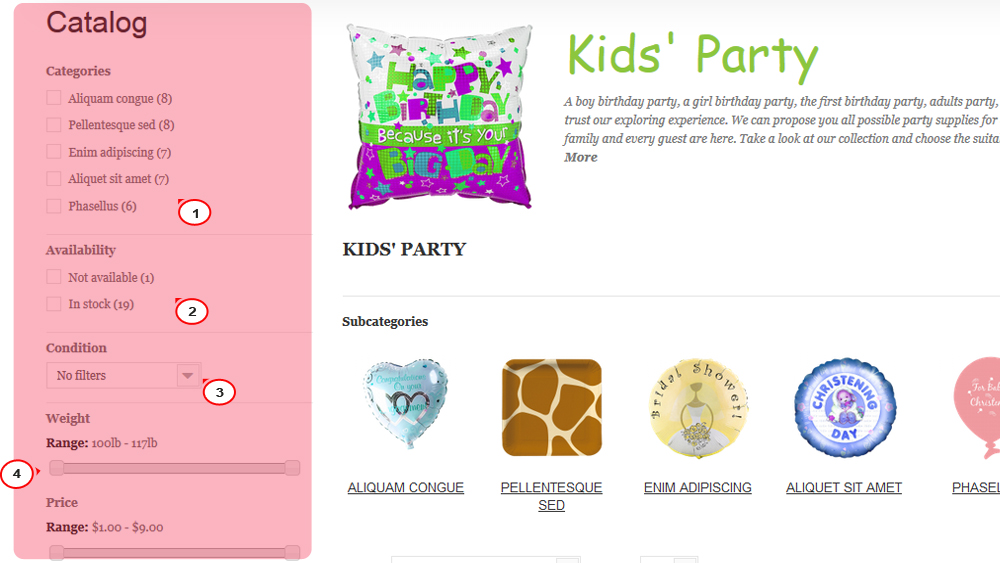
That is the end of the tutorial. Now you know how to manage Layered navigation in PrestaShop 1.6.x templates.
Feel free to check the detailed video tutorial below:
PrestaShop 1.6.x. How to manage the “Layered Navigation” module
