Introduction What can be found in this package, and what can it be used for
Thank you for purchasing a website template from our company. This manual will show you how to work with your template, how to edit it and make it a "live" website.
All pages content is made with HTML, and dynamic animation is made with JavaScript.
Unzipping Template Package
After unzipping the template package you will find 3 folders: "documentation", "screenshots" and "site". You can also see a zip archive called "sources_############.zip" that you need to unzip.
The sources package contains all source files for the template. The package is password protected and can be extracted only with WinZip (Windows OS) and StuffitExpander (MAC OS) software.
You can download both applications for free using the free trial options:
While unzipping "sources_############.zip" archive you will be prompted to enter a password, which you can find at your Product Download Page (open the link in the email you received from our company).
As soon as you are done with the unzipping the template, you should have 4 folders in total: "documentation", "screenshots", "site" and "sources".
General Information
Software requirements
Sublime Text 3 (download for free). Used to edit the .HTML, .JS, .PHP and .CSS files.
Adobe Photoshop CS or later (download free trial). Used to edit .PSD files.
The following scheme displays the template files structure.
- Documentation – contains documentation on template editing and installation.
- Screenshots - contains screenshots of the template.
- Site - contains the .html files of the template.
- assets - contains assets and bonus add-ons.
- bat - contains contact form processing .php script.
- css - contains all the .css files used in the design.
- img - contains all the images used in .html files.
- js - contains JavaScript libraries and jQuery plugins.
- search - contains .js, .php and .css files of the search engine.
- sources - contains source files.
- psd - contains Adobe Photoshop .psd files.
- less - contains .css LESS files used in the template.
- fonts_info.txt - contains the list of fonts used in template.
- info.txt - contains the information about password protected "sources" folder.
Editing template
Working with the template you need to edit the .html, .css, .js and .psd files.
Editing HTML and CSS files
All editable HTML files are located in "site" folder of the template package (index.html, index-1.html, index-2.html, etc.) Each index-#.html file represents a single template page.
To open .html file with Sublime Text 3 application, you should right mouse click on the file and in the context menu select Open with > Sublime Text 3. When the file is open, you can start editing it.
Sublime Text 3 is a recommended application as it allows you to edit the HTML files content.
CSS files are used to change the template appearance like fonts (font-family, font-size, color etc), backgrounds, column width values etc. You can edit the css files with Sublime Text 3 application. Detailed tutorials on how to work with the CSS files are available at our online help center.
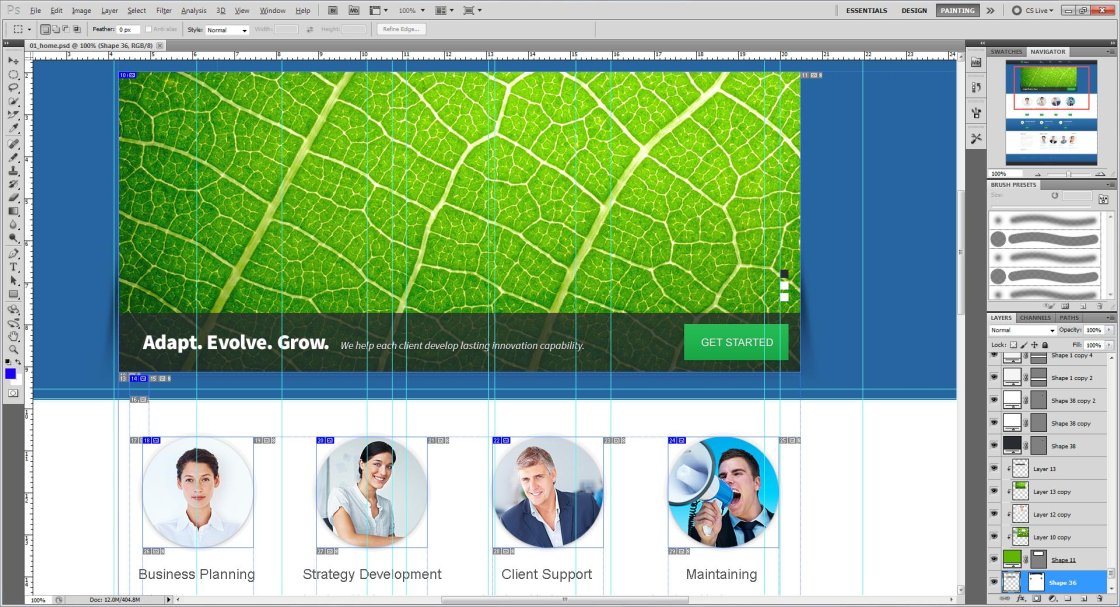
Editing PSD files
PSD files are located in the "sources/psd" folder in your template package. PSD are the source files of the template design. They are divided into layers, so any part of the template design can be changed.
During the customization process you can refer to the PSD files in order to change the images used in the content pages or in the design.
You can learn more about working with Photoshop by checking the detailed tutorials.
Custom Fonts
Some templates may contain the non-default fonts used in the design. By default, the internet browser can render only fonts that are installed to your operating system. In other words, if your website design uses some custom fonts and these custom fonts are not installed on your website visitor's computer, custom fonts won't be displayed. Default fonts will be rendered instead. That's why web developers should look for some alternative solutions. In our templates custom fonts are embedded using Google Web Fonts technology.
Google Web Fonts
You can learn more on using Google Web Fonts by checking the tutorial on how to work with Google web Fonts.
Can't load Google Fonts:
- Open 'site\index-*.html' or 'site\css\style.css' files
- Locate the line:
//fonts.googleapis.com/css?family=[---your_web_font_name_here---]
- Replace it with the following:
//fonts.useso.com/css?family=[---your_web_font_name_here---]
Customization Tutorials
How to edit text
These templates are HTML based, so all content is stored and could be accessed though the .html files.
- Open your template package and go to the site folder.
- There open index.html file with your HTML editor.
- You can use the search tool CTRL+F to find any text you need.
- Edit text in HTML editor. Save the file and open it with your Browser to see the changes.
The other way is to use the browser developer tool to find the blocks you want to edit. You can learn more about the developer tools checking the tools description and tutorials.
Feel free to check the following Developer Tools article.
You can also check the video tutorial on how to edit text in JS Animated templates
How to edit images
Open the template folder, go to 'site/img' directory. You can upload your images with the same name and extension to replace the default ones.
The other way is to upload custom images with your titles and extensions. Then you’ll need to change the image file names in the html files.
- Open .html file from the “site” folder with your html editor.
- Use search tool CTRL+F to find the images in the html file.
- Replace the image title and extension.
You can also check the video tutorial on how to edit images.
How to activate contact form
- Open the template folder.
- Go the site/bat directory.
- There open the 'MailHandler.php' file with your editor (Sublime Text 3, Notepad etc).
- Using the Find and Replace tool (CTRL+F) search for the $owner_email.
You should see the following line:
$owner_email='#';
replace # symbol with your email address. That's all, now the contact form should send the messages to your email account.
TM add-ons
Depending on a template design a template may include the following free add-ons:
- Contact Form - gives visitors the opportunity to send messages to the site-owner.
- Search Engine - performs search through content of .html files.
- Under Construction - is the page with countdown timer.
- Subscription Form - allows to organize newsletter subscription.
Note, depending on the template design, it may include Contact Form, Search Engine, Countdown and Subscription Form add-ons that are already implemented into your template and are working by default. Feel free to check the detailed documentation for each add-on in case you want to have additional configuration or if you are going to implement them into another website/project/template.
Contact Form manual
<form id="contact-form">
  <div class="contact-form-loader"></div>
  <fieldset>
    <label class="name">
      <input type="text" name="name" placeholder="Name:" value="" data-constraints="@Required @JustLetters"  />
      <span class="empty-message">*This field is required.</span>
      <span class="error-message">*This is not a valid name.</span>
    </label>
    <label class="state">
      <input type="text" name="state" placeholder="State:" data-constraints="@JustLetters" />
      <span class="empty-message">*This field is required.</span>
      <span class="error-message">*This is not a valid state.</span>
    </label>
    <label class="email">
      <input type="text" name="email" placeholder="Email:" value="" data-constraints="@Required @Email" />
      <span class="empty-message">*This field is required.</span>
      <span class="error-message">*This is not a valid email.</span>
    </label>
    <label class="phone">
      <input type="text" name="phone" placeholder="Phone:" value="" data-constraints="@Required @JustNumbers" />
      <span class="empty-message">*This field is required.</span>
      <span class="error-message">*This is not a valid phone.</span>
    </label>
    <label class="fax">
      <input type="text" name="fax" placeholder="Fax:" data-constraints="@JustNumbers" />
      <span class="empty-message">*This field is required.</span>
      <span class="error-message">*This is not a valid fax.</span>
    </label>
    <label class="file">
      <input type="file" name="attachment" class="filestyle file-input" data-input="true" >
      <span class="empty-message">*This field is required.</span>
      <span class="error-message">*This is not a valid file.</span>
    </label>
    <label class="message">
      <textarea name="message" placeholder="Message:" data-constraints='@Required @Length(min=20,max=999999)'></textarea>
      <span class="empty-message">*This field is required.</span>
      <span class="error-message">*The message is too short.</span>
    </label>
    <div>
      <a href="#" data-type="submit" >submit</a>
      <a href="#" data-type="reset" >reset</a>
    </div>
  </fieldset>
  <div class="modal fade response-message">
    <div class="modal-dialog">
      <div class="modal-content">
        <div class="modal-header">
          <button type="button" class="close" data-dismiss="modal" aria-hidden="true">×</button>
          <h4 class="modal-title">Modal title</h4>
        </div>
        <div class="modal-body">
          You message has been sent! We will be in touch soon.
        </div>
      </div>
    </div>
  </div>
</form>
Description
The HTML structure inside the form is flexible, the only condition is that all the fields (input, textarea HTML elements) should be placed inside the label tags that have class corresponding to their type.There are following classes/types by default:
- name – the User's Name. Validation: digits are disallowed, not less than 2 symbols;
- email – the User's Email;
- state – Country (Area). Validation: digits are disallowed, not less than 2 symbols;
- phone – Phone. Validation: digits only, not less than 5 symbols. Additionally accepts non-alphabetic symbols: "space", "+" and "-";
- fax – Fax. Validation: digits only, not less than 5 symbols. Additionally accepts non-alphabetic symbols: "space", "+" and "-";
- file – File upload. Validation: max upload file size 10 MB. Only for doc, docx, txt, pdf, zip, rar file formats.
- message – Message. Validation: any symbols, not less than 20 symbols.
- @Required – This data-constraints attribute is used as a pointer for the optional fields while filling the forms out.
Also, label tag mentioned above can contain nested span elements with classes error-message and empty-message, which include the error message in case the data in the field is specified incorrectly or the field is just empty.
Script Initialization
To activate the contact form, you need to include contact from script in the <head> section of HTML file and copy "bat" folder to your website root folder. The "bat" folder should contain 2 files: MailHandler.php, libmail.php
<script type="text/javascript" src="js/jquery.js"></script>
<script type="text/javascript" src="js/modal.js"></script>
<script type="text/javascript" src="js/bootstrap-filestyle.js"></script>
<script type="text/javascript" src="js/TMForm.js"></script>
Then you need to open MailHandler.php file in bat folder and set/change the required options:
$owner_email='#';

//SMTP server settings
$host = 'ssl://smtp.gmail.com';
$port = '465';//"587";
$username = '';
$password = '';

$subject='A message from your site visitor ';

$file_types='/(doc|docx|txt|pdf|zip|rar)$/';

$error_text_filesize='file size must be less than';
$error_text_filetype='wrong file type';
$error_text='something goes wrong';
Use the following parameters for customization:
- $owner_email – the Email address the data will be sent to;
Keep in mind that you need to define the following four options ($host, $port, $username and $password) only when you use the SMTP server to send mails from your website. By default, MailHandler.php uses the standard PHP mail() function that works in most cases and does not require additional settings.
- $host – SMTP host address for sending mails;
- $port – SMTP host port for sending mails;
- $username – username to log into SMTP server;
- $password – password to log into SMTP server;
- $subject – subject for your contact form mails;
- $file_types – file types, that you can upload and send via the form;
- $error_text_filesize – error text for not correct size of the uploaded file;
- $error_text_filetype – error text for not correct type of the uploaded file;
- $error_text – error text for issues with the mail sending.
Search engine manual
Attention! Search feature will not work locally. It works only on a hosting-server with PHP enabled.
Enter a word to search for:
For instance: lorem, ipsum, dolor
<form id="search" action="search.php" method="GET" accept-charset="utf-8">
   <input type="text" name="s" />
   <a onclick="document.getElementById('search').submit()">Search</a>
</form>
Description
Files needed to work with the form:
- jquery.js – jQuery library (the form will work with this version of library only);
- search.css – stylesheet file which is being used for stylization of the search results pages ;
- search.php – page where the search results will appear;
- search.js – script which is responsible for the search results output in an iframe on the page search.php;
- results.php – PHP script which actually performs the search.
In this form we should define such parameters as: action="search.php" and method="get", also set parameter for an input: name="s". If you want to change the name of the search form, which is id="search" by default, you should change it on the line 3 in the file search.js as well, you can find it in search folder.
Settings
Note that search form is enabled, configured and works by default. These steps are required if you are trying to use this search form in another project/template without working search form.
To make the form work correctly, please perform the following steps:
- copy search folder to the root directory with your *.html files;
- move file search.php from the search folder to the root directory (with *.html files);
- edit your form using the directions above;
- copy partly header and footer with all the connected scripts in the section <head></head> to the page search.php, but necessarily add connection of the file search.js. For example:
<link rel="stylesheet" href="css/reset.css" type="text/css" media="all">
<link rel="stylesheet" href="css/fonts.css" type="text/css" media="all">
<link rel="stylesheet" href="css/style.css" type="text/css" media="all">
<script src="js/jquery.js"></script>
<script src="search/search.js"></script>
- for the search results output add the following block to your content:
<h4>Search result:</h4>
<div id="search-results"></div>
- change style of the search results using search.css.
All the rest main styles of your template will be automatically pulled from the file style.css by the PHP script.
Countdown Script Manual (Under Construction page)
Days
Hours
Minutes
Seconds
<div id="counter"></div>
<div class="counter_desc">
  <div class="days">Days</div>
  <div class="hours">Hours</div>
  <div class="minutes">Minutes</div>
  <div class="seconds">Seconds</div>
</div>
Features:
- counts time till exact date;
- has custom skin designs.
Description
Files needed to work with the timer:
- jquery.js – jQuery library (the timer will work only with this version of library);
- jquery.countdown.min.js – the timer functionality;
- demo.css – the set of CSS styles for the timer stylization.
<link rel="stylesheet" href="css/demo.css" type="text/css" media="all">
<script type="text/javascript" src="js/jquery.js"></script>
<script type="text/javascript" src="js/jquery.countdown.min.js"></script>
Initialization
You can find code for the timer initialization in the end of the jquery.countdown.min.js file:
$(document).ready(function(){
var _date=new Date()
	,countdown_to={
		year:2013
		,month:6
		,date:13
		,hours:0
		,minutes:15
		,seconds:00
	}

_date.setFullYear(countdown_to.year,countdown_to.month,countdown_to.date)
_date.setHours(countdown_to.hours)
_date.setMinutes(countdown_to.minutes)
_date.setSeconds(countdown_to.seconds)

/*code for demonstration*/
_date=new Date()
_date.setMonth(_date.getMonth()+8)
/*end code for demonstration*/

$('#counter').countdown({
	image: 'img/digits_inverted.png',
	startTime: _date,
	stepTime: 35
});
});
The initialization occurs on the event $(document).ready().
Parameters:- image – shows path to the image which will be used as a skin (the directory img contains files that you can use as skins for the timer);
- startTime – sets the final date of the countdown. Time countdown is implemented with the help of variable _date;
- stepTime – sets cycle rate of numbers' animation.
The demo version shows the time that remains from the current date plus 8 months. That is why timer starts a new countdown every time you refresh the demo page. Here is a code where you can edit these parameters:
/*code for demonstration*/
_date=new Date()
_date.setMonth(_date.getMonth()+8)
/*end code for demonstration*/
If you want to set exact date, you should change variable _date. To do this, you must change values for year, month (pay attention that months' numbering starts from zero), date, hours, minutes, seconds. Here is a piece of code where you can change these parameters:
$(document).ready(function(){
var _date=new Date()
	,countdown_to={
		year:2013
		,month:6
		,date:13
		,hours:0
		,minutes:15
		,seconds:00
	}
});
Also you have to delete the following code:
/*code for demonstration*/
_date=new Date()
_date.setMonth(_date.getMonth()+8)
/*end code for demonstration*/
Color themes
Below you'll find examples of skin solutions for the timer. You can find all these skins in img directory.
Days
Hours
Minutes
Seconds
$('#counter').countdown({
	image: 'img/digits.png',
});
Days
Hours
Minutes
Seconds
$('#counter').countdown({
	image: 'img/digits2.png',
});
Subscription form manual
Subscribe Form Sample
<form id="subscribe-form">
  <div class="success">Your subscription request<br> has been sent!</div>
    <fieldset>
    <label class="name">
        <input type="text" value="Enter Name:">
        <span class="error">*This is not a valid name.</span></label>
    <label class="email">
        <input type="email" value="Enter Email:">
        <span class="error">*This is not a valid email address.</span></label>
    <div class="btns"><a href="#" class="button" data-type="submit">Submit</a></div>
  </fieldset>
</form>
Description
The HTML structure inside the form is flexible, the only condition is that inputs should be placed inside the label tags that have class corresponding to their type.
There are the following classes/types by default:
- name – the User's Name. Validation: digits are disallowed, not less than 2 symbols;
- email – the User's Email;
Also, label tag mentioned above can contain nested span elements with class error, which include the error message in case the data in the field is specified incorrectly.
Script Initialization
To activate the subscribe form you need to include subscribe form script in the <head> section of HTML file and copy "bat" folder to your website root folder. The "bat" folder should contain 1 file: MailHandler-sub.php
<script type="text/javascript" src="js/jquery.min.js"></script>
<script type="text/javascript" src="js/sForm.js"></script>
After this you should initialize your subscription form on the $(window).load() : event at the end of sForm.js file
$(window).load(function(){
  $('#subscribe-form').sForm({
    ownerEmail:'#',
    sitename:'sitename.link'
  })
})
Use the following parameters for initialization:
- ownerEmail – the Email address the data will be sent to;
- sitename – website address which maintains subscription form.
In case of successful subscription, the website owner and the website visitor get two separate successful subscription confirmation emails. The website owner target email is grabbed from sForm.js file and the website visitor email is an email specified during subscription.
TM gallery
Description
tmMultimediaGallery is a responsive gallery that uses 3D and CSS3 animation methods. Image transition effects are defined by CSS features.
We should note that the browsers not supporting CSS3 animation will get the simple fade effect for image changing.
We should note that the browsers not supporting CSS3 animation will get the simple fade effect for image changing.
The gallery can be realized in two ways:
- Automatic composing of an image list with a path to the images folder.
- Manual insert of the list into HTML code with corresponding paths to the images.
Let's analyze both ways and find out their divergences.
Way 1.
Implementing and configuring the gallery compiles a few steps:
- Create a new copy of any website page and rename it the way you like.
- Leave the header and footer in the new page, delete all content part.
- Copy gallery folder that contains gallery files into your website root.
- Add the following scripts and styles in the head section:
<!-- start gallery scripts -->
<link rel="stylesheet" href="gallery/css/tmMultimediaGallery.css">
<script src="gallery/js/isotope.pkgd.min.js"></script>
<script src="gallery/js/tmFileList.js"></script>
<script src="gallery/js/tmPaginationGenerator.js"></script>
<script src="gallery/js/tmMultimediaGallery.js"></script>
<script src="gallery/js/tmMultimediaGallery_init.js"></script>
<!--[if (gt IE 9)|!(IE)]><!-->
<script src="gallery/js/jquery.touchSwipe.min.js"></script>
<!--<![endif]-->

<!-- end gallery scripts -->
- You should insert code before closing </body> tag and define the correct paths to image folders. pathThumb is a path to thumbnails folder, pathFull is a path to the large gallery images folder, that correspond thumbnails:
<script> $(function(){ pathThumb = 'img/gallery/category1/'; pathFull = 'img/gallery/category1/full/'; }) </script> - Insert the following code before the content:
<div class="galleryContainer"> <!-- spinner --> <div class="imgSpinner"></div> <!-- close button --> <a href="" class="close-icon"><i class="fa fa-times"></i></a> <!-- Navigation --> <div class="gallery_nav"> <!-- previous button --> <a href="#" class="prevButton"> <i class="fa fa-angle-left"></i> </a> <!-- next button --> <a href="#" class="nextButton"> <i class="fa fa-angle-right"></i> </a> </div> <!-- main gallery and image holder --> <div class="galleryHolder"> <div class="imageHolder"> <img src="images/gallery/category1/full/img-1.jpg" alt=""> </div> </div> </div> - It is necessary to define the correct path to any large image in the inserted code.
- You need to create <div> element with the "inner" CSS class inside the content part of your HTML page:
<div class="inner"></div>
- Link the required elements from your website to the newly created page and enjoy your gallery.
Important! Created HTML files should be located in the root directory of your website, on the same level with the "gallery" folder.
Attention! If the names and the number of the thumbnails do not correspond to the names and number of the large images, the gallery will work incorrectly.
The essence of this way is that you do not need to write manually the path to each image. You need just to define paths to the thumbnails and large images folder. The script will find images in the defined folders and generate the list itself. That is why you had to maintain corresponding names and numbers of images in both folders.
View demo
Way 2.
The second way differs from the first one by the ability to attach the description to each photo if necessary. You need to complete steps 1-5 from the first way of the gallery implementation.
You have to:- Insert the following code before the content:
<div class="galleryContainer"> <!-- spinner --> <div class="imgSpinner"></div> <!-- close button --> <a href="" class="close-icon"><i class="fa fa-times"></i></a> <!-- Navigation --> <div class="gallery_nav"> <!-- previous button --> <a href="#" class="prevButton"> <i class="fa fa-angle-left"></i> </a> <!-- next button --> <a href="#" class="nextButton"> <i class="fa fa-angle-right"></i> </a> </div> <!-- main gallery and image holder --> <div class="galleryHolder"> <div class="imageHolder"> <img src="images/gallery/category1/full/img-1.jpg" alt=""> </div> </div> <!-- description --> <a href="#" class="info-icon"><i class="fa fa-info"></i></a> <div class="galleryDescription"> <ul class="description_list"> <li> .......your description....... <a href="#" class="close-info-icon"><i class="fa fa-times"></i></a> </li> </ul> </div> <!-- end description --> </div> - You should create <div> element with the "inner" CSS class and the images list inside the content:
<ul> <li><a href="images/gallery/category1/full/img-1.jpg" ><img src="images/gallery/category1/img-1.jpg" alt=""></a></li> <li><a href="images/gallery/category1/full/img-2.jpg" ><img src="images/gallery/category1/img-2.jpg" alt=""></a></li> .............. </ul> - Write the description for images within <ul class="description_list"> list. The fisrt li element of this list will correspond the first <li> tag (image) element from the list inside <div class="inner">.
View demo
You can customize gallery appearance in the \gallery\less\tmMultimediaGallery.less (for experts only) or \gallery\css\tmMultimediaGallery.css file.Video background
To create video background you need to use Vide jQuery plugin.
Plugin installation
Download Video plugin archive from the official website. Copy vide.js file to jsfolder, include script to your html page and add script initialization to script.js:
      include('js/jquery.vide.js');
      $(document).ready(function () {
          $("#home").vide("video/[file_name]",{
            volume: 1,
            playbackRate: 1,
            muted: true,
            loop: true,
            autoplay: true,
            position: "50% 50%" // Alignment
        });
          $('#home video').fadeOut(0).delay(200).fadeIn(800);
      });
where [file_name] - is name of the video file, without extension. #home is a block with id="home" that will contain video.
Also you need to prepare video in mp4, ogv, webm formats and poster in png, jpg or gif formats. All files names should be equal to [file_name]. All prepared files should be placed in video directory in the website root.
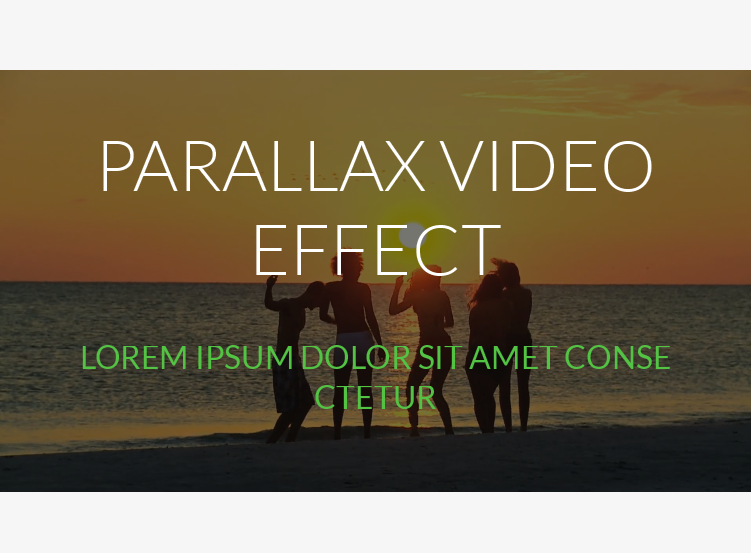
Parallax effect
To add block with parallax effect to your website you need to use Stellar jQuery plugin
Plugin installation
Download plugin from the official website. Copy jquery.stellar.js file to js folder, add script to your hrml file and script initialization to script.js file:
        include('js/jquery.stellar.js');
        $(document).ready(function() {
            $.stellar({
              horizontalScrolling: false,
              verticalOffset: -50
          }
        });
Add data-stellar-background-ratio="[value]" attribute to the parallax block element:
<section id="priorities" data-stellar-background-ratio="-0.1"></section>
where [value] - is a scroll speed coefficient. You can learn more from plugin documentation.
Don't forget to specify background for the parallax block element:
      #priorities {
        background: url('../images/[your_image].jpg');
      }
Cookie Policy
Cookies are small text files which websites place on visitors’ computers. They’re typically used to identify that particular visitor and provide them with a better experience. Cookies are a crucial part of many website functions which we take for granted.
For instance, it’s usually cookies which allow online shops to remember what items you have in your shopping trolley. They’re also used to keep you logged into a website or to provide valuable usage statistics and information to website owners.
If you run a website, it almost certainly uses cookies. Their most likely function is to monitor visitor numbers and behaviours through tools like Google Analytics. They may also be used to display relevant adverts to visitors, or – if you sell online – to power key parts of your online shopping system.
26th May 2012 - The ICO released a change to the enforcement, "implied consent" is now allowed as long as you make it clear where your privacy/cookie policy is.
Box info:
Following the Cookie Law conditions, we suggest you add the plugin cookiecuttr created by Chris Wharton and provided under the GNU General Public License.
This is how it looks like:
This plugin is used to warn the visitors of your website about cookies usage. The plugin will add the information panel/box which can be fully customized via css and js files:

How to implement the plugin
You need to download the jquery.cookie.js, jquery.cookiecuttr.js and cookiecuttr.css file. Copy them into the js and css folders respectively, include plugin scripts and css file reference in the <head> section of each html file:
<!-- cookiecuttr plugin -->
 <link rel="stylesheet" href="css/cookiecuttr.css">
 <script src="js/jquery.cookie.js"></script>
 <script src="js/jquery.cookiecuttr.js"></script>
<!-- end cookiecuttr plugin -->
Plugin customization
The plugin has a lot of parameters and options. This allows you to customize it according to you needs and wishes.
Here are just a few of them:
cookieCutter //  if you’d like to actively hide parts of your website, set this to true, for example, say you use a comments system that inserts cookies, you can put the div name in below to replace it with a cookie warning message.
cookieAnalytics //if you are just using a simple analytics package, you can set this to true, it displays a simple default message with no privacy policy link - this is set to true by default.
cookieDeclineButton // if you’d like a decline button to (ironically) write a cookie into the browser, then set this to true.
cookieAcceptButton // set this to true to hide the accept button, it is set to false by default.
cookieResetButton // if you’d like a reset button to delete the accept or decline cookies, then set this to true.
cookieOverlayEnabled // don't want a discreet toolbar? this makes the whole message into a 100% height.
cookiePolicyLink // if applicable, enter the link to your privacy policy in here - this is as soon as cookieAnalytics is set to false.
cookieMessage // edit the message you want to appear in the cookie bar, remember to keep the {{cookiePolicyLink}} variable intact, so it inserts your privacy policy link.
cookieAnalyticsMessage // edit the message you want to appear, this is the default message.
cookieWhatAreTheyLink // edit the link for the 'What are Cookies' link.
cookieErrorMessage // edit the message you’d like to appear in place of the functionality.
cookieNotificationLocationBottom // this is false by default, change it to true and the cookie notification bar will show at the bottom of the page instead, please note this will remain at the top for mobile and iOS devices and Internet Explorer 6.
cookieDisable // list elements separated by comma here, that you want to disable, this will only work if cookieCutter is set to true.
cookieAcceptButtonText // you can change the text of the green accept button.
cookieDeclineButtonText // you can change the text of the red decline button.
cookieResetButtonText // you can change the text of the orange reset button.
cookieWhatAreLinkText // you can change the text of the "What are Cookies" link shown on Google Analytics message.
cookiePolicyPage // set this to true to display the message you want to appear on your privacy or cookie policy page.
cookiePolicyPageMessage // edit the message you want to appear on your policy page.
cookieDiscreetLink // false by default, set to true to enable.
cookieDiscreetLinkText // edit the text you want to appear on the discreet option.
cookieDiscreetPosition // set to topleft by default, you can also set topright, bottomleft, bottomright.
cookieDomain // empty by default, add your domain name here without www. or https:// or http:// to remove Google Analytics cookies on decline.
You can find more detailed information and instructions on plugin customization and usage at the official cookiecuttr website.
Uploading template
In order to make your site "live", you need to upload all the content of "site" folder from your local computer to your hosting server.
Please note: your website root depends on the directory structure on your hosting server. If you upload the "site" folder itself into your server, the root to your website will be http://your_domain_name/site. To avoid this and make the website root http://your_domain_name/, please open the "site" folder and upload the folder content.
This video tutorial will show you how you can upload files to your host using free FTP software FileZilla.
This video tutorial will show you how you can upload files to your host using hosting cPanel (WebHost Manager, WHM).
Please do not upload the sources directory or any of the template source files to the hosting server.
Addendum where to get help, support and additional information
We hope this manual was useful for you and helped you to install, to edit the template and to resolve your issues.
Help and Support
Instructions
W3C validation
Both HTML markup and CSS styles used in our templates are semantically correct and valid. However some W3C errors still can take place. Making code 100% W3C valid eliminates the usage of modern website technologies as CSS3 features and HTML5 markup. Our goal is to deliver rich user experience with high quality templates and sometimes we have to break some rules.