


- Web templates
- E-commerce Templates
- CMS & Blog Templates
- Facebook Templates
- Website Builders
FAQs
General Tutorials
Featured templates
MonsterONE Subscrioption


Hello, this tutorial shows how to manage Products in your WooCommerce catalogue.
WooCommerce. How to manage products
In order to add new product to your catalog, you should perform the following:
Open WordPress administration panel;
Go to Products -> Add Product tab:

Input your product name;
Enter your Full Product Description;
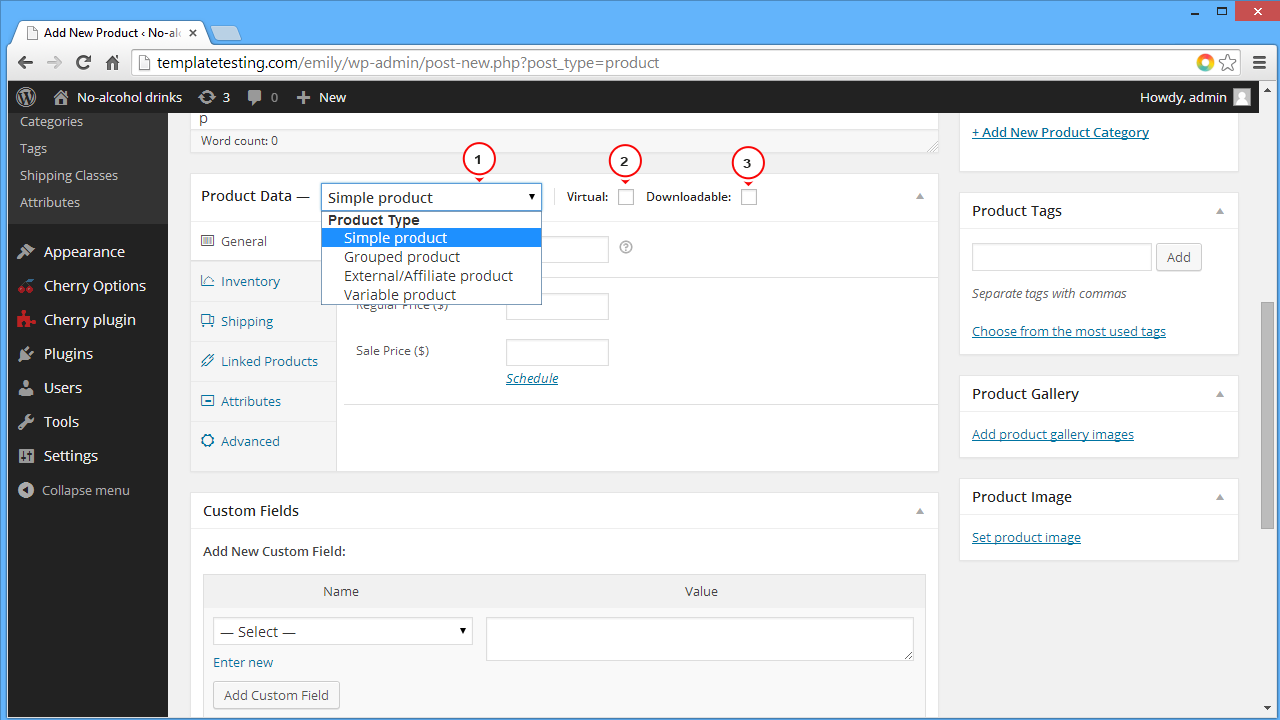
Select your Product Type from the dropdown menu:
General tab where you can set your product prices including both Regular and Sale prices. You can also set the SKU for your product in this tab;
Inventory tab allows you to manage the stock for the product individually and define whether to allow back orders. Sold Individually box allows to limit the product to 1 per one order;
Shipping tab allows to define products weight, dimensions. It also allows you to set specific Shipping Class that contains some specific shipping methods to group similar products;
Linked Products tab allows you to add up-sells and cross-sells products, that help you to promote your products with one another;
Attributes tab allows you to set a specific attribute set to your product created earlier. You can check the WooCommerce Documentation for more details on creating the attributes.
Advanced tab allows you to set the Purchase Note that will be sent to your customer when the order is placed. You can also set there Menu Order and Enable Reviews for the item:

The next available field is a Product Short Description. The description entered in this field will appear next to the product image on the product listing page. The Full description will appear within the Product Description tab:

Check the Categories panel on the right side. You can assign your product to one of the categories from the list:

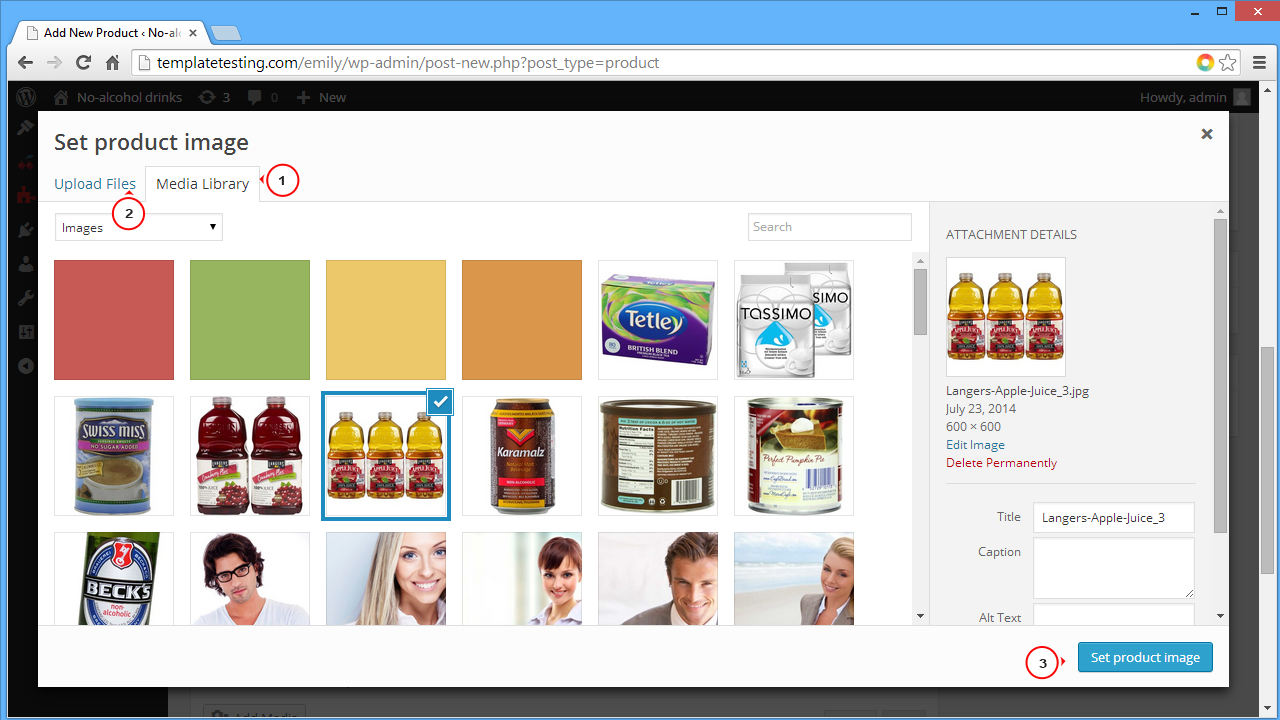
You can assign a Product Image by selecting one from your Media Library or uploading from your computer:
There is also a possibility to add a Product Gallery that will display several images per one product, where the main image is a Featured image:

Check some more details on adding images at WooCoomerce Documentation page .
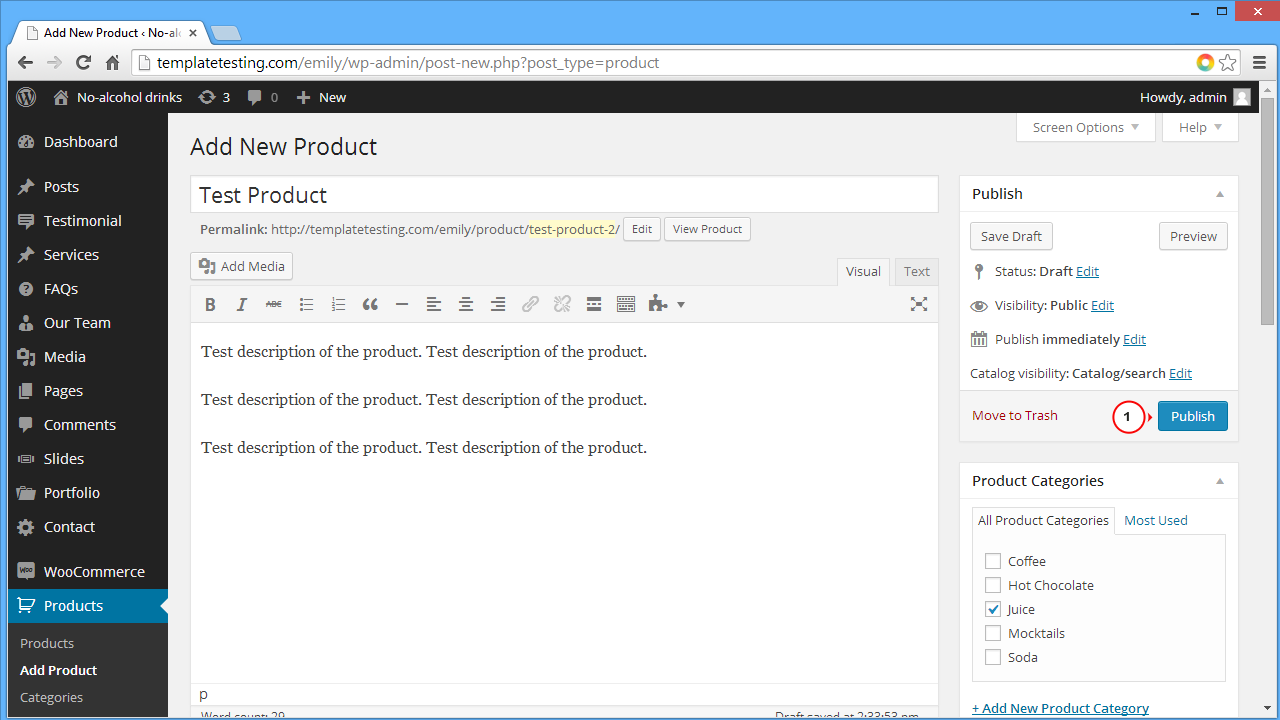
Click Publish in order to save your product:
Feel free to check the detailed video tutorial below:
