- Web templates
- E-commerce Templates
- CMS & Blog Templates
- Facebook Templates
- Website Builders
WordPress. How to change the logo using Adobe Photoshop
January 29, 2014
This tutorial will show you how to customize an image logo on your WordPress theme.
WordPress. How to change the logo using Adobe Photoshop
1. Open the “sources/psd” folder of your template package.
2. Open the .psd file you have there (usually its name includes the word "home") with Adobe Photoshop software.
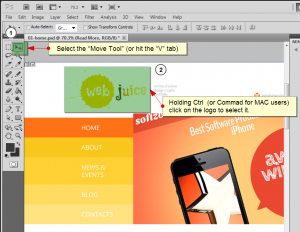
3. Select the "Move Tool" (or hit the "V" button) and holding Ctrl (or Command for MAC users) click on the logo to select it.
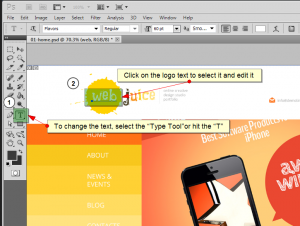
4. To change the text, select the “Type Tool” or hit the “T” button and click on the logo text to select it and edit it.
5. If you see the following message:
– install all fonts that are listed in the “fonts_info.txt” file of the template package.
Don’t forget to restart your Adobe Photoshop software after installing the font(s).
6. When finished editing the logo, go to the top menu “File” -> “Save for web and devices.” In the “Save for Web” window , select the Slice tool again (or hit the “C” tab), select the logo by clicking on it and click “Save.”
7. Navigate to the folder on your computer where you want to save the new logo. It may be your Desktop (when the desktop is selected, Photoshop will create a new “images” folder with your logo. In the “Save Optimized as” window that is going to pop up, you need to select the following: Images Only, Default Settings, Selected Slices. Then click on “Save.”
Feel free to check out the tutorial on How to save for WEB.
8. Log in to your WordPress admin panel, navigate to Cherry Options->Cherry Options, open the Logo and Favicon tab.
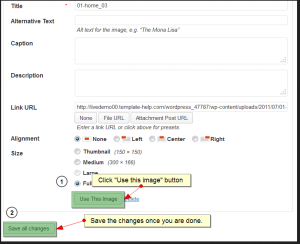
9. Use the “Upload” button to upload your new logo. (Do not forget to click on “Use This Image” button and save the changes.)
10. Refresh your browser window to see the changes. The logo image has been successfully changed.
Feel free to check the detailed video tutorial below:


