


- Web templates
- E-commerce Templates
- CMS & Blog Templates
- Facebook Templates
- Website Builders
FAQs
General Tutorials
Featured templates
MonsterONE Subscrioption


PrsetaShop 1.6.x. How to add custom content to Contact us page
This tutorial shows how to add custom content to Contact us page in PrestaShop 1.6.x.
Sometimes you need to add more content to your contact page. There are two ways to do it.
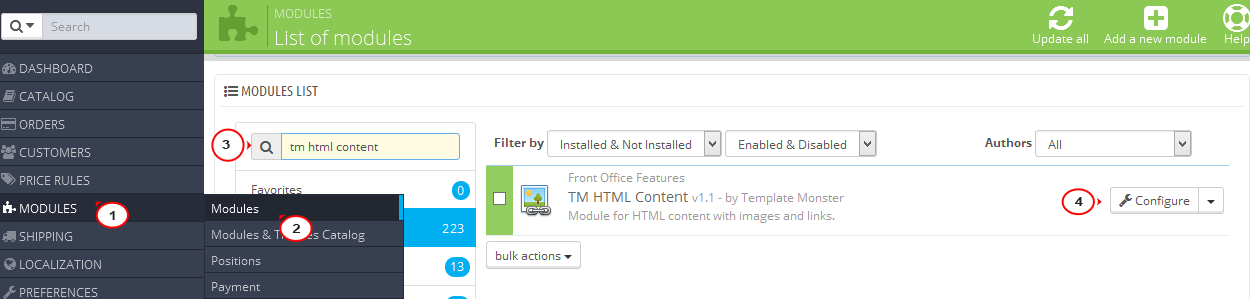
Open the admin section and navigate to Modules -> Modules -> TM HTML Content -> Configure:
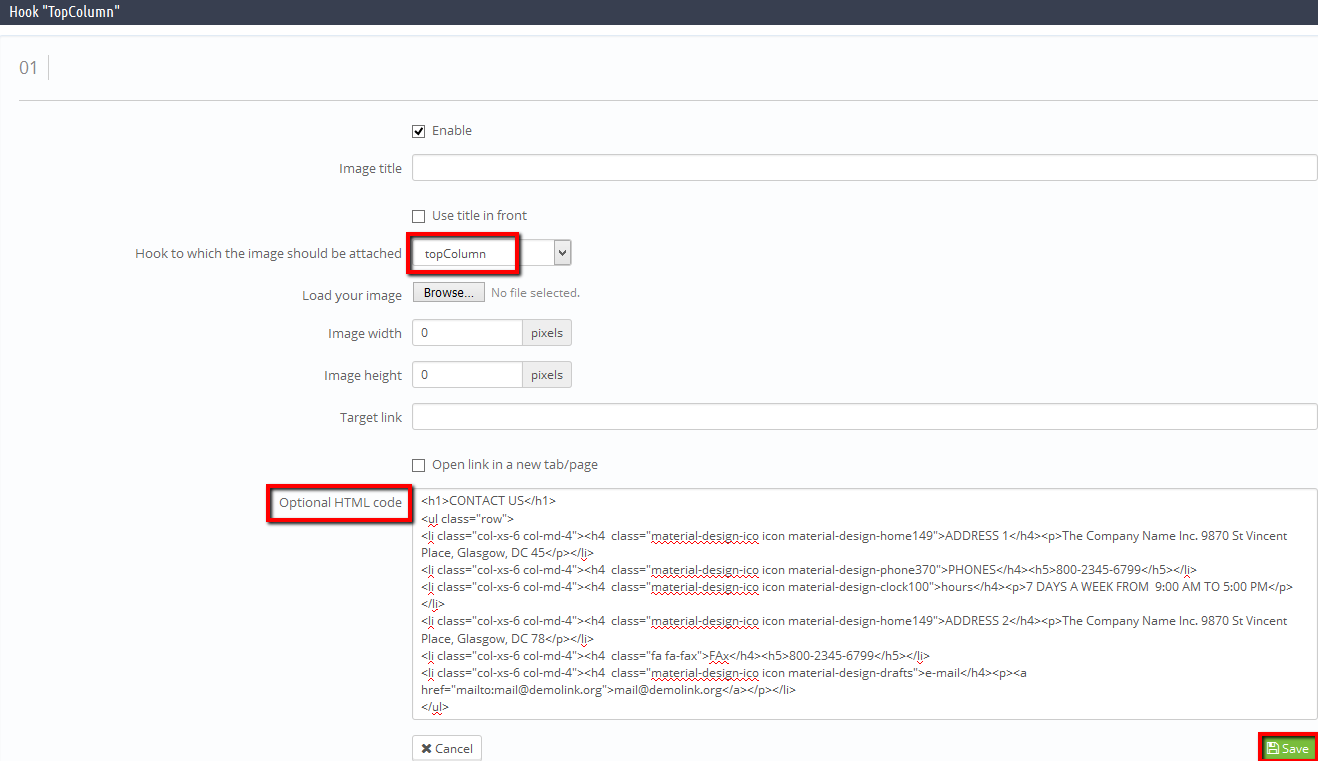
Add the item and select the hook you want the information to be displayed, for example, Hook “topColumn”.
For more details, please check this tutorial: PrestaShop 1.6.x. How to manage “TM HtmlContent” module.
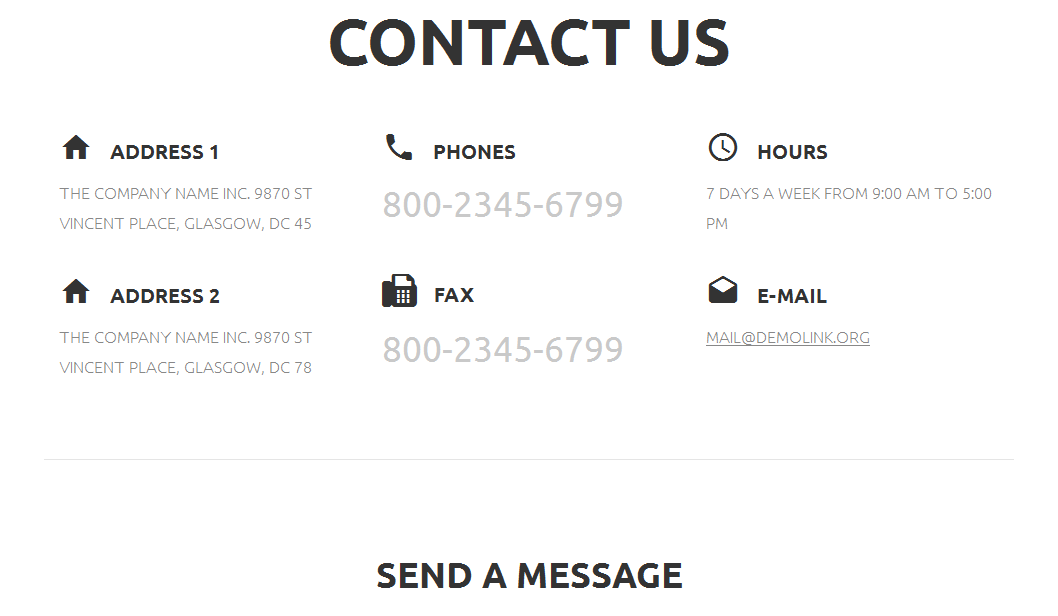
Paste the content code to Optional HTML code field. For instance:
 <h1>CONTACT US</h1>
  <ul class="row">
  <li class="col-xs-6 col-md-4"><h4  class="material-design-ico icon material-design-home149">ADDRESS 1</h4><p>The Company Name Inc. 9870 St Vincent Place, Glasgow, DC 45</p></li>
  <li class="col-xs-6 col-md-4"><h4  class="material-design-ico icon material-design-phone370">PHONES</h4><h5>800-2345-6799</h5></li>
  <li class="col-xs-6 col-md-4"><h4  class="material-design-ico icon material-design-clock100">hours</h4><p>7 DAYS A WEEK FROM  9:00 AM TO 5:00 PM</p></li>
  <li class="col-xs-6 col-md-4"><h4  class="material-design-ico icon material-design-home149">ADDRESS 2</h4><p>The Company Name Inc. 9870 St Vincent Place, Glasgow, DC 78</p></li>
  <li class="col-xs-6 col-md-4"><h4  class="fa fa-fax">FAx</h4><h5>800-2345-6799</h5></li>
  <li class="col-xs-6 col-md-4"><h4  class="material-design-ico icon material-design-drafts">e-mail</h4><p><a href="mailto:mail@demolink.org">mail@demolink.org</a></p></li>
  </ul>
Save the changes:
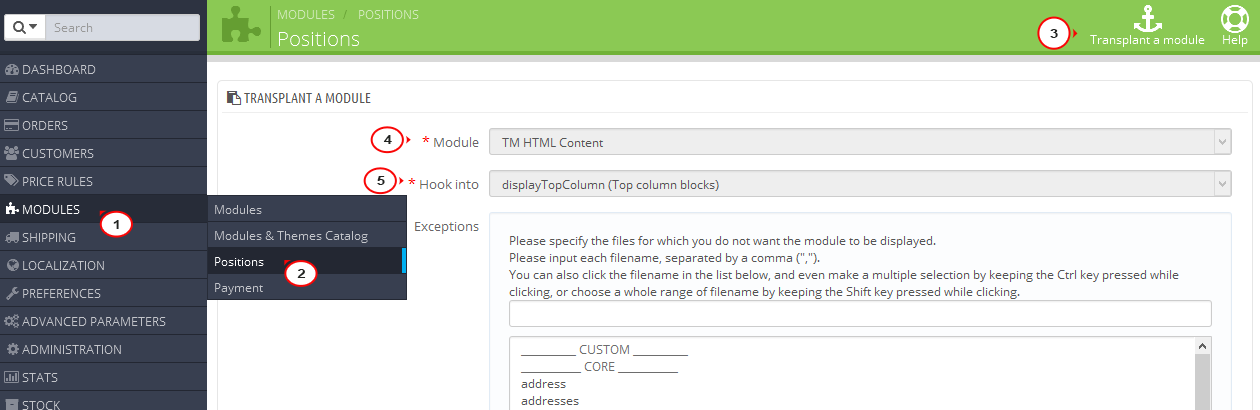
Navigate to Modules -> Positions and transplant the TM HTML Content module to the displayTopColumn hook or another one depending on the module’s added item hook:
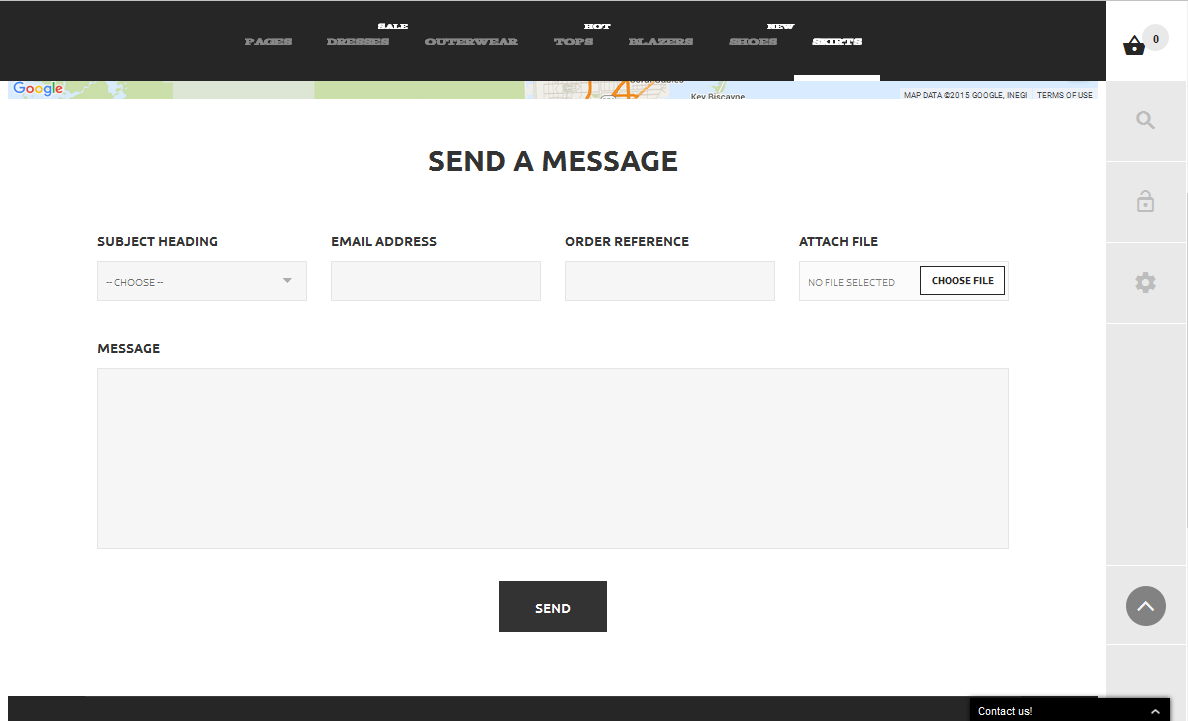
Click on Save and refresh the contact page to see the changes:
Reach your site directory on the server via FTP or hosting cPanel and open themes/theme_number/contact-form.tpl.
We strongly recommend backing up the file before editing it:

Paste the code like this before or after the <form> section:
  <p><span style="color: #888888; font-weight:bold">Hotline:</span><br />
  <span style="color: #888888;">+00-000-000-000</span><br />
  <span style="color: #888888;">+00-000-000-000</span><br />
  <br />
  <span style="color: #888888; font-weight:bold">Skype:</span><br />
  <span style="color: #888888;">skype-name</span><br />
  <br />
  <span style="color: #888888; font-weight:bold">Email:</span><br />
  <span style="color: #888888;">info@your-email.com</span></p>

Save the changes and refresh the contact page:

You may need to clear Smarty cache and browser cache to see the changes on the site.
Feel free to check the detailed video tutorial below:
PrsetaShop 1.6.x. How to add custom content to Contact us page
