Zen Cart Documentation
Zen Cart engine installation
Downloading
To install Zen Cart you need to download the Zen Cart engine package from the official website at www.zen-cart.com. Just click a 'Download' button in the right box.

Please make sure your version of Zen Cart engine matches the template requirements. All versions of Zen Cart are available at SourceForge.
Extracting Files
Once the Zen Cart engine package is downloaded, you will need to extract its files and folders from the archive.
This can be done with the required software like WinZip 9+ (Windows) and Stuffit Expander 10+ (Mac).
Please check the following tutorials on how to extract files from the archives with WinZip(PC) and StuffitExpander(MAC).
Please note: if your hosting control panel has the option to 'Extract' files, you can use it to extract files directly on your server after the .zip file is uploaded.
Uploading Zen Cart engine files
In case you’ve extracted the files locally on your computer, you will need to upload them to your hosting server.
This can be done using the hosting control panel File Manager or third party FTP Manager applications like FileZilla, TotalCommander, CureFTP, etc.
You can check the detailed video tutorial on how to upload files to server using FTP manager and how to upload files to a server using cPanel (WebHost Manager, WHM).
Zen Cart engine installation
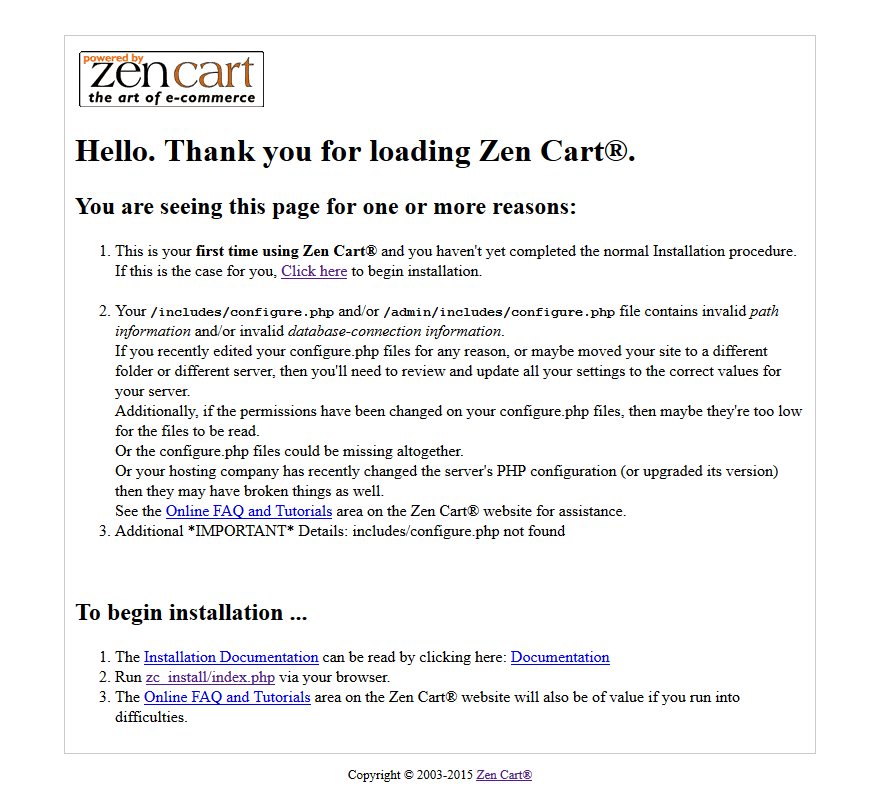
When you are done with the files upload, you can start Zen Cart engine installation. Open your web browser and type in the domain name/path to your Zen Cart directory in the address bar and reload the current page. You should see the welcome screen. Please follow the instructions below to install Zen Cart.
Installation Assistant
Click the “Click here to begin the installation” link.
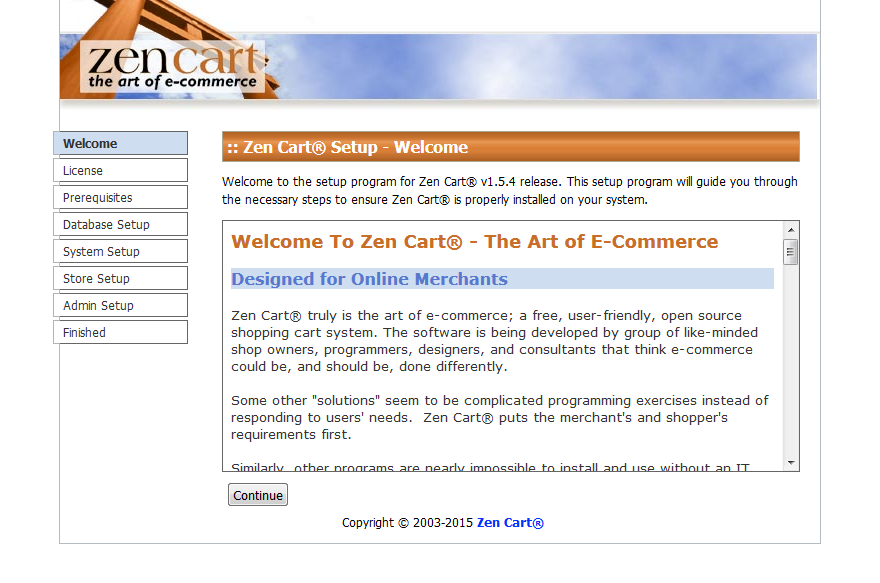
Installation Assistant (License agreements)
Please check the license agreement.
When you are done, click 'Continue' button.
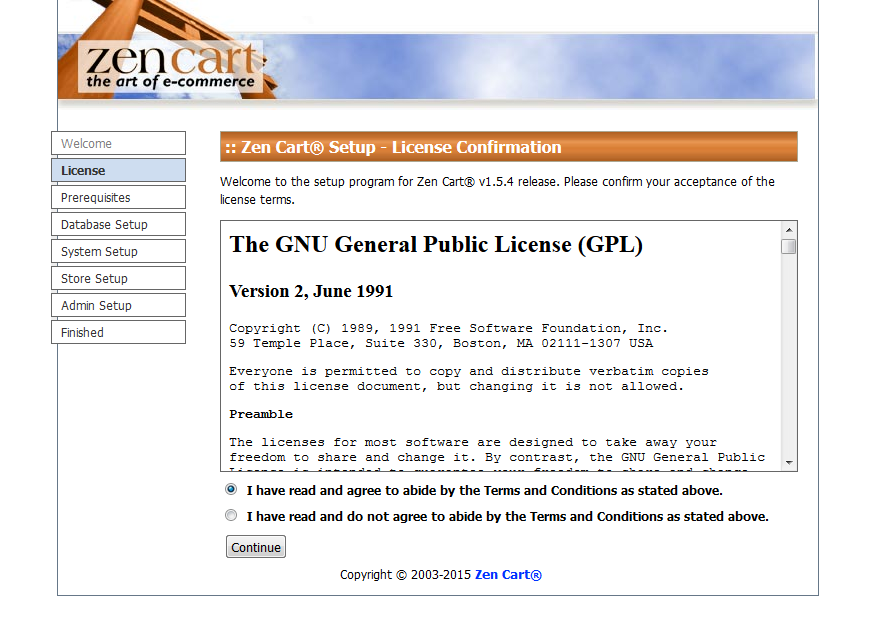
Installation Assistant (License Confirmation)
When you are done, select 'I have read and agree to abide by the Terms and Conditions as stated above' and click 'Continue' button.
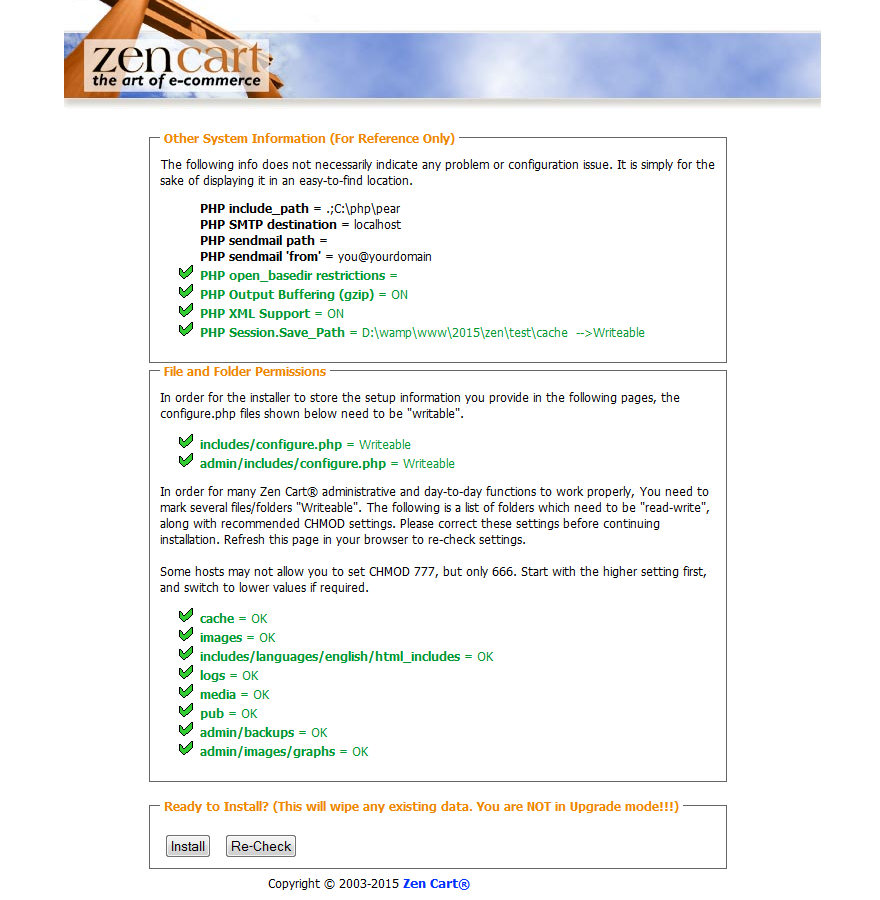
System Inspection
Make sure your hosting server matches the ZenCart engine requirements. Otherwise you’ll see the error message. Contact your hosting provider if the System Inspection screen shows any errors. If everything is OK, click Install button at the bottom of the screen.
If everything is correct, click the 'Install' button.
Database Setup
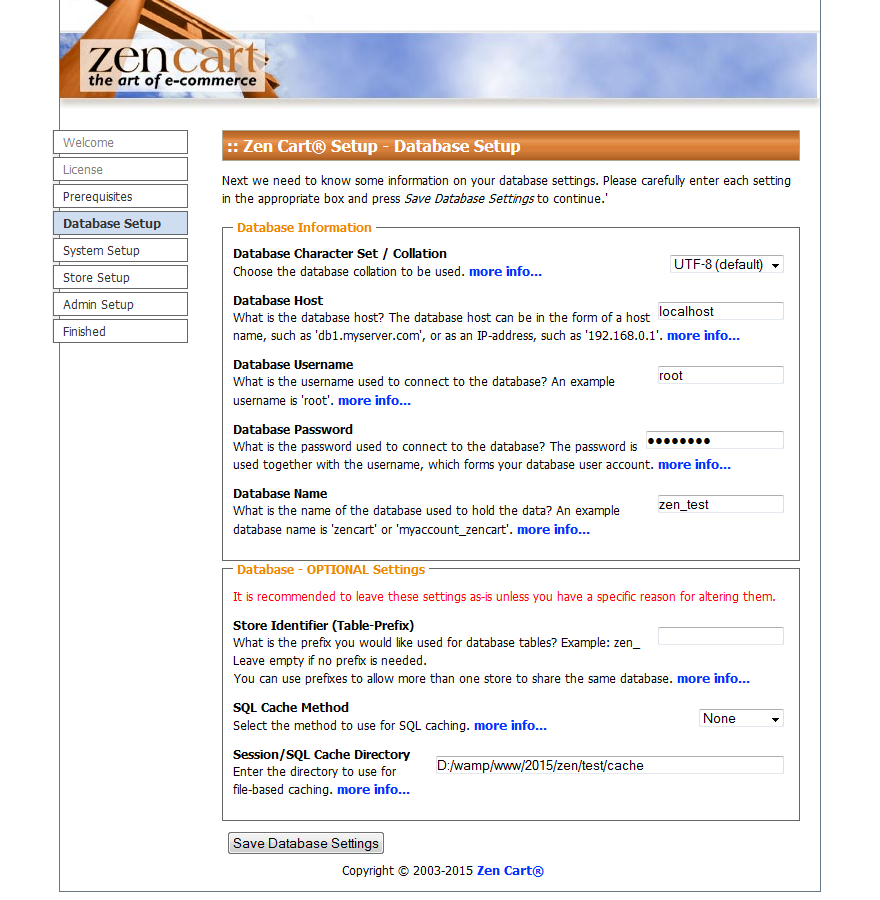
At the Database setup step you need to input your database details. Note that you should have a new database created. Feel free to check the detailed tutorial on how to create a database.
You need to input the database host name, user name, password and database name. All these details can be obtained from your hosting control panel or by contacting your hosting provider.
When you are done, click 'Save Database Settings' button.
System Setup
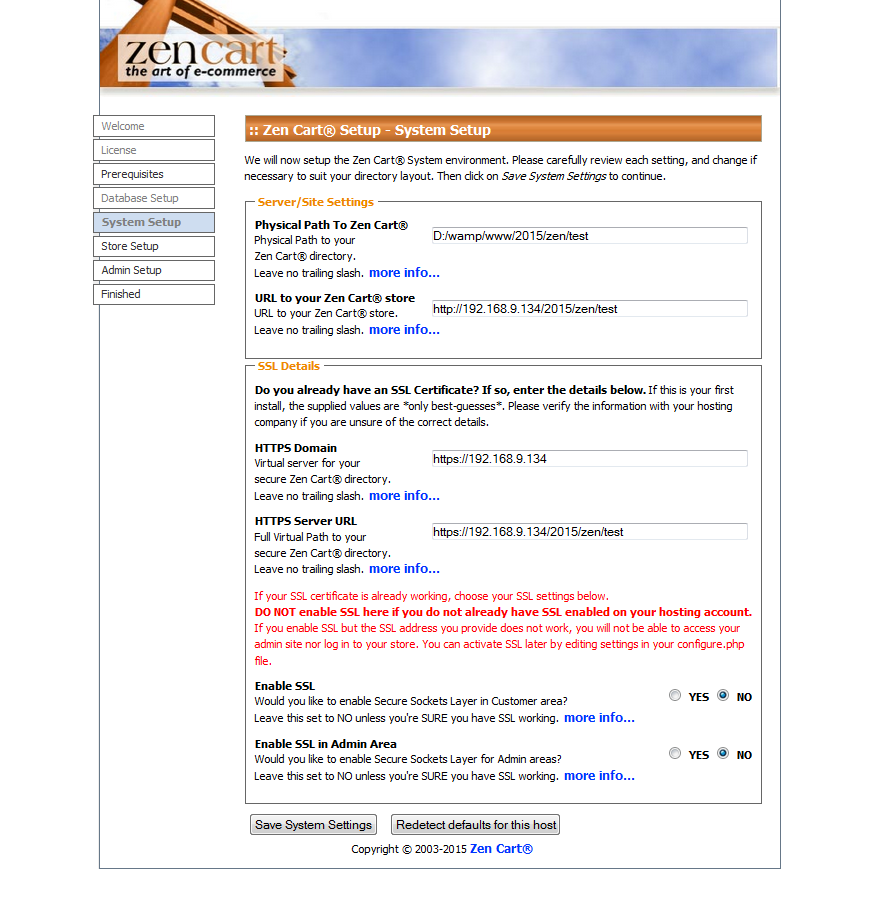
At the System Setup step you can define the root to your ZenCart installation and install SSL certificate. If you are not sure, please do not perform any changes at this step. Click the Save System Settings at the bottom of the screen to proceed.
When you are done, click 'Save System Settings' button.
Store Setup
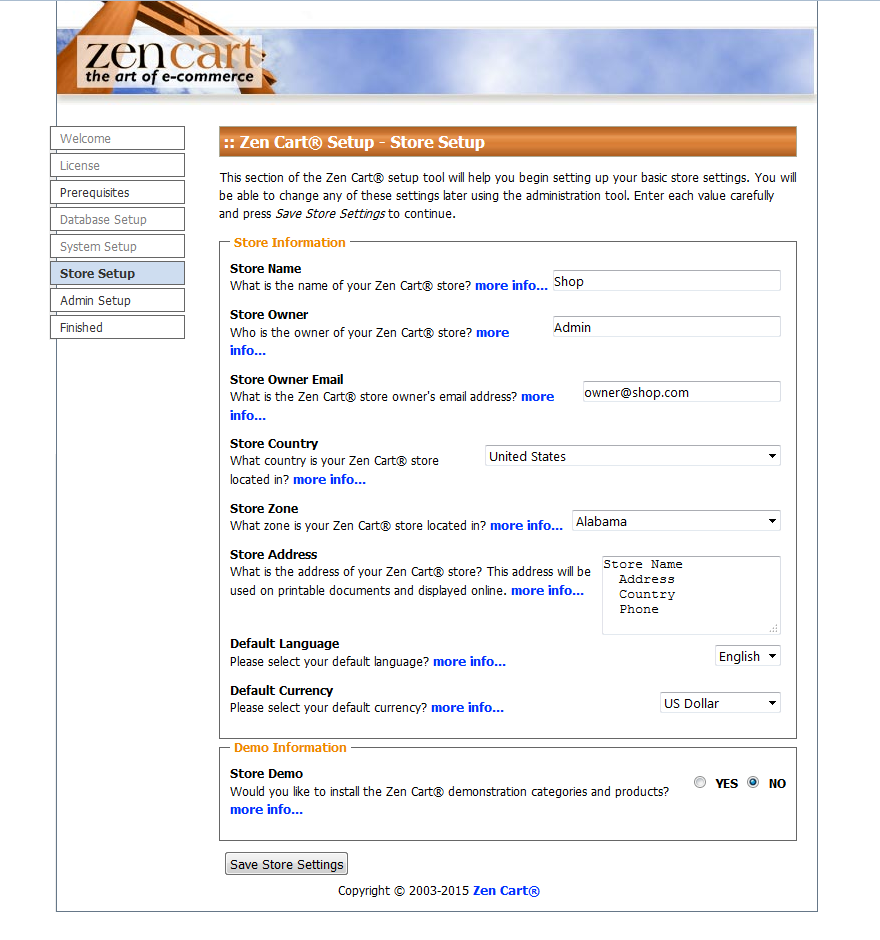
Store setup step lets you input the store info like store name, country and region. The Store demo at the bottom allows you to install the default ZenCart sample data – sample products that allow to test the store functionality. If you are using purchased ZenCart template, there is no need to install default demo store. The sample products are provided within the template package.
When you are done, click 'Save Store Settings' button.
Administrator Account Setup
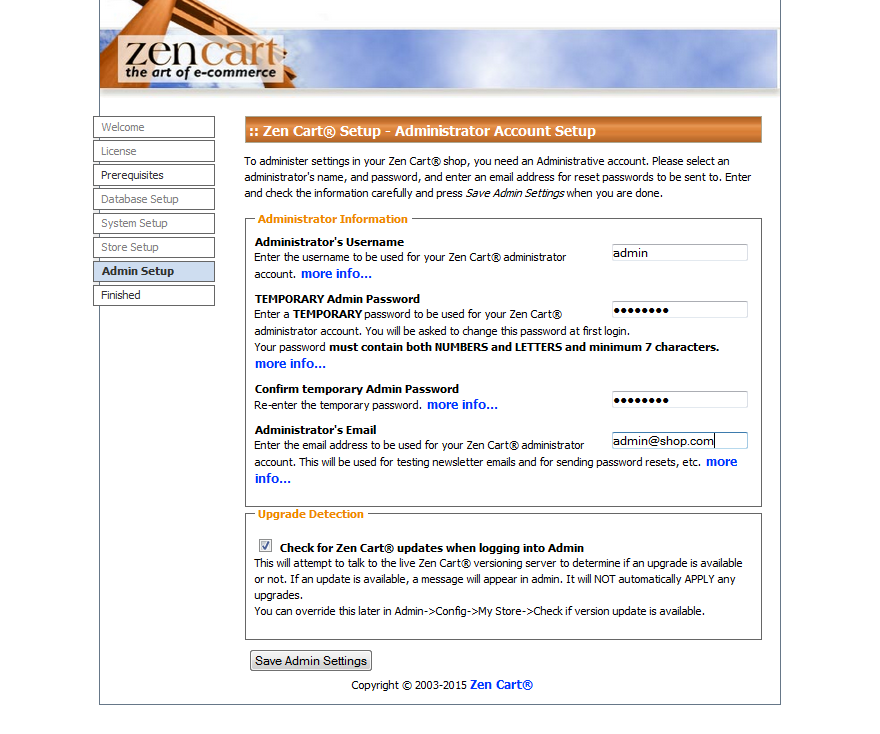
At the Administrator Account Setup step you need to create the store administrator account. Input Administrator user name, email and password. Keep these details safe to avoid unauthorized access.
When you are done, click 'Save Admin Settings' button.
Setup - Finished
Congratulations. You’ve successfully installed ZenCart store. Use the buttons at the bottom of the screen to access the store frontend or the ZenCart administration panel.
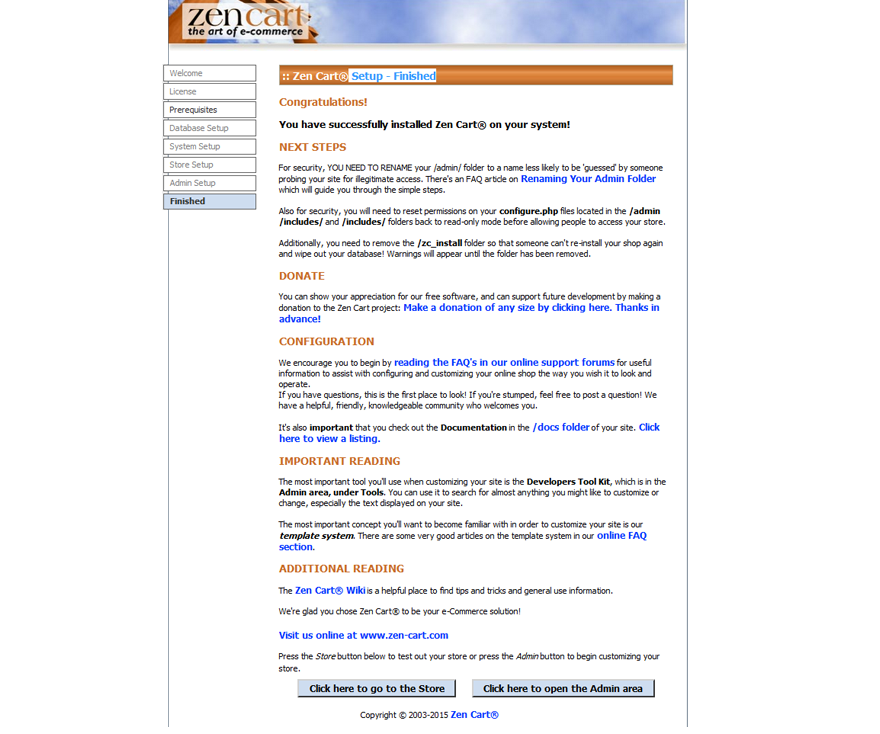
For security reasons it is highly recommended setting permissions for the configuration files to "Read only" and renaming the admin folder.
Now you are ready to proceed to configuring your Zen Cart based Web site. Click 'Click here to go to the Store' button to view your Web site or 'Click here to open the Admin area' to view Zen Cart backend.
Please check the detailed video tutorial on how to install Zen Cart engine.
